Welcome to the delectable world of edible bowls, a culinary symphony where creativity and taste intertwine. These edible bowls are not just vessels for your favorite culinary creations; they are edible masterpieces in their own right. Imagine biting into a crispy, savory parmesan bowl filled with a creamy mushroom risotto, or indulging in a sweet and tangy fruit bowl made entirely of fresh berries and yogurt.
This article presents a curated collection of edible bowl recipes that will tantalize your taste buds and impress your dinner guests. From savory to sweet, simple to elaborate, there's a recipe here for every palate and occasion. Get ready to embark on a culinary journey that will redefine your dining experience.
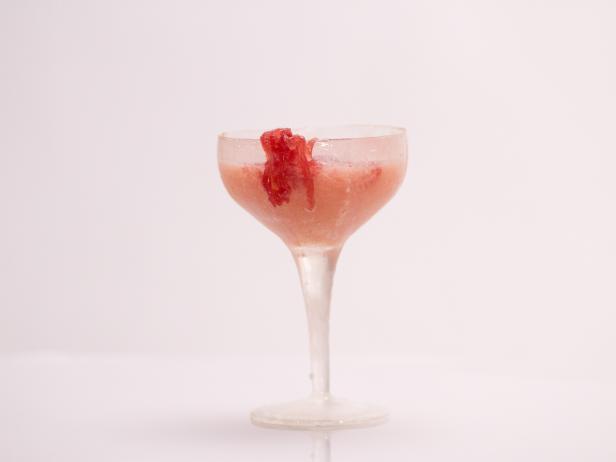
ZOMBIE DRINK IN EDIBLE GLASSWARE
Steps:
- For the caviar spherification: In a medium bowl and using an accurate gram scale, measure 5 grams of calcium chloride and dissolve it in 500 milliliters of water. In another bowl, gradually sprinkle 5 grams of sodium alginate into 500 milliliters of water or juice. Let the alginate hydrate for 2 minutes. Add 1.5 grams of sodium citrate. Blend thoroughly with an immersion blender and strain if needed. This is your "batter."
- Tint the batter your desired color and flavor with your desired flavoring. Squirt the batter into the calcium chloride firming solution using a syringe, dragging to create "intestines" and dropping drips to create "platelets." Lift out the pieces of batter with a strainer and rinse carefully with clean water. Set the pieces aside.
- For the edible glassware (if making): Preheat the oven or a toaster oven to 275 degrees F.
- Melt the isomalt in a 4-cup heatsafe glass liquid measuring cup in the microwave on high for 3 minutes. Stir, then melt in 1-minute increments until the isomalt is completely liquid. Hold in the heated oven or toaster oven for 10 minutes to release all the bubbles.
- Pour the isomalt into a food grade silicone glassware mold, then pour out any excess into the measuring cup. Let the mold cool completely. Unmold the glassware, then spray the inside with the food lacquer until completely covered. Drain upside-down on a cooling rack (to let any excess food lacquer drip out) until completely dry. Repeat for as many edible glasses as you need to make.
- For the zombie drink: Put some "intestines" and "platelets" into each edible glass or regular glass. Pour 1 tablespoon grenadine syrup into each glass, then add enough mineral water to fill. If serving in the isomalt glasses, serve immediately, as the drink will slowly dissolve the glasses; they won't last more than 20 minutes.
EDIBLE CHOCOLATE BOWL

Steps:
- Put the chocolate in a microwave-safe bowl and microwave for 30 seconds, stirring occasionally. Continue heating the chocolate for 10 seconds at a time until completely melted; be careful not to burn the chocolate. Stir until smooth. Let it cool slightly; the heat can pop the balloons.
- Blow up 2 latex balloons to 4 to 6 inches in diameter and tie. Carefully dip each balloon in the chocolate. Rotate and slightly tilt each balloon, allowing the chocolate to go up the sides. Use a spatula or the back of a spoon to spread the chocolate up the sides.
- Cool the balloons in the refrigerator tie-side down in a glass bowl or muffin tin for 5 minutes to set. Carefully snip the ties off with scissors to remove the balloons. The balloons should separate from the chocolate. If the balloons are still stuck to the chocolate, carefully peel off.
- If you'd like the bowls to sit flat for serving, add a dollop of melted chocolate, about 1/2 tablespoon, to the center of the bottom of the bowls and place on a piece of parchment paper. Let set in the refrigerator for a few minutes.
MONSTER SMOOTHIE BOWLS
Provided by Food Network Kitchen
Time 10m
Yield 2 servings
Number Of Ingredients 0
Steps:
- Blend 2 cups spinach, 1 chopped peeled apple, 1 cup ice, 1/2 frozen banana and 1 tablespoon each honey and lemon juice in a blender until smooth and thick. Pour into 2 bowls and top with fruit, nuts and/or seeds to make a face.
CARAMEL BOWLS
This makes a decorative edible dish for your ice cream.
Provided by Martha Stewart
Categories Food & Cooking Dessert & Treats Recipes
Number Of Ingredients 2
Steps:
- Lightly oil the outside of an eight-ounce ladle. Working over a piece of parchment or baking sheet drizzle the caramel coating from a tablespoon over the ladle, making thin intersecting lines. Turn ladle right-side up, and place 2 ice cubes inside the ladle. Swirl to cool the coating, being careful not to spill the ice or any drops of water on the caramel. Let the caramel set completely.
- Gently cup the ladle with your hand, and ease the hardened caramel off the ladle. Immediately transfer bowl to an airtight container. Empty ice, dry ladle, and re-oil; repeat with the remaining coating. If necessary, caramel coating can be reheated over low heat. Store in airtight container up to 2 days.
Tips:
- Choose the right molds: Use molds made of durable, food-safe materials like silicone or plastic. Avoid metal molds as they can conduct heat and cause the chocolate to melt unevenly.
- Prepare the molds: Make sure the molds are clean and dry before using them. Lightly grease the molds with cooking spray or oil to prevent the chocolate from sticking.
- Use high-quality chocolate: The quality of the chocolate you use will greatly affect the taste of your edible bowls. Look for high-quality, couverture chocolate with a cocoa content of at least 70%.
- Temper the chocolate: Tempering is a process of heating and cooling chocolate in a controlled manner, which stabilizes the cocoa butter and gives the chocolate a smooth, glossy finish. While it's not essential, tempering the chocolate will produce better results.
- Be patient: Allow the chocolate to cool completely in the molds before removing them. Rushing this process can cause the chocolate to crack or break.
Conclusion:
Edible bowls made from chocolate are a fun and creative way to serve desserts, appetizers, or snacks. They are relatively easy to make and can be customized with different colors, flavors, and decorations. With a little patience and creativity, you can create beautiful and delicious edible bowls that will impress your guests.
Are you curently on diet or you just want to control your food's nutritions, ingredients? We will help you find recipes by cooking method, nutrition, ingredients...
Check it out »
You'll also love


