Indulge your sweet cravings with our delectable Jam Thumbprints, a classic treat that combines a buttery shortbread crust with a burst of fruity preserves. These bite-sized cookies are not only visually appealing but also a delight to the palate.
Our collection features a variety of recipes that cater to different tastes and preferences. From the classic raspberry jam filling to the tangy lemon curd and the sweet and savory apricot preserves, each recipe promises a unique flavor experience. We've also included a gluten-free version for those with dietary restrictions, ensuring everyone can enjoy these delightful cookies.
Whether you're a seasoned baker or just starting out, our detailed instructions and helpful tips will guide you through the process of creating perfect Jam Thumbprints. With just a few simple ingredients and a little bit of time, you can impress your family and friends with these homemade treats.
So grab your apron, preheat your oven, and embark on a delightful baking journey with our Jam Thumbprint recipes. From the first bite, you'll be captivated by the harmonious blend of buttery crust and fruity filling, making these cookies a timeless favorite.
THUMBPRINTS WITH DULCE DE LECHE, NUTELLA OR JAM

Thumbprints are the simplest of cookies, but these are packed with flavor from freshly toasted nuts, each paired with its own filling: pecans with dulce de leche (or homemade caramel sauce, if you have some on hand), hazelnuts with Nutella, or pistachios with a festive pool of red currant jelly in the center. Choose a single combination, or make a batch of each. These cookies benefit from forming the thumbprint halfway through baking, but if you can't take the heat, let the dough soften a bit and then press the thumbprints into the dough before baking.
Provided by Susan Spungen
Categories snack, cookies and bars, dessert
Time 1h
Yield 3 dozen cookies
Number Of Ingredients 9
Steps:
- Heat oven to 350 degrees. Spread the hazelnuts or pecans out on a small baking sheet and cook in oven, shaking several times, until toasted, 10 to 12 minutes. If using hazelnuts, transfer to a bowl to cool, cover with a folded dish towel, then rub off the skins. (No need to toast the pistachios.)
- Once cooled, transfer the nuts to a food processor, preferably a mini one. Add 2 teaspoons flour and pulse just until nuts are finely ground, being careful not to overprocess.
- In the bowl of a stand mixer fitted with the paddle attachment, cream together butter and granulated sugar on medium-high speed until light and fluffy, 2 to 3 minutes, scraping bowl as needed. Add egg yolks and vanilla, and beat on medium-high speed until well combined, about 2 minutes, scraping the bowl a few times as needed.
- Add 1/2 cup ground nuts, the salt and the remaining 2 1/4 cups flour; beat on low speed just until combined, then increase speed and beat until dough starts to clump together. Scrape the bowl and fold a few times to make sure everything is well mixed. Wrap dough in plastic wrap, flatten into a disk, and chill until firm, at least 1 hour and up to 3 days.
- Heat oven to 350 degrees. Pinch off small pieces of dough the size of a rounded tablespoon (about 20 grams each) and roll the top half of each one in the remaining ground nuts. Place a few inches apart on parchment- or silicone mat-lined baking sheets. Chill in the freezer until firm, about 10 minutes.
- Bake for 8 minutes, remove from oven and make a thumbprint in each cookie. Bake until golden brown on the bottom, and nuts are looking toasty but not burned, 6 to 8 minutes longer. Let cool a few minutes on the baking sheets and transfer to wire racks to cool further. While the cookies are still a little warm, fill each one with about 1/2 teaspoon of filling, and cool completely. Sprinkle with flaky sea salt. Cookies will keep in an airtight container at room temperature for up to 1 week.
JAM THUMBPRINTS
Steps:
- Preheat oven to 350 degrees F.
- In an electric mixer fitted with the paddle attachment, cream together the butter and sugar until just combined, and then add the vanilla. Separately, sift together the flour and salt. With the mixer on low speed, add the flour mixture to the creamed butter and sugar. Mix until the dough starts to come together. Dump on a floured board and roll together into a flat disk. Wrap in plastic wrap and chill for 30 minutes.
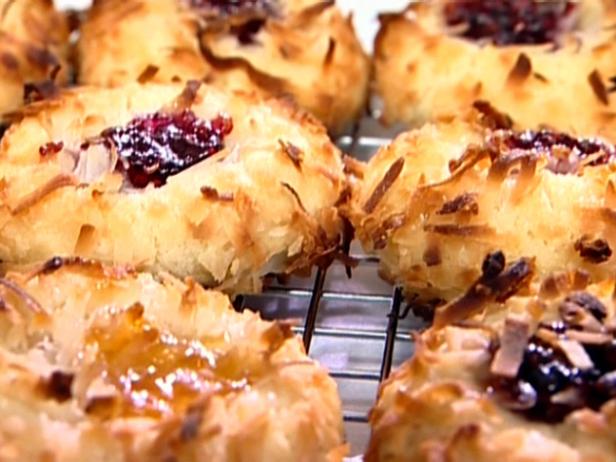
- Roll the dough into 1 1/4-inch balls. (If you have a scale, they should each weigh 1-ounce.) Dip each ball into the egg wash and then roll it in coconut. Place the balls on an ungreased cookie sheet and press a light indentation into the top of each with your finger. Drop 1/4 teaspoon of jam into each indentation. Bake for 20 to 25 minutes, until the coconut is a golden brown. Cool and serve.
Tips:
- Use high-quality ingredients. Fresh, ripe berries will make the best jam. And don't skimp on the butter and sugar - they add flavor and richness.
- Cook the jam until it reaches the desired consistency. If you like a thick jam, cook it for longer. If you prefer a thinner jam, cook it for less time.
- Let the jam cool completely before filling the thumbprints. This will help the jam to set properly.
- If you don't have a thumbprint cookie cutter, you can use the back of a spoon to make indentations in the cookies.
- Be careful not to overfill the thumbprints. Too much jam will make the cookies messy and difficult to eat.
Conclusion:
Jam thumbprints are a classic cookie that is perfect for any occasion. They're easy to make and always a hit with kids and adults alike. With a few simple tips, you can make sure your jam thumbprints turn out perfect every time.
Are you curently on diet or you just want to control your food's nutritions, ingredients? We will help you find recipes by cooking method, nutrition, ingredients...
Check it out »
#60-minutes-or-less #time-to-make #course #preparation #occasion #desserts #oven #holiday-event #cookies-and-brownies #equipment
You'll also love


