Best 4 Family Funs Sand Castle Cake Co Tasty Dish Recipes


Indulge in a delightful culinary adventure with our Family Fun's Sand Castle Cake, a captivating dessert that resembles a majestic sandcastle, evoking memories of sun-kissed beaches and childhood dreams. This visually stunning cake is not only a feast for the eyes but also a symphony of flavors, sure to leave a lasting impression on your taste buds.
Prepared with meticulous attention to detail, our Sand Castle Cake features a moist and fluffy chocolate cake base, providing a solid foundation for the intricate sandcastle structure. Layers of creamy vanilla frosting, akin to the foamy waves crashing against the shore, envelope the cake, creating a smooth and velvety canvas for the edible decorations.
Topped with a medley of colorful candies, crumbled cookies, and wafer rolls, this cake transforms into an edible masterpiece, resembling a vibrant sandcastle adorned with flags, pebbles, and seashells. The vibrant hues and playful textures add a touch of whimsy and excitement, making it a perfect centerpiece for any celebration.
Whether you're hosting a fun-filled family gathering or seeking a unique dessert to impress your friends, our Family Fun's Sand Castle Cake is sure to be the highlight of the occasion. With its captivating appearance and irresistible taste, this cake is guaranteed to bring smiles and create lasting memories. So, gather your ingredients, preheat your oven, and embark on a culinary journey that will transport you to a world of imagination and delight.
SANDCASTLE CAKE
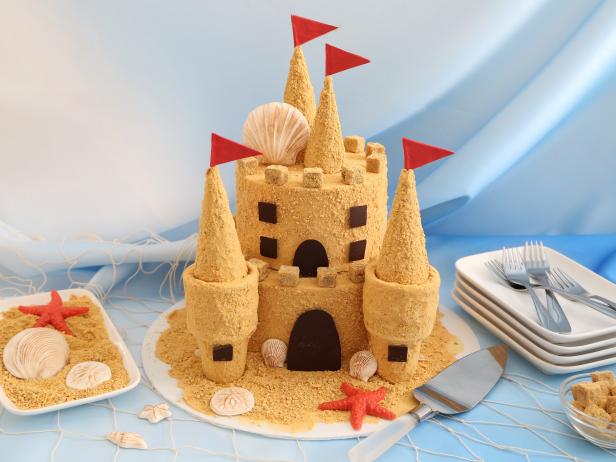
With layers of brown sugar cake, sea salt caramel frosting and "sand" made from graham cracker crumbs, this festive summer dessert is a beach-lover's delight.
Provided by Food Network
Categories dessert
Time 4h
Yield 20 to 25 servings
Number Of Ingredients 27
Steps:
- Position the racks in the upper and lower thirds of the oven and preheat to 350 degrees F.
- For the cakes: Coat two 8-inch round cake pans and two 6-inch round cake pans with nonstick baking spray with flour.
- Whisk together the flour, baking powder, cinnamon and salt in a large bowl and set aside.
- Combine the butter, brown sugar, vegetable oil and vanilla in the bowl of an electric mixer fitted with the paddle attachment. Beat until fluffy and light, about 5 minutes. Add the eggs one at a time, beating well after each addition.
- Add half the dry ingredients to the butter-sugar mixture and mix on low speed until just incorporated. Add the buttermilk and mix again until combined. Add the remaining flour mixture and mix until just combined. Scrape down the bowl with a rubber spatula, folding in any ingredients that didn't get incorporated. Divide the batter between the prepared pans, filling each no more than 3/4 full.
- Bake until a toothpick inserted near the center of the cakes comes out clean, about 30 minutes for the 6-inch cakes and 40 to 45 minutes for the 8-inch cakes.
- Cool in the pans for 5 minutes, then turn the cakes out onto wire racks to cool completely. If necessary, level the cakes with a serrated knife or cake leveler.
- For the frosting: In the bowl of an electric mixer fitted with the whip attachment, combine the butter and confectioners' sugar. Beat on low speed, gradually increasing to high as the sugar is incorporated and the mixture is light and fluffy. Add the dulce de leche in three additions until thoroughly combined. Beat in milk or cream 1 tablespoon at a time until the mixture is a spreadable consistency, about 2 tablespoons. Beat in the fine sea salt.
- Transfer 3/4 cup of the frosting to a piping bag and set aside. Cover the remaining frosting with a damp towel so it doesn't dry out.
- For assembly: Place an 8-inch cake layer on an 8-inch cake board. Top with 1 cup caramel frosting, spreading evenly to the edges. Top with a second layer. Cover the entire cake with a layer of frosting, using a cake smoother or bench scraper to make the frosting as smooth and even as possible. Chill for 20 minutes or until the frosting is firm.
- Pour half the graham cracker crumbs onto a rimmed baking sheet. Remove the chilled cake from the refrigerator and roll the sides in the crumbs. Cover the top of the cake evenly with crumbs, gently patting them into the frosting. (The crumbs should stick naturally, but if they don't, brush the cake with a light coating of water using a pastry brush and roll again.)
- Place a 6-inch cake layer on a 6-inch cake board and top with 1/2 cup caramel frosting. Repeat the frosting, chilling and crumb-coating process as before. Place the finished 6-inch tier on top of the 8-inch cake. Anchor the two cakes together using one long cake dowel, if desired. Refrigerate the cake while you prepare the remaining decorations. Reserve the pan of graham cracker crumbs to use later.
- Make the spires and turrets by frosting the top inner edges of two cake cones with the caramel frosting. Nest a second cake cone inside each frosted one. Coat the outsides of the cones with frosting using a small offset spatula, then roll both cone stacks in the reserved graham cracker crumbs until completely coated.
- Frost the exterior of two sugar cones with the caramel frosting and roll in the graham crumbs. Snip a small hole at the end of the piping bag and pipe a thick line of caramel frosting on the inside of each cake cone and top with the coated sugar cones so they point upward.
- Trim away 1 inch from the bottom of one of the remaining sugar cones with a serrated knife using a gentle sawing motion. Cover the cone with caramel frosting and roll in the crumbs. Coat the remaining sugar cone with frosting and roll in the crumbs. Refrigerate all the decorated cones until firm, about 15 minutes.
- Remove the cake from the refrigerator and position the two assembled cake cone towers on either side of the front of the cake. Anchor each in place using a dot of frosting. Arrange the two remaining decorated sugar cones on top of the cake. Pipe a mound of frosting under each cone to anchor it in place.
- Put the brown sugar cubes in a large bowl and drizzle with honey. Toss with a fork to coat the cubes with honey, then toss with some of the remaining graham cracker crumbs. Arrange the coated cubes around the top edges of the cake tiers. Use a dot of piped frosting to anchor each cube in place.
- Use the remaining frosting to cover the serving plate. Generously sprinkle the remaining graham cracker crumbs over the frosting to create a sandy beach appearance. (You may have leftover crumbs.) Refrigerate while you prepare the candy decorations.
- Make the decorations: Combine the orange and red candy melting wafers in a microwave-safe bowl. Microwave in 30 second intervals, stirring well with a rubber spatula between each, until the candy is melted and smooth. Transfer the candy to a piping bag, snip the end and pipe into the starfish candy mold. Put the candy molds on separate small trays or baking sheets. Rap each pan on the countertop to remove air bubbles and freeze until set, about 20 minutes. Turn the candy out onto a work surface immediately after removing from the freezer.
- Place the white candy melting wafers in a microwave-safe bowl. Microwave in 30 second intervals, stirring well with a rubber spatula between each, until the candy is melted and smooth. Transfer the candy to a piping bag, snip the end and pipe into the shell and sand dollar molds. Put the candy molds on separate small trays or baking sheets. Rap the pans on the countertop to remove air bubbles and freeze until set, about 20 minutes. Turn the candy out onto a work surface immediately after removing from the freezer. Allow all the candy decorations to come to room temperature.
- Dip a dry art brush in the cocoa powder and tap off excess. Lightly brush across the white candy pieces to give them dimension. Arrange the candy shells and starfish around the cake tiers as desired.
- To make the castle doors and windows, put the melted semisweet chocolate in a piping bag and snip a small hole at the end. Put the printed template on a small sheet pan. Cover the template with parchment paper and pipe chocolate onto the paper following the outlines of the shapes on the template. Use a toothpick to spread the chocolate into corners and fill any holes. Freeze the chocolate until firm, about 10 minutes, then turn the pieces over using a toothpick. Handle the pieces as little as possible to avoid melting the chocolate.
- Pipe caramel frosting on the back of each chocolate piece and attach to the sandcastle.
- Use a metal skewer or cocktail pick to gently tap a hole into the tip of each sugar cone. Insert the cupcake flags into the sugar cone spires.
- Bring the cake to room temperature before serving.
FAMILY FUN'S SAND CASTLE CAKE C/O --TASTY DISH--

My most elaborated recipe posted yet! While I was waiting in the lobby for my aromatherapy session, I spotted this cake recipe in Family Fun magazine. Fun is right! Lots of possibilities with this one! I want Mommy to make this cake and give it a Tinkerbell sprinkling of fairy dusty! Not tested yet.
Provided by COOKGIRl
Categories Dessert
Time 1h30m
Yield 1 cake, 12 serving(s)
Number Of Ingredients 9
Steps:
- Notes and tips: I read through the recipe reviews on the Family Fun site and they are worth noting here. One reviewer stated that the cake does not transport well, another added fruit roll up shaped like flags to the tops of the turrrets.
- Use a long serrated knife to trim the top of the round cake flat, if needed. Cut a 5 1/2-inch and a 3 1/2-inch circle from the square cake, as shown, then stack all three pieces, spreading vanilla frosting between the layers. Frost the stack.
- Use a rolling pin or food processor to crumble the wafers. With your hands, press the crumbs into the frosting, completely coating the cake. Spread frosting on the bottom of each ice-cream cup, then set them around the cake. With a serrated knife, carefully trim 1 1/2 inches from the top of 2 of the sugar cones. Set all 6 cones into the cups to complete the turrets, spreading a bit of frosting around the rims to hold them if needed.
- Press 2 graham cracker-stick doors into the middle cake layer and rim the rest of the cake with graham cracker-stick halves. Sprinkle the remaining crumbs around the base and add a scattering of candy seashells and rocks, if using.
- Servings estimated.
HOMEMADE SANDCASTLES
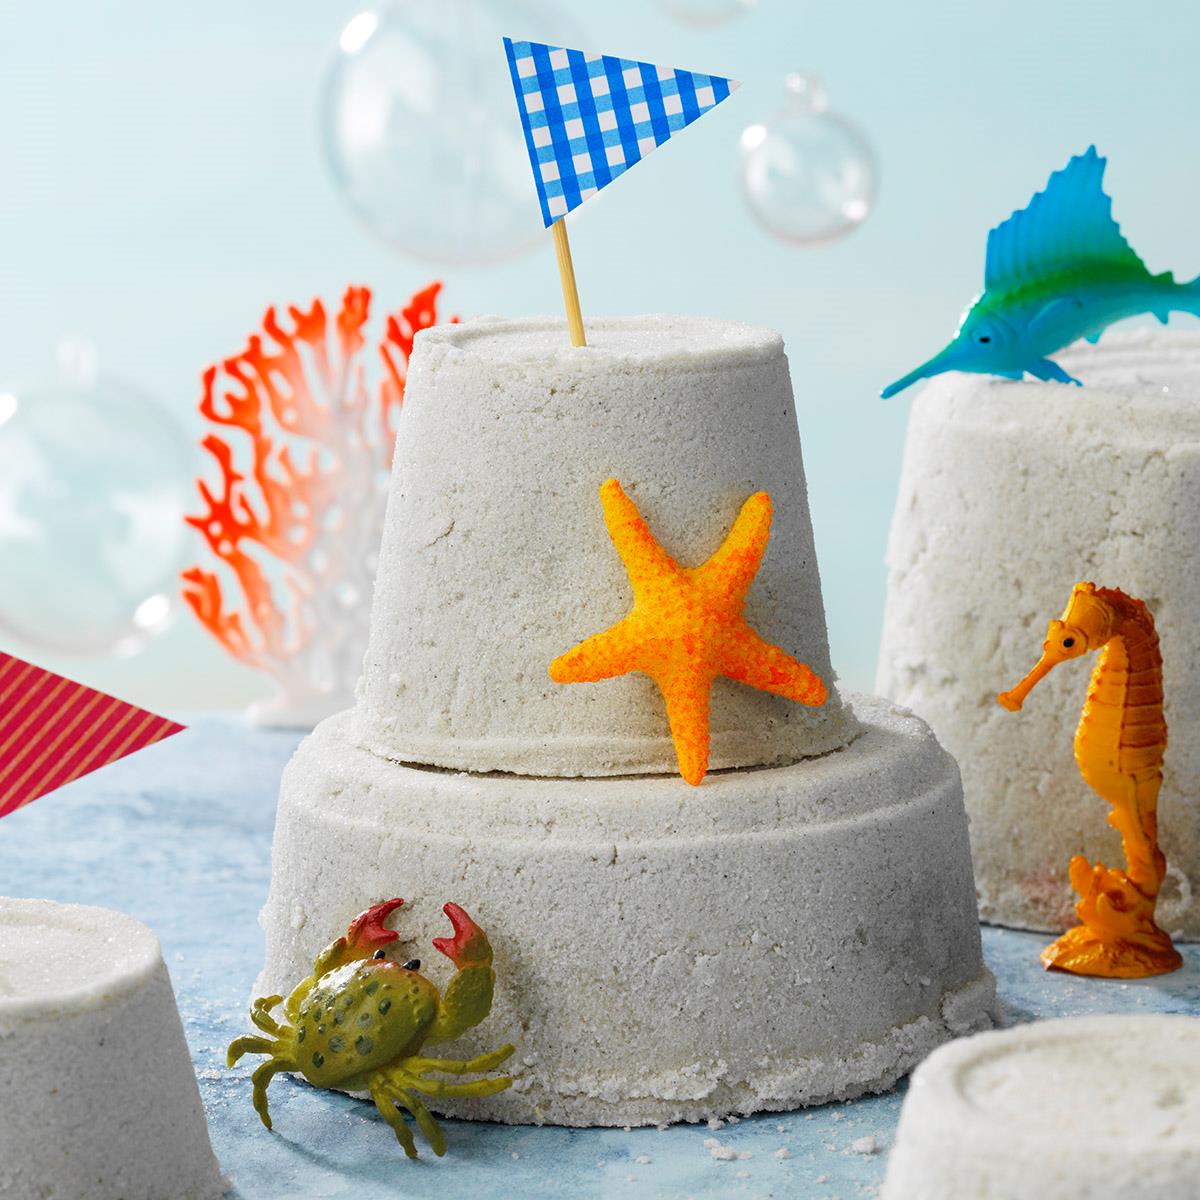
Here's the perfect centerpiece for a beach-themed party. Kids can help make this easy project. -Taste of Home Test Kitchen
Provided by Taste of Home
Categories Desserts
Time 20m
Yield 1.
Number Of Ingredients 6
Steps:
- In a saucepan, combine flour and sugar. Gradually add cold water; mix well. Cook and stir over low heat until mixture thickens to pudding consistency. , Place sand in a large pail; stir in flour mixture. When cool to the touch, mix together with your hands, adding more water if needed so that sand holds its shape. Firmly pack into molds. Invert on a flat surface; remove molds. , Let dry completely before handling. Depending on the humidity, this may take a few days., To create a centerpiece, weave rope between the sandcastles; fill in with sand, rocks and seashells., Editor's Note: The sand mixture will keep for weeks when stored in an airtight container.
Nutrition Facts :
FAMILY FUN'S BUTTERFLY CAKE (FOR DUMMIES)
I am *not* a cake baking expert. What I wanted: (1) to bake a cake for --Tasty's-- birthday, (2) butterfly shaped and (3) something festive, kid-pleasing and easy. Family Fun website to the rescue! Happy Birthday, --Tasty Dish-- and this marks my 1,000th recipe posted on the site. I predict this recipe will somehow make its way to cakewrecks.com...
Provided by COOKGIRl
Categories Dessert
Time 1h
Yield 1 9
Number Of Ingredients 7
Steps:
- *Note: I must confess that I cheated and used a box of 'Baker Josef's Golden Yellow Cake Mix' from Trader Joe's. Sincere apologies to my loyal fans who depend on me for made-from-scratch recipes. Also, it's worth mentioning I made two cakes-one using a standard 9" pie pan and the other using a 9" cast iron skillet. The cake baked in the cast iron skillet turned out far better. To remove the cake from the pan *after it has cooled completely*, first take a knife and run along the edge of the pan to loosen. Place a wire cookie rack over the top of the pan, invert carefully and set aside. I used two spatulas and carefully moved the cake from the wire rack to the cake serving plate to frost it. This method worked best for this inexperienced cake baker. Two cakes were made in case of any mistakes. The second cake was cut in half then in half again and made into "baby butterflies".
- Other candy decorating suggestions: M&Ms (regular or mini size), gummy candy, non pareils, sprinkles, etc.
- Once cake has baked and cooled *completely*, cut the cake in half (see photo) and place the two halves close together with the flat/straight cut side facing out and curved sides facing each other (leave about a 3/4" gap between the two halves).
- Frost. For my test cake: The main body/wings and Twinikie were frosted yellow, the inner body pink. I made a pattern out of a piece of paper for the inner wing design. Placed the piece on paper on the cake halves and using a toothpick made small holes around the edge of the pattern as my guide. Then I carefully drew the line with the toothpick. Remove paper and frosted the main section first then the inner wing. (See photo.).
- Frost the Twinkie and place it on top of the two cut cake halves between the wings for the butterfly's body.
- *Decorate the wings with candies and adding licorice antennae to the Twinkie. (I just curled the ends of the licorice and placed the pieces on the plate.).
- *Tip: it's best to decorate the cake right before serving [depending] on the candies you choose. As an example, if you use M&M candies, the dye will run and stain the frosting. Fortunately I was able to frost the cake the day before and due to the type of candies used had no staining problems.
Nutrition Facts : Calories 2896.7, Fat 112.5, SaturatedFat 20.6, Sodium 1275.1, Carbohydrate 470.5, Sugar 437.3
Tips:
- Use the right tools: A good set of cake decorating tools will make the process much easier. This includes a piping bag, various tips, a spatula, and a turntable.
- Start with a simple design: If you're new to cake decorating, don't try to make a masterpiece on your first try. Start with a simple design, such as a beach scene with waves and a few shells. You can always add more details later on.
- Use edible decorations: Edible decorations are a great way to add color and texture to your cake. You can use things like sprinkles, candy, cookies, and fruit.
- Be patient: Cake decorating takes time and patience. Don't get discouraged if your cake doesn't turn out perfect on the first try. Just keep practicing and you'll eventually get the hang of it.
Conclusion:
A sand castle cake is a fun and festive way to celebrate a special occasion. With a little planning and effort, you can create a cake that is both delicious and beautiful. Just remember to use the right tools, start with a simple design, use edible decorations, and be patient. With a little practice, you'll be able to create amazing sand castle cakes that will impress your friends and family.
Are you curently on diet or you just want to control your food's nutritions, ingredients? We will help you find recipes by cooking method, nutrition, ingredients...
Check it out »
You'll also love