Best 6 Diabetic Maple Cheesecake Recipes


Indulge in a guilt-free delight with our diabetic-friendly maple cheesecake recipe, specially crafted for those with diabetes or anyone seeking a healthier dessert option. This delectable cheesecake features a creamy, sugar-free filling made with a combination of cream cheese, Greek yogurt, and a hint of maple flavor, all nestled on a crispy almond flour crust. The maple cheesecake is not only a treat for the taste buds but also packed with essential nutrients and a reduced sugar content, making it a responsible choice for those managing their blood sugar levels.
But that's not all! Along with the classic maple cheesecake, this article offers a variety of other diabetic-friendly cheesecake recipes to satisfy every palate. Discover the zesty lemon cheesecake with a tangy filling and a graham cracker crust, perfect for those who prefer a citrusy twist. If you're a chocolate enthusiast, the rich and decadent chocolate cheesecake with a cocoa cookie crust will surely hit the spot. And for a unique flavor combination, try the peanut butter cheesecake with a creamy peanut butter filling and a chocolate cookie crust, offering a delightful blend of sweet and nutty flavors. Each recipe includes detailed instructions, ingredient lists, and nutritional information to guide you in creating these delightful desserts.
DIABETIC MAPLE CHEESECAKE
My diabetic adaption of Boomette's Recipe #245417. My fat and sugar content is calculated from the low fat and no sugar added syrup container labels. Now, I need to say that while I labeled this as diabetic it by no means has low numbers. It has been lightened to allow a diabetic to have a slice with family or guests without doing the damage that a full fat and sugar cheesecake would.
Provided by Annacia
Categories Cheesecake
Time 1h
Yield 6 serving(s)
Number Of Ingredients 5
Steps:
- In a bowl, whisk cream cheese and maple syrup.
- Add the egg whites and milk, blend well.
- Put the mixture into 6 Pam sprayed individual baking dishs.
- Bake in the center of the oven about 40 mins or until almost set @ 350.
- Let cool in the oven, the door slightly opened, and then put in the fridge for 4 to 8 hours.
- Serve cold in dessert dishes with a little bit of maple syrup on top if desired.
Nutrition Facts : Calories 152.2, Fat 10.9, SaturatedFat 6.1, Cholesterol 35.9, Sodium 233.1, Carbohydrate 4.3, Sugar 4.2, Protein 9.2
KETO CHEESECAKE RECIPE (LOW CARB SUGAR-FREE CHEESECAKE)

A gluten-free, keto cheesecake recipe that's EASY to make with only 8 ingredients and 10 minutes prep time. This low carb sugar-free cheesecake tastes just like the real thing!
Provided by Maya | Wholesome Yum
Categories Dessert
Time 1h10m
Number Of Ingredients 9
Steps:
- Preheat the oven to 350 degrees F (177 degrees C). Line a 9-inch (23-cm) springform pan with parchment paper.
- To make the almond flour cheesecake crust, stir the almond flour, melted butter, Besti, and vanilla extract in a medium bowl, until well combined. The dough will be slightly crumbly.
- Press the dough into the bottom of the prepared pan. Bake for about 10-12 minutes, until barely golden. Let cool at least 10 minutes.
- Meanwhile, beat the cream cheese and powdered sweetener together at low to medium speed until fluffy.
- Beat in the eggs, one at a time.
- Beat in the lemon juice and vanilla extract. (Keep the mixer at low to medium the whole time; too high speed will introduce too many air bubbles, which we don't want.)
- Pour the filling into the pan over the crust. Smooth the top with a spatula (use an icing spatula for a smoother top if you have one). If you want to ensure no air bubbles, tap the pan on the counter several times.
- Bake for about 40-55 minutes, until the center is almost set, but still jiggly.
- Remove the cheesecake from the oven. If the edges are stuck to the pan, run a knife around the edge (don't remove the springform edge yet). Cool in the pan on the counter to room temperature, then refrigerate for at least 4 hours (preferably overnight), until completely set. (Do not try to remove the cake from the pan before chilling.)
Nutrition Facts : Calories 325 kcal, Carbohydrate 6 g, Protein 7 g, Fat 31 g, SaturatedFat 2 g, Cholesterol 10 mg, Sodium 33 mg, Fiber 1 g, Sugar 2 g, ServingSize 1 serving
MAPLE BACON CHEESECAKE
Provided by Stacey Poon-Kinney, Food Network Star Season 9 Finalist
Categories dessert
Time 1h45m
Yield 1 large or 6 mini cheesecakes
Number Of Ingredients 21
Steps:
- Preheat the oven to 350 degrees F.
- For the crust: In a food processor, pulse the wafers, pecans, sugar and cinnamon until they reach a consistency that can be pressed. Work the butter into the mix until crumbly. Press uniformly into 1 large or 6 mini springform pans. Bake for 5 minutes.
- For the filling: In a stand mixer or with a hand mixer, mix the cream cheese and sugar until light and fluffy. Add the sour cream and mix well. Add the eggs and yolks one at a time; mix well and scrape down the sides before adding the next egg. Add the maple syrup and extract. Pour into the pan with the baked crust, stopping 1/2 inch from the top of the crust. Bake for 12 minutes (if using mini pans) or 27 minutes (if using a large pan). After 5 or 10 minutes (depending on the size of pan), put the pieces of bacon into the cheesecake.
- For the topping: Mix the sour cream, sugar, maple syrup, vanilla and bacon fat in a bowl. Carefully pour spoonfuls of the topping on the cheesecake from the outside edges to the middle of the top. Be careful to not overfill the pan. Bake for an additional 5 minutes. Carefully remove from the oven and cool in the refrigerator until set.
- For the candied bacon garnish: Cook the bacon until crispy and place on a rack. Mix the maple syrup with the extract and pepper and paint the mixture with a pastry brush on both sides of the bacon. Broil the bacon for 1 minute on each side. Crack more pepper over the bacon and cool until set. Garnish the cheesecake with the candied bacon.
DIABETIC CHEESECAKE
Make and share this Diabetic Cheesecake recipe from Food.com.
Provided by Northern_Reflectionz
Categories Cheesecake
Time 10m
Yield 8 serving(s)
Number Of Ingredients 10
Steps:
- Mix water and gelatin in blender.
- Add cottage cheese, milk, sweetener and lemon juice. Blend til smooth.
- Add crushed pineapple.
- Blend.
- Pour into 8 inch pan.
- TOPPING:.
- Mix all ingredients in blender.
- Sprinkle over filling and refrigerate 24 hours.
Nutrition Facts : Calories 44.3, Fat 0.9, SaturatedFat 0.5, Cholesterol 3, Sodium 102.4, Carbohydrate 5.7, Fiber 0.2, Sugar 3.4, Protein 3.3
MAPLE CHEESECAKE
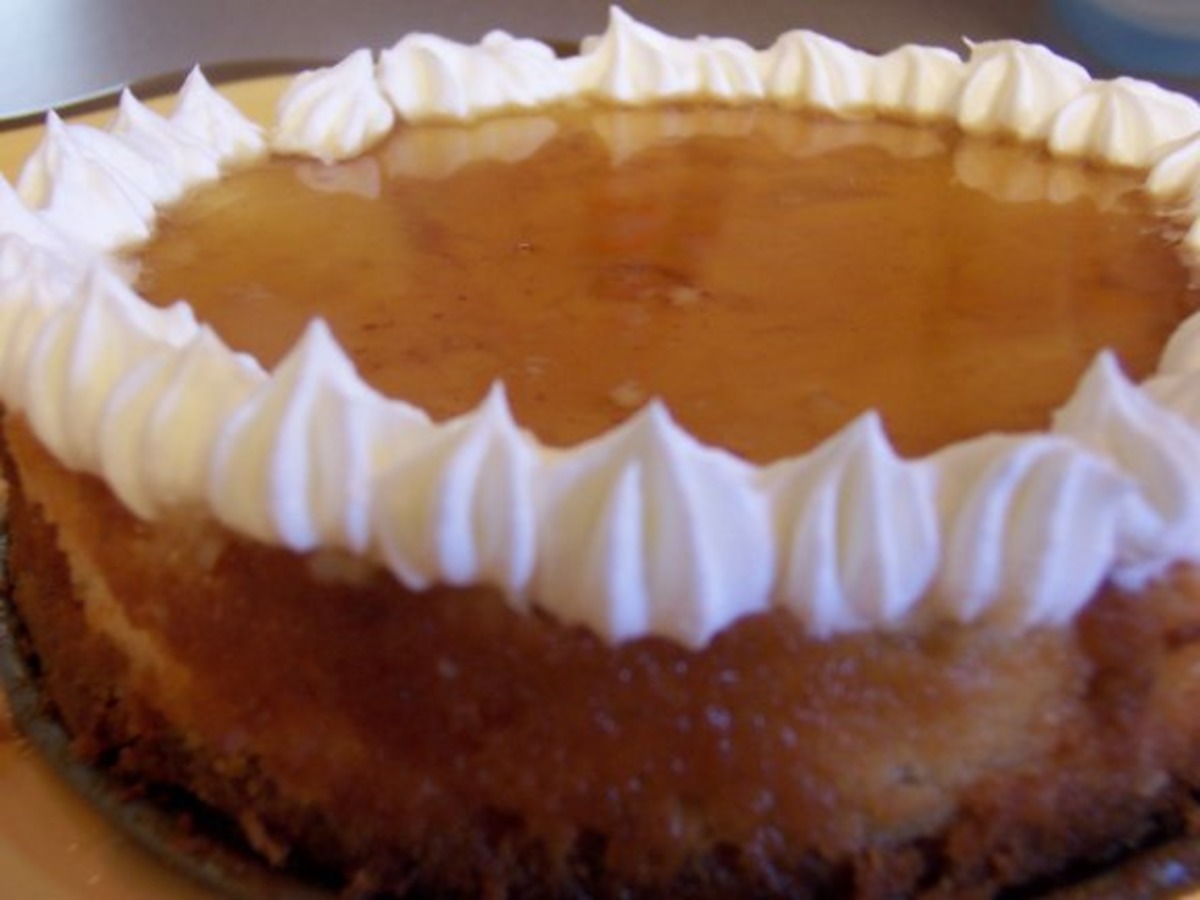
Make and share this Maple Cheesecake recipe from Food.com.
Provided by Boomette
Categories Cheesecake
Time 1h25m
Yield 8-10 serving(s)
Number Of Ingredients 8
Steps:
- Preheat oven at 350°F.
- In a bowl, mix all the crust ingredients and press lightly into bottom of 8" spring form pan.
- Bake at 350 F 15 minutes. Remove from the oven and set aside.
- In another bowl, whisk cream cheese and maple syrup.
- Add the eggs and heavy cream, blend well.
- Put the mixture in the crust.
- Bake in the center of the oven about 1 hour.
- Let cool in the oven, the door slightly opened, and then put in the fridge for 4 to 8 hours.
- Serve cold with a little bit of maple syrup.
Nutrition Facts : Calories 499.1, Fat 33.7, SaturatedFat 19.6, Cholesterol 198, Sodium 333, Carbohydrate 43, Fiber 0.4, Sugar 31.1, Protein 8.2
BUNYAN'S DIABETIC SWEET POTATO GINGERSNAP CHEESECAKE WITH MAPLE-WHIPPED CREAM
This is an AWESOME cheesecake!!!
Provided by Paul Bushay
Categories Cakes
Time 2h20m
Number Of Ingredients 14
Steps:
- 1. To make the Crust:
- 2. Preheat your oven to 350 degrees. Get out your 9-inch springform pan. Put the crumbs, Splenda blend and margarine in the pan. Mix with a fork until the butter is completely mixed into the crumbs and the Splenda sort of disappears into the mixture. Pat this mixture with your fingers into the bottom of the pan and partially up the sides of the pan. It should come up the side a half inch or more. You don't have to be too precise. Bake for 8 to 9 minutes until set. Let cool.
- 3. To make the Filling:
- 4. First drain the sweet potatoes in a colander. Put the sweet potatoes in a food processor and whiz them to make a puree. You can add up to a half cup of water to make the potato puree smooth. Sometimes you need a little liquid to get the processor started in its chopping process.
- 5. In a large bowl, put in your cream cheese, Splenda blend, sweet potato puree mixture, spice, and one egg. Mix for one minute, stopping the mixer to scrape down the sides. Add the next egg and mix another minute. Add the last egg and the vanilla and mix one more minute. This makes your filling nice and fluffy. Pour this over your crust. Level it with your spatula
- 6. Wrap your cheesecake pan in two layers of aluminum foil. You want to seal it good and tight so no water will get in. Wrap the bottom and up the sides. Set the pan in a larger roasting pan and then add water so the water level will be one inch up the side of the cheesecake. Bake at 350 degrees for 1 hour and 45 minutes until the cheesecake is set. Remove the cheesecake from the water pan and put it back in the oven (now turned off) with the door open for 15 more minutes so the cheesecake cools down slowly. Then let it cool on the counter. Take off the aluminum foil side cover. Finally, chill the cheesecake in the refrigerator overnight before serving. You can put a loose covering of plastic wrap on top of the cheesecake after it has cooled on the counter so it doesn't soak up any refrigerator flavors.
- 7. To make Whipped Cream:
- 8. Whip your cream as usual. Instead of adding vanilla or sugar when the cream reaches soft peaks, add the syrup and continue beating until stiff peaks form. Make the whipped cream right before you serve.
- 9. To serve
- 10. Take a sharp knife and slide it along the edge of the cheesecake to make sure it is loosened from the pan edge. Place it on your platter and unlock the springform to release the cheesecake. Gently lift off the outer ring. Clean up any little crumbs or messy edges. Slice your cheesecake with a very sharp knife that has been dipped in warm water and wiped off with a towel. This will make a very smooth cut.
- 11. The cheesecake will taste best on days 2 through 4. As the days progress, the cheesecake flavor intensifies. Depending on the humidity in your refrigerator, your crust might start to get soggy, but the cheesecake will still taste good. As with all cheesecakes, I recommend taking it out of the refrigerator at least 15 to 30 minutes or even longer before you serve it. The colder it is, the less the flavors come through. Savor each bite by rolling it over on your tongue. Yum!
Tips:
- Use almond flour for a grain-free option: Almond flour is a great alternative to traditional wheat flour, making this cheesecake suitable for those with gluten sensitivities or following a grain-free diet.
- Ensure the cream cheese is at room temperature: This will ensure a smooth and creamy cheesecake filling. Take the cream cheese out of the refrigerator about an hour before you start baking.
- Don't overbeat the filling: Overbeating the cheesecake filling can cause it to become dense and crumbly. Mix the ingredients until just combined.
- Bake the cheesecake in a water bath: This will help prevent the cheesecake from cracking. Place the cheesecake pan inside a larger pan filled with hot water.
- Chill the cheesecake for at least 4 hours before serving: This will allow the cheesecake to set properly and develop its full flavor.
Conclusion:
This diabetic-friendly maple cheesecake is a delicious and satisfying dessert that can be enjoyed by people with diabetes and those without. With its creamy texture, rich maple flavor, and pecan praline topping, this cheesecake is sure to be a hit at any gathering. The use of sugar substitutes and almond flour makes it a healthier choice without compromising on taste. So, give this recipe a try and enjoy a sweet treat that won't spike your blood sugar levels.
Are you curently on diet or you just want to control your food's nutritions, ingredients? We will help you find recipes by cooking method, nutrition, ingredients...
Check it out »
#60-minutes-or-less #time-to-make #course #main-ingredient #cuisine #preparation #occasion #north-american #5-ingredients-or-less #desserts #eggs-dairy #easy #diabetic #fall #spring #summer #winter #cheesecake #cheese #eggs #dietary #seasonal
You'll also love