Cookie puzzles are a delightful combination of art, baking, and problem-solving. Imagine a delicious cookie that doubles as a captivating puzzle, challenging your mind as you piece together intricate designs. These edible masterpieces are perfect for any occasion, from birthday parties to family gatherings, and they're a guaranteed hit with people of all ages.
This article presents a collection of delectable cookie puzzle recipes, each offering a unique design and flavor experience. From classic chocolate chip cookies transformed into intricate geometric patterns to vibrant rainbow cookies arranged like a jigsaw puzzle, there's a cookie puzzle recipe for every taste and skill level. Whether you're a seasoned baker or a novice just starting out, these recipes provide step-by-step instructions and helpful tips to guide you through the process of creating these edible works of art. So, gather your ingredients, preheat your oven, and let's embark on a delicious adventure into the world of cookie puzzles!
LOVE HEART COOKIE PUZZLE

Steps:
- For the cookie dough: Preheat the oven to 175 degrees C/350 degrees F. Line a baking sheet with a silicone mat or parchment paper.
- In the bowl of a stand mixer, cream the butter and sugar together until the mixture is light and fluffy, about 3 minutes. Add the vanilla extract and egg and beat again for 1 minute to combine, scraping down the bowl to ensure all of the butter mixture is incorporated.
- In a separate bowl, mix together the flour, baking powder and salt. With the mixer on low speed, slowly add the dry ingredients in 3 parts and mix until combined.
- Scrape the dough onto a work surface and slightly wet your hands. Knead the dough into a smooth disc and place between 2 pieces of parchment paper. Roll the dough out until it is 1/4 inch thick.
- Remove the parchment paper and use a heart puzzle cookie cutter to cut out heart shapes. If you do not have a heart puzzle cookie cutter, use a normal heart cookie cutter, then cut the heart down the middle with a knife to create a left and right side. Lift the cookies onto the prepared baking sheet and bake until they are just slightly golden around the edges, about 7 minutes. Allow to cool completely.
- For the icing: Add 1 cup of the royal icing mix to one bowl and the remaining 1/2 cup to a second bowl. In the first bowl with 1 cup of icing mix, create the flooding consistency royal icing. Add a drop of red food gel to the bowl and then, starting with 1 teaspoon of water, stir the mixture together with a spoon. Keep adding water to the bowl 1/2 teaspoon at a time until the mixture reaches the flooding consistency--when you drag a line through the icing mixture with a spoon, the line should disappear within 5 to 10 seconds. If the line disappears earlier, your mixture is too runny and you need to add a few tablespoons of royal icing mix to thicken the icing to the right consistency. If the line takes longer than 10 seconds to disappear, then your mixture is still too thick and you need to keep adding water 1/2 teaspoon at a time until you have the correct consistency. Once you have your red flooding icing, place a damp kitchen towel over the top of the bowl to stop it from drying out.
- In the remaining bowl, create the soft peak-consistency royal icing. Again, adding just 1/2 teaspoon of water at a time, stir the mixture together until it reaches a soft peak stage--when you lift the spoon out of the bowl and hold it in the air, the icing forms a soft peak on the end of the spoon. If the mixture is too runny and the icing falls off the end of the spoon, add more royal icing mix. If the mixture is too stiff, just add water 1/4 teaspoon at a time and mix together until it reaches soft peak consistency. Once you have the correct consistency, transfer about 2 tablespoons of the white soft peak icing to another bowl. Add red food gel coloring to the remaining mixture and stir to combine. If you would like to flavor any of the royal icing, add 1/4 teaspoon of your favorite extract, such as vanilla.
- Transfer the royal icing mixtures into separate piping bags fitted with number 2 round tip nozzles. Cover the ends of the piping nozzles with a damp tea towel at all times to stop them from drying out.
- With a cooled cookie in front of you, pipe a border of red soft peak royal icing around the edge of the cookie. Apply even pressure with your hand, and squeeze a thin line of icing along the outside of the cookie, joining the icing up at the end. Repeat on all of the cookies.
- Next, you need to flood the cookies. Pipe the red flooding royal icing inside the border you just created on each cookie, filling up the center of the cookies with icing. Use the piping nozzle to squeeze the icing into the edges to ensure each cookie is covered entirely. Allow to set for 10 minutes.
- Using the white soft peak royal icing, apply even pressure with your hand and decorate the center of each cookies with names, initials or messages. The cookies should be eaten the same day for the best taste.
SANTA'S COMING COOKIE PUZZLE
This clever confection s easy to make with store-bought cookie dough and is entirely edible to boot! Blanched almonds make it simple for little hands to grasp the puzzle Pieces, which are completely removable.-Taste of Home Test Kitchen
Provided by Taste of Home
Categories Desserts
Time 50m
Yield 1 cookie puzzle (24 servings).
Number Of Ingredients 7
Steps:
- In a large bowl, combine cookie dough and flour. On a parchment paper-lined surface, roll dough into a 14x11-in. rectangle. With cookie cutters, cut out puzzle shapes. Slide a baking sheet under the parchment paper and dough. Chill for 5-10 minutes. , Remove shapes; place on an ungreased baking sheet. Place an almond on its side into the center of each shape for a handle. Bake shapes at 350° for 7-9 minutes or until edges are golden brown. While still warm, recut shapes with the same cookie cutters to form neat edges. (If cookies cool too quickly, return to oven until softened.) Remove to wire racks; cool. , Bake large rectangular puzzle on a parchment paper-lined baking sheet for 12-13 minutes or until edges are golden brown. Immediately recut the shapes inside the puzzle to form neat edges. Cool completely on a wire rack. , In a small bowl, combine the confectioners' sugar, milk and vanilla until smooth. Tint frosting with food coloring as desired. Frost puzzle and shapes; decorate with decorating gel and sprinkles as desired. Place puzzle shapes inside puzzle.
Nutrition Facts : Calories 153 calories, Fat 5g fat (1g saturated fat), Cholesterol 7mg cholesterol, Sodium 91mg sodium, Carbohydrate 27g carbohydrate (17g sugars, Fiber 0 fiber), Protein 1g protein.
PIZZELLES III
This recipe calls for a batter-like dough and is baked on a pizzelle iron. Powdered sugar adds an elegant touch. In the Italian version, vanilla is replaced by anise. Chocolate may also be used.
Provided by Marianne Jungels
Categories World Cuisine Recipes European Italian
Time 50m
Yield 24
Number Of Ingredients 6
Steps:
- In a large bowl, beat eggs and sugar until thick. Stir in the melted butter and vanilla. Sift together the flour and baking powder, and blend into the batter until smooth.
- Heat the pizzelle iron, and brush with oil. Drop about one tablespoon of batter onto each circle on the iron. You may need to experiment with the amount of batter and baking time depending on the iron. Bake for 20 to 45 seconds, or until steam is no longer coming out of the iron. Carefully remove cookies from the iron. Cool completely before storing in an airtight container.
- For chocolate pizzelles, add 1/4 cup cocoa sifted together with flour and baking powder, 1/4 cup more sugar and 1/4 teaspoon more baking powder. I find that for the chocolate mixture, the iron must be well oiled to start and then brush on more as needed.
Nutrition Facts : Calories 102 calories, Carbohydrate 13.4 g, Cholesterol 33.4 mg, Fat 4.5 g, Fiber 0.2 g, Protein 1.8 g, SaturatedFat 2.6 g, Sodium 76.9 mg, Sugar 6.4 g
COOKIE JIGSAW - DEE DEE'S
Christmas fun with kids or the grand kids. I think this is a memory maker they won't forget! I don't remember where I found this recipe, I found it a few years ago when my grandson's were to young to help with this. They are 4 and 3 now and this Christmas just might be the right time to bring this recipe out. I've not tried it...
Provided by Diane Atherton
Categories Cookies
Time 1h30m
Number Of Ingredients 11
Steps:
- 1. 1. On cardboard or paper, draw a Christmas-tree template 10 inches high (from tip of tree to top of trunk) and 10 1/2 inches wide (at base of tree above trunk), with a 1-inch high by 2-inch wide trunk. Cut out template and set aside.
- 2. 2. In large bowl, with mixer at medium speed, beat butter and sugar until creamy. Beat in egg, milk, and vanilla until well blended (mixture may look curdled). On waxed paper, combine flour, baking powder, and salt. At low speed, beat in flour mixture just until blended. Pat dough into a small rectangle.
- 3. 3. Preheat oven to 325 degrees F. Grease and flour large cookie sheet. Place dough in center of cookie sheet. With floured rolling pin, roll dough into 13" by 11" rectangle. Bake 15 minutes.
- 4. 4. Place cookie sheet on wire rack; center tree template lengthwise on warm cookie. With knife, cut around template into cookie; remove template, leaving tree outline. Press floured 1 1/2-inch star-shaped cookie cutter into cookie at top of tree; remove cutter, leaving star outline. Press floured 1-inch round cookie cutters into tree in several places, leaving ornament outlines. Press 2 1/2-inch star cutter into remaining cookie around tree, leaving star outlines.
- 5. 5. Cut Christmas tree into various geometric-shaped puzzle pieces, being careful not to cut into ornament outlines. Cut remaining cookie around tree into puzzle pieces, being careful not to cut into star outlines.
- 6. 6. Return cookie sheet to oven and bake 12 to 14 minutes longer or until cookie is light brown. Set cookie sheet on wire rack; cut through all designs and pieces. Cool cookie puzzle on cookie sheet 10 minutes. Carefully slide puzzle, in 1 piece, onto wire rack; cool completely.
- 7. 7. To decorate: In 1-quart saucepan, heat corn syrup to boiling over medium heat, stirring frequently. Boil 1 minute, stirring. Remove round ornament pieces from tree; brush tree and trunk with corn syrup. Sprinkle tree with green sugar crystals to coat, then attach small round yellow candies as desired. Sprinkle or dip trunk into chocolate sprinkles. Brush ornament pieces with corn syrup; sprinkle or dip into choice of colored sugar crystals or decors. Remove star decorations from around tree; brush with corn syrup and sprinkle or dip into yellow sugar crystals. Brush puzzle pieces around tree with corn syrup; sprinkle with blue sugar crystals to coat, then sprinkle lightly with white decors and stars. Reheat corn syrup if it becomes too thick.
- 8. 8. Allow puzzle pieces to dry completely, about 1 hour. When pieces are dry, reassemble puzzle on large tray to serve, or store puzzle in tightly covered container at room temperature up to 1 week.
PUZZLE COOKIES
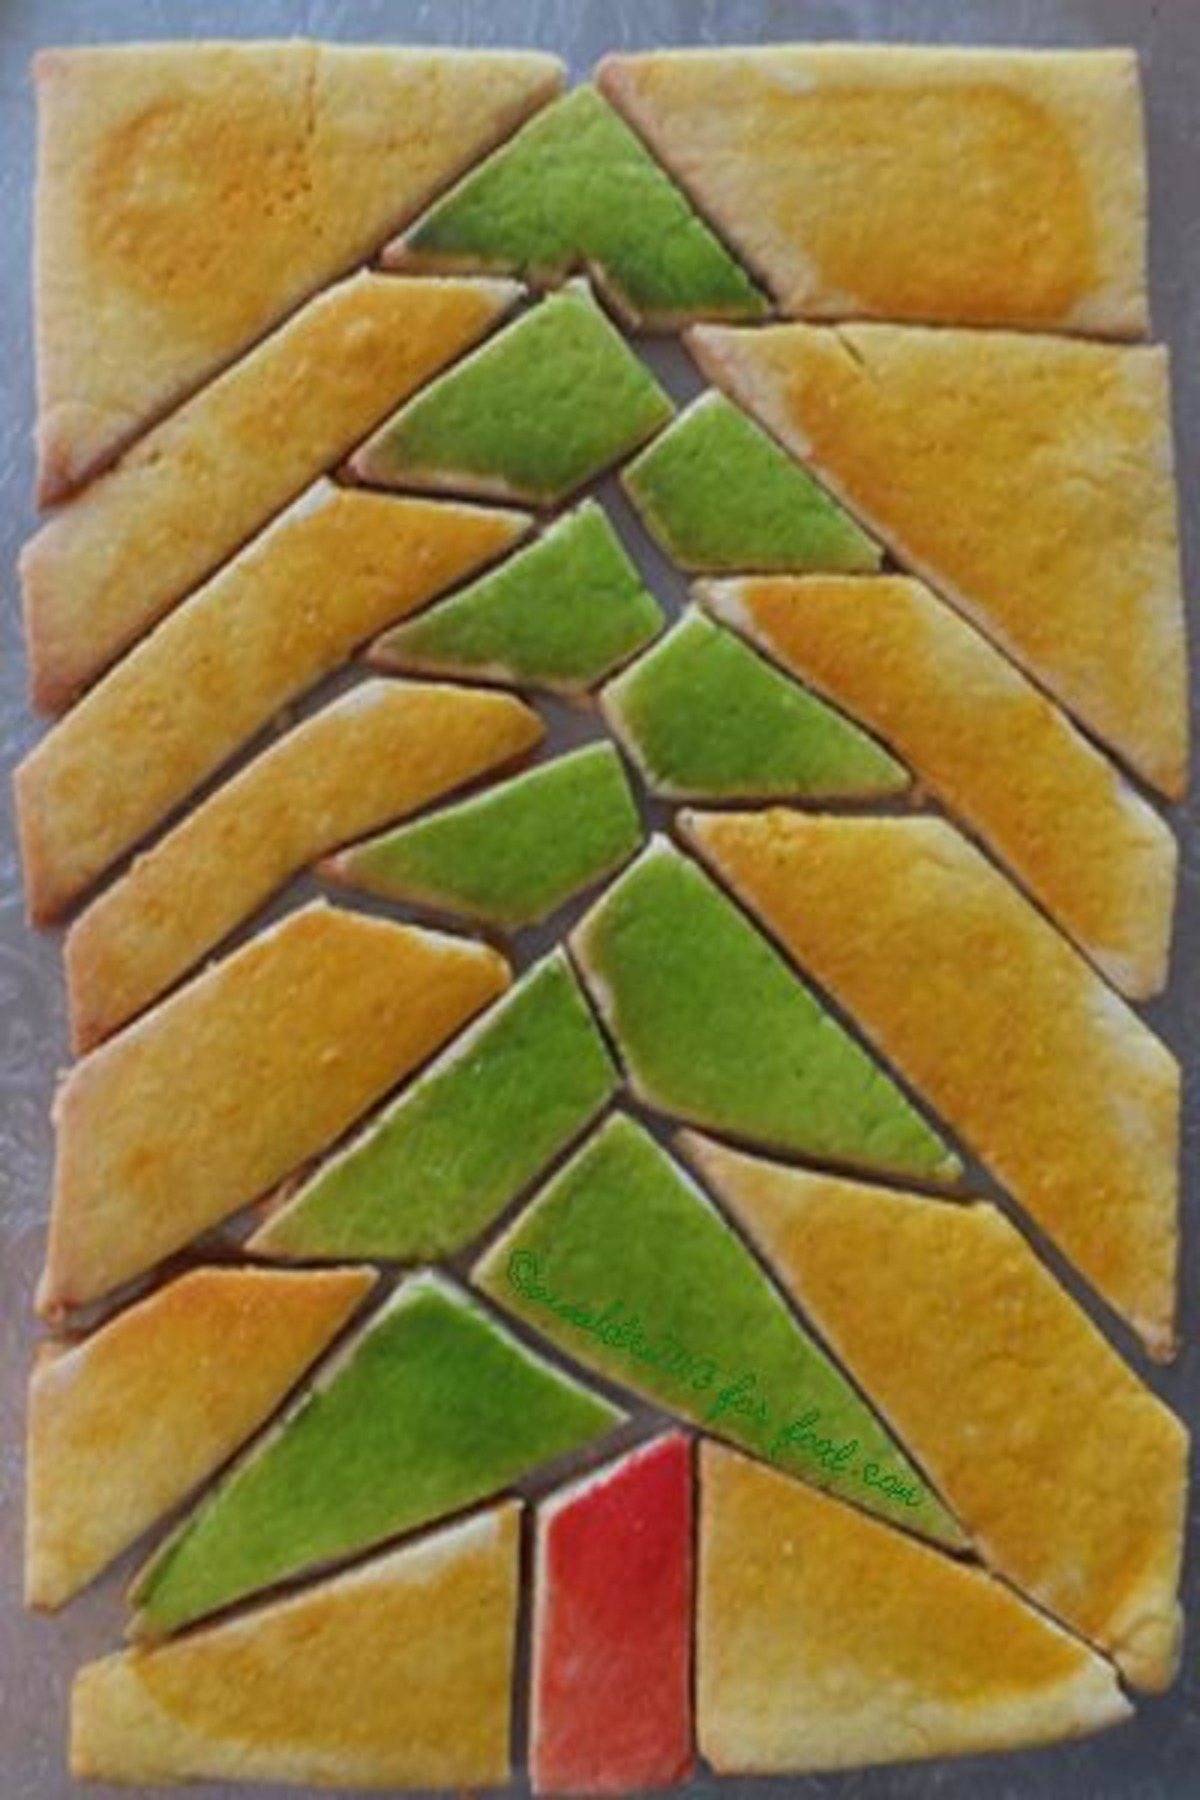
This recipe was designed for Halloween but would work for any holiday or event with a change of cookie cutters. I think that the kids will LOVE this! This will make 6 "assembled" cookies out of the purchased but you can always share the "pieces". The colors are optional to use as and if you desire.
Provided by Annacia
Categories Dessert
Time 32m
Yield 6 cookies if using the purchased dough
Number Of Ingredients 5
Steps:
- In a medium bowl knead flour into sugar cookie dough.
- Divide dough into 6 (or more) portions.
- On an ungreased cookie sheet, roll each portion into a 5-inch square.
- Press a well-floured 3- to 4-inch Halloween cookie cutter into the square (use smaller cutters, if desired).
- Carefully remove cookie cutter without removing dough.
- Using a table knife, cut outside portion of square into large puzzle pieces.
- In a small mixing bowl beat egg yolks and water.
- Divide mixture among 3 or 4 small bowls.
- In each bowl, add 2 to 3 drops of liquid food coloring or desired amount of paste food coloring in desired color; mix well.
- Brush dough puzzle pieces with different colors of egg yolk mixture.
- Apply to cookie dough with small clean paintbrush.
- If mixture thickens while standing, stir in water, one drop at a time.
- Bake in a 350 degree F oven for 7 to 8 minutes or until bottoms of cookies just start to brown and centers are set.
- While still warm, carefully recut pieces with the knife.
- Trim edges as needed.
- Transfer cookies to a wire rack; cool completely.
Nutrition Facts : Calories 406.2, Fat 19, SaturatedFat 5, Cholesterol 87.6, Sodium 361.5, Carbohydrate 54.3, Fiber 0.7, Sugar 18.4, Protein 4.9
PUZZLE COOKIE

Baking these cookies is a wonderful winter activity to do with kids.
Provided by Martha Stewart
Categories Food & Cooking Dessert & Treats Recipes Cookie Recipes
Yield Makes about 10 cookies
Number Of Ingredients 14
Steps:
- In a large bowl, whisk together flour, baking soda, and baking powder; set aside.
- In the bowl of an electric mixer fitted with the paddle attachment, cream butter and sugar on medium speed until light and fluffy, about 2 minutes. Add ginger, cinnamon, cloves, salt, and pepper. Beat to combine. Add eggs, and beat to combine, then beat in molasses. Reduce speed to low; add flour mixture, and beat to combine. Divide dough in half, and shape into flattened disks, wrap in plastic, and chill for at least 1 hour.
- Preheat oven to 350 degrees. Line baking sheets with Silpats. Generously flour a large piece of parchment, and roll one piece of dough out on the parchment into a 1/8-inch-thick rectangle, about 14 by 10 inches. Transfer to the freezer to chill for 15 minutes. Repeat rolling and chilling process with the remaining piece of dough.
- Remove one piece of dough from freezer. Using a large owl cookie cutter or our template, cut out a cookie and transfer to prepared baking sheet. Using a 3/4-inch cookie cutter cut out eyes from scraps. Using the small end of a 1/2-inch round pastry tip, cut out center of each eye, creating rings. Place on cookie. Return cookie to freezer to chill, about 15 minutes. Repeat with remaining dough. The scraps can be rerolled once.
- Bake until edges are golden, about 12 minutes, rotating halfway through. Using a pizza cutter or a sharp knife, cut cookies into desired puzzle shapes. Leaving intact, transfer baking sheets to wire racks until cool.
- Divide royal icing among four bowls, and tint one batch black, one yellow, and one blue; leave one white. Decorate cooled cookies with royal icing using the #1, #3, and #4 round Ateco tips. Separate the puzzle pieces once the cookies are decorated, but before the icing hardens.
Tips:
- Choose the right cookie base: A sturdy cookie, such as a shortbread or sugar cookie, will hold up best to being cut into puzzle pieces.
- Chill the dough before cutting: This will help the cookies keep their shape and prevent them from spreading too much in the oven.
- Use a sharp knife to cut the cookies: This will help you get clean, precise cuts.
- Decorate the cookies before assembling the puzzle: This will make it easier to see the different pieces and put the puzzle together.
- Use a variety of cookie shapes and sizes to make the puzzle more challenging: You can also use different colors of icing or sprinkles to create a more visually appealing puzzle.
- Package the cookie puzzle in a clear container: This will make it easy to see the puzzle and will also help to keep the cookies fresh.
Conclusion:
Cookie puzzles are a fun and challenging activity that can be enjoyed by people of all ages. They are also a great way to get creative and use your imagination. With a little planning and effort, you can create a cookie puzzle that is both delicious and visually appealing. So next time you're looking for a fun activity to do with friends or family, try making a cookie puzzle.
Are you curently on diet or you just want to control your food's nutritions, ingredients? We will help you find recipes by cooking method, nutrition, ingredients...
Check it out »
You'll also love


