Best 6 Chocolate Dipped Toffee Crunch Ice Cream Cones Recipes


Indulge your sweet cravings with the delectable Chocolate-Dipped Toffee Crunch Ice Cream Cones featured in this comprehensive culinary guide. Embark on a delightful journey as you discover the secrets behind creating these irresistible treats, from the perfect ice cream cone to the luscious chocolate coating and the tantalizing toffee crunch. This article presents an array of recipes, catering to diverse dietary preferences and skill levels. Dive into the classic Chocolate-Dipped Toffee Crunch Ice Cream Cones recipe, a timeless favorite that combines the richness of chocolate with the irresistible crunch of toffee. For those seeking a healthier alternative, explore the Vegan Chocolate-Dipped Toffee Crunch Ice Cream Cones recipe, featuring creamy coconut milk ice cream and a luscious avocado-based chocolate coating. Unleash your creativity with the DIY Toffee Crunch Recipe, crafting homemade toffee bits that add an extra layer of texture and flavor to your cones. Enhance your ice cream cone experience with the delectable Chocolate Ganache Topping recipe, a rich and decadent sauce that elevates the dessert to a new level of indulgence. Discover the art of tempering chocolate with our detailed guide, ensuring a smooth and glossy finish for your chocolate coating.
Check out the recipes below so you can choose the best recipe for yourself!
CHOCOLATE AND TOFFEE CRUNCH ICE CREAM
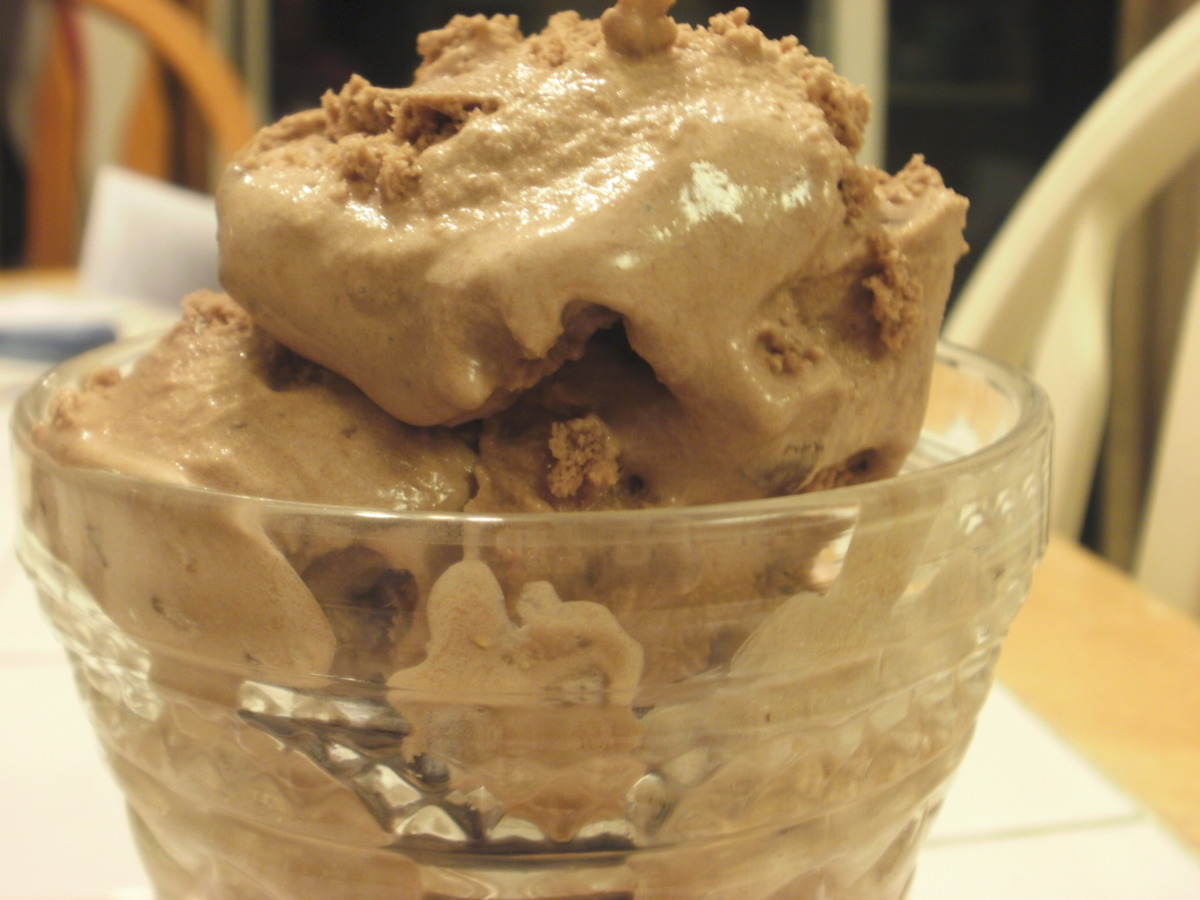
This recipe calls for stirring in chocolate-covered toffee but you can chop and stir in any favorite candy. Cook time includes freeze time. I have included instructions to make chocolate dipped cones which are so good! I leave the cones right side up so I get a good amount of chocolate in the tip of the cone for a delightful surprise at the end. I let them stand for at least 20 minutes. Then I dipped them around the sides
Provided by RecipeNut
Categories Frozen Desserts
Time 6h15m
Yield 8 serving(s)
Number Of Ingredients 7
Steps:
- In large bowl, combine sugar and cocoa powder. Add whipping cream, milk, vanilla, and salt; stir until sugar is dissolved.
- Pour cream mixture into freezer canister of 1 or 1 1/2 quart ice cream freezer. Freeze according to manufacturer's directions. Stir in toffee pieces. If desired, ripen ice cream about 4 hours.
- Chocolate-Dipped Cones.
- For a fun way to dress up ice cream cones with chocolate, place 1/2 cup semisweet chocolate chips (or 3 ounces chopped semisweet chocolate) in a microwave-safe bowl. Microwave, uncovered, on 70 percent power (medium-high) for 1 minute; stir. Microwave for 1 1/2 to 3 minutes more or until the chocolate is melted and smooth, stirring every 15 seconds. Spoon chocolate over the tops of ice cream cones to cover about 1/3 of each cone. (If the chocolate is too thick, stir in 1 teaspoon of melted shortening.) Place cones, top sides down, on baking sheet lined with waxed paper. Chill the cones about 15 minutes or until set.
CHOCOLATE-DIPPED ICE CREAM CONE
Steps:
- Make a cone holder: Find a small, sturdy, clean box that will fit in your freezer. Turn it over, and cut eight X's about 2 inches apart with a sharp knife. Open up each X with your fingers so it will securely hold an ice cream cone upright.
- Cook the chocolate, coconut oil and a pinch of salt in a small saucepan over medium-low heat, stirring constantly with a rubber spatula, until melted, about 4 minutes. Transfer to a small bowl.
- Pour about 1 tablespoon of melted chocolate into a sugar cone, and swirl to completely coat the inside. Pour any excess chocolate back into the bowl. Place the cone in the cone holder. Repeat with the 7 remaining cones. Freeze the cones to set the chocolate, about 10 minutes.
- Fill each cone to the top with ice cream, and top with an additional 1/3-cup scoop. Return the cones to the cone holder, and freeze to harden the ice cream, about 30 minutes.
- Dip the cones: Put your desired topping in a small bowl. If the remaining chocolate starts to solidify, heat it in the microwave in 10-second increments, stirring in between, until it is fluid again. Dip each top scoop of ice cream in the chocolate to mostly cover it, leaving a little bit exposed. Let any excess chocolate drip off, then immediately dip the top scoop in the topping. Work quickly, as the chocolate shell sets in seconds.
- Serve the cones immediately, or put them in the freezer until ready to serve. To freeze individually (for up to 2 weeks), roll the cone up in a large triangle of wax paper and tape closed.
CHOCOLATE-DIPPED ICE CREAM CONES
When you're hanging by the pool with no ice cream truck in sight, cool off with our homemade, customizable version of a classic: an ice cream cone with a crunchy chocolate shell (and cone inner coating) studded with toppings. Coconut oil helps the shell harden quickly, but you can use shortening if coconut isn't your thing. Our favorite combos to try: strawberry ice cream with pistachios, coconut ice cream with toasted coconut and salted caramel gelato with a sprinkle of sea salt. For a nice serving presentation, cover your cone holder in decorative wrapping paper (click the Photos tab for our step-by-step guide).
Provided by Cooking Channel
Categories dessert
Time 50m
Yield 8 cones
Number Of Ingredients 6
Steps:
- Make a cone holder: Find a small, sturdy, clean box that will fit in your freezer. Turn it over, and cut eight X's about 2 inches apart with a sharp knife. Open up each X with your fingers so it will securely hold an ice cream cone upright.
- Cook the chocolate, coconut oil and a pinch of salt in a small saucepan over medium-low heat, stirring constantly with a rubber spatula, until melted, about 4 minutes. Transfer to a small bowl.
- Pour about 1 tablespoon of melted chocolate into a sugar cone, and swirl to completely coat the inside. Pour any excess chocolate back into the bowl. Place the cone in the cone holder. Repeat with the 7 remaining cones. Freeze the cones to set the chocolate, about 10 minutes.
- Fill each cone to the top with ice cream, and top with an additional 1/3-cup scoop. Return the cones to the cone holder, and freeze to harden the ice cream, about 30 minutes.
- Dip the cones: Put your desired topping in a small bowl. If the remaining chocolate starts to solidify, heat it in the microwave in 10-second increments, stirring in between, until it is fluid again. Dip each top scoop of ice cream in the chocolate to mostly cover it, leaving a little bit exposed. Let any excess chocolate drip off, then immediately dip the top scoop in the topping. Work quickly, as the chocolate shell sets in seconds.
- Serve the cones immediately, or put them in the freezer until ready to serve. To freeze individually (for up to 2 weeks), roll the cone up in a large triangle of wax paper and tape closed.
CHOCOLATE-DIPPED TOFFEE CRUNCH ICE CREAM CONES

Categories Chocolate Dairy Dessert Freeze/Chill Fourth of July Kid-Friendly Bastille Day Frozen Dessert Birthday Family Reunion Bon Appétit Vegetarian Pescatarian Peanut Free Tree Nut Free Soy Free Kosher Small Plates
Yield MAKES 8
Number Of Ingredients 5
Steps:
- Soften ice cream slightly in refrigerator if hard. Using small spoon, gently pack some ice cream into hollow part of each cone. Top each with rounded scoop (about 1/3 cup) of ice cream. Place each cone, ice cream side up, in small glass. Freeze overnight.
- Place chopped Heath Bars on plate. Place chocolate and shortening in medium metal bowl. Set bowl over saucepan of simmering water and stir until melted and smooth. Remove bowl from over water. Let chocolate stand until cool but still liquid, about 5 minutes. Dip ice cream end of 1 cone into chocolate, rotating to coat completely and tilting bowl if necessary. Hold cone until chocolate is almost set, about 10 seconds. Immediately roll dipped portion into Heath Bars, pressing gently to adhere. Return cone to glass and place in freezer. Repeat with remaining cones, chocolate and Heath Bars. (Can be prepared 1 week ahead. Wrap each cone in plastic.) Serve frozen.
HOMEMADE CHOCOLATE-DIPPED ICE CREAM CONES

Skip the ice cream parlor this time around and try this tasty recipe for Homemade Chocolate-Dipped Ice Cream Cones.
Provided by My Food and Family
Categories Home
Time 20m
Yield 6 servings
Number Of Ingredients 5
Steps:
- In a medium bowl, microwave chocolate and vegetable oil for about 1 minute. Stir every 20 seconds until smooth.
- Place ice cream cones on a small lined baking sheet. (Make sure you have cleared space in your freezer for the sheet.). Drizzle about 1 teaspoon melted chocolate into the bottom of each ice cream cone. Place in the freezer for 10 minutes, to set chocolate.
- Remove vanilla ice cream from freezer to let thaw a few minutes before filling cones. Scoop ice cream into cones. Place filled cones into short glasses and onto baking sheet. Freeze for 10 minutes to set ice cream.
- One at a time, dip tops of cones in melted chocolate mixture (you may need to warm in your microwave for 15-20 more seconds to thin slightly).
- Immediately roll into chopped nuts. If necessary, sprinkle nuts over top to coat evenly.
- Place the cones back into the short glasses, onto the baking sheet, and into your freezer.
- Repeat process until all sugar cones are filled, dipped and sprinkled with nuts.
- Enjoy!
Nutrition Facts : Calories 0 g, Fat 0 g, SaturatedFat 0 g, TransFat 0 g, Cholesterol 0 g, Sodium 0 g, Carbohydrate 0 g, Fiber 0 g, Sugar 0 g, Protein 0 g
TOFFEE CRUNCH ICE CREAM
I grew up on a farm where we had fresh eggs, milk and cream, so we often made homemade ice cream. Many years later, I'm back on a small farm where we have fresh eggs and I'm making ice cream again.
Provided by Taste of Home
Categories Desserts
Time 45m
Yield 6 servings (3 cups).
Number Of Ingredients 10
Steps:
- In a saucepan, combine the egg, sugar and salt. Gradually add milk. Cook and stir over medium heat until mixture reaches 160° and coats the back of a metal spoon. Remove from the heat. Whisk in chocolate, then add cream, coffee and vanilla. Refrigerate for at least 2 hours., Fold in candy and nuts. Fill cylinder of ice cream freezer; freeze according to manufacturer's directions. Allow to ripen in ice cream freezer or firm up in the freezer for 2-4 hours before serving.
Nutrition Facts :
Tips:
- Mise en place: Before you start cooking, make sure you have all your ingredients and equipment ready. This will help you stay organized and ensure that you don't forget anything.
- Use high-quality ingredients: The quality of your ingredients will greatly affect the taste of your ice cream cones. Use the best quality chocolate, toffee, and ice cream that you can find.
- Don't overmix the batter: Overmixing the batter will make the ice cream cones tough. Mix just until the ingredients are combined.
- Chill the batter before baking: Chilling the batter before baking will help the ice cream cones to hold their shape. Place the batter in the refrigerator for at least 30 minutes before baking.
- Bake the ice cream cones until they are golden brown: The ice cream cones should be baked until they are golden brown. This will ensure that they are crispy and have a slightly caramelized flavor.
- Dip the ice cream cones in chocolate: Once the ice cream cones have cooled, dip them in melted chocolate. You can use any type of chocolate that you like. Dark chocolate, milk chocolate, or white chocolate will all work well.
- Sprinkle the ice cream cones with toffee crunch: After the ice cream cones have been dipped in chocolate, sprinkle them with toffee crunch. The toffee crunch will add a sweet and crunchy texture to the ice cream cones.
- Chill the ice cream cones before serving: Once the ice cream cones have been dipped in chocolate and sprinkled with toffee crunch, chill them in the refrigerator for at least 30 minutes before serving. This will help the chocolate to set and the toffee crunch to become firm.
Conclusion:
Chocolate-dipped toffee crunch ice cream cones are a delicious and easy-to-make treat. They are perfect for parties, picnics, or a special dessert. With a few simple ingredients and a little bit of time, you can create these delicious ice cream cones that will be sure to impress your friends and family.
Are you curently on diet or you just want to control your food's nutritions, ingredients? We will help you find recipes by cooking method, nutrition, ingredients...
Check it out »
You'll also love