Best 2 Stained Glass Cookie Recipes


Indulge in the delightful world of Stained Glass Cookies, where vibrant colors and flavors dance harmoniously. These captivating treats, also known as Windowpane Cookies, are a feast for the eyes and the palate. With their colorful hard candy centers encased in delicate, crisp cookies, they resemble stained glass windows, adding a touch of whimsy to any occasion. Discover the art of creating these edible masterpieces with our curated collection of recipes, each offering unique flavor combinations and decorating techniques. From classic red and green to a rainbow of hues, these cookies will transform your kitchen into a stained glass studio. Let your creativity shine as you explore the endless possibilities of this enchanting confection.
Here are our top 2 tried and tested recipes!
STAINED GLASS COOKIE ORNAMENTS
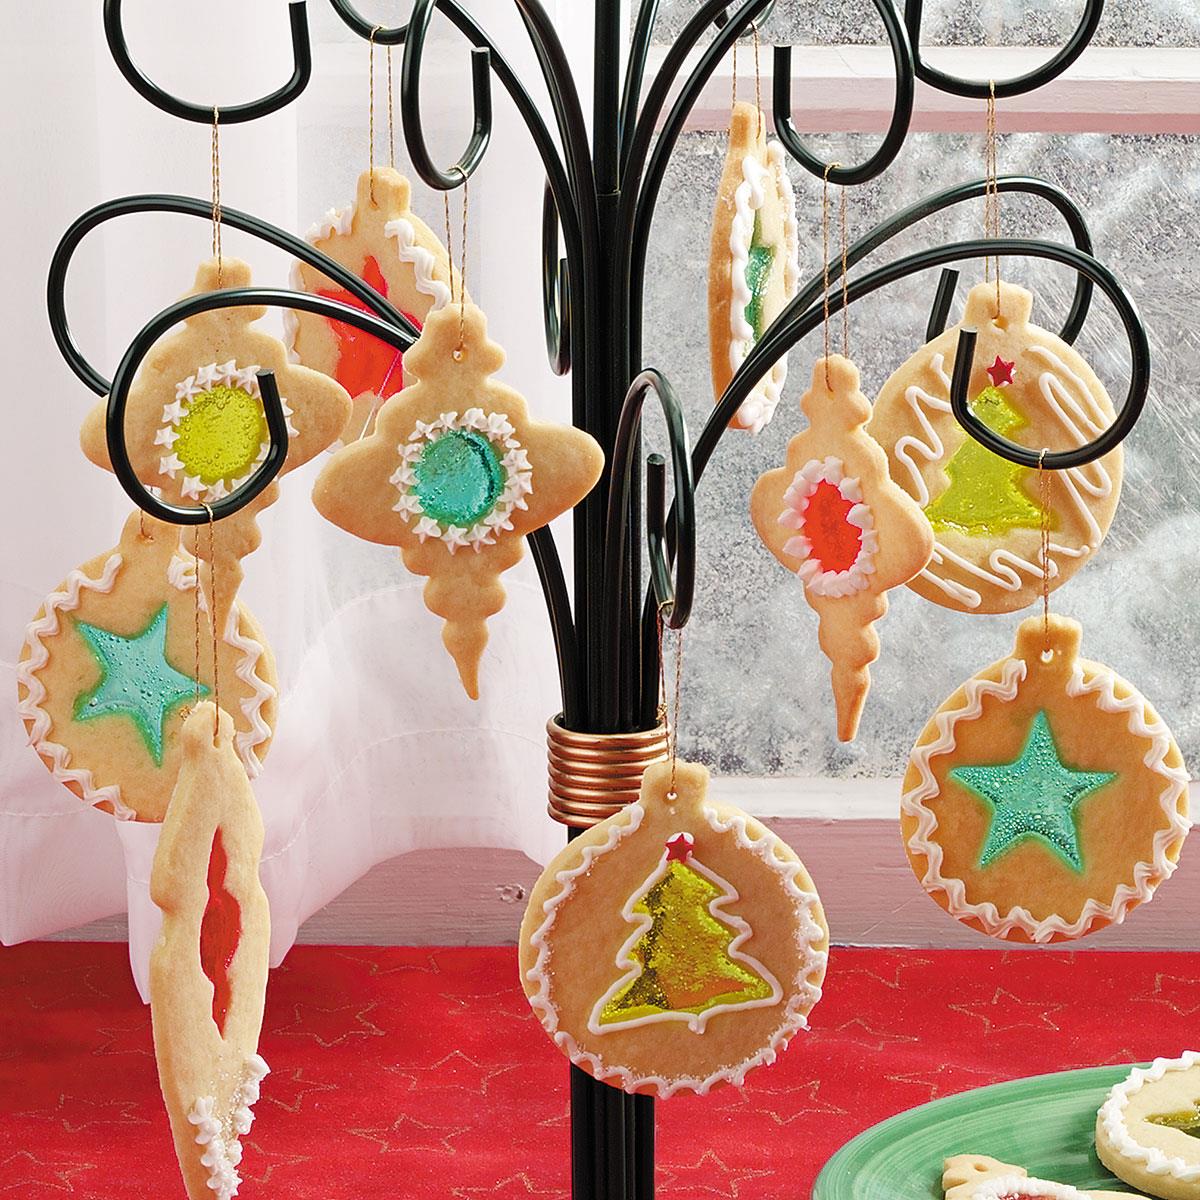
Bring back sweet memories of the magic of Christmases past with these fancy jewel-colored cookie ornaments. You can make they in a variety of seasonal shapes and sizes, and hang them on a tree, in the window, or on an ornament stand. -Taste of Home Test Kitchen
Provided by Taste of Home
Categories Desserts
Time 55m
Yield about 7 dozen.
Number Of Ingredients 12
Steps:
- In a large bowl, cream butter and sugar until light and fluffy. Add eggs, one at a time, beating well after each addition. Beat in vanilla. Combine the flour, baking soda, cream of tartar and salt; gradually add to the creamed mixture and mix well. Divide into three portions; cover and refrigerate for 30 minutes or until easy to handle. , On a lightly floured surface, roll out one portion to 1/4-in. thickness. Cut with a floured 2-1/2-in. ornament-shaped cookie cutters. Cut out centers with a 1/2-in. cookie cutters. Place larger cutouts 2 in. apart on greased baking sheets. Poke a small hole in the top of each cookie. Repeat with remaining dough; reroll small cutouts if desired. , Place the same color of hard candies in small resealable plastic bags; crush candies. Sprinkle in center of each. Bake at 350° for 8-10 minutes or until lightly browned. Cool for 2-3 minutes or until candies are set before carefully removing to wire racks. , In a small bowl, beat meringue powder and water until soft peaks form. Gradually add the confectioners' sugar. Decorate cookies with icing.
Nutrition Facts :
STAINED-GLASS COOKIE ORNAMENTS

Sugar cookies turn magical when their centers are cut out and filled with chopped hard candies. As the dough bakes, the candy melts into a dazzling stained-glass window, creating a colorful confection.
Provided by Martha Stewart
Categories Food & Cooking Dessert & Treats Recipes Cookie Recipes
Yield Makes about 40
Number Of Ingredients 8
Steps:
- In a large bowl, sift together flour, salt, and baking powder. Set aside.
- In bowl of an electric mixer fitted with paddle attachment, beat butter and sugar on medium speed until fluffy, about 3 minutes. Add egg; beat until smooth, 1 minute.
- Add reserved flour mixture, and mix on low speed until thoroughly combined. Stir in vanilla. Wrap dough in plastic, and refrigerate for about 45 minutes.
- Position two racks in oven; preheat oven to 325 degrees. Line two baking sheets with parchment paper or a Silpat (nonstick baking mat); set aside.
- On a well-floured work surface, roll out chilled dough to 1/8 inch thick. Cut out exterior shapes using a cookie cutter or templates. With a metal spatula, transfer whole cookies to the prepared baking sheets. Using tip of a paring knife, make a cutout in center of each cookie to be filled with candy. Using a straw or the narrow end of a plain round pastry tip, cut a hole in the top of each cookie for hanging.
- Chop the candies into 1/4-inch pieces. Sprinkle chopped candy in the center of each cookie, filling the hole. Transfer baking sheet to the refrigerator, and chill until cookie dough is firm, about 15 minutes. Place the baking sheet in the oven, and bake cookies until the candy has melted and completely filled the cut-out area, 6 to 8 minutes. Do not let the cookies brown, or the stained-glass effect will not be as brilliant and the candy centers may become bubbly, not clear.
- Let the cookies cool on the baking sheet for about 3 minutes, and then use a metal spatula to transfer them to a wire rack to cool completely.
Tips:
- Ensure your oven is preheated to the correct temperature before baking the cookies. - Chill the dough for at least 30 minutes before baking to prevent spreading. - Roll out the dough to a thickness of 1/8 inch for best results. - Cut the dough into squares or circles using a sharp knife or cookie cutter. - Place the cut-out dough onto a parchment paper-lined baking sheet. - Bake until the edges just start to brown, approximately 10-12 minutes. - Let the cookies cool on the baking sheet for a few minutes before transferring to a wire rack to cool completely. - Decorate the cooled cookies with melted chocolate and crushed hard candies. - Be creative with your candy selection to create different designs and patterns. - Store the decorated cookies in an airtight container at room temperature for up to 3 days.Conclusion:
Stained glass cookies are a beautiful and delicious treat that is perfect for any occasion. With a few simple ingredients and a little bit of time, you can create these stunning cookies that are sure to impress your friends and family. So, preheat your oven and get ready to create some stained glass magic!
Are you curently on diet or you just want to control your food's nutritions, ingredients? We will help you find recipes by cooking method, nutrition, ingredients...
Check it out »
You'll also love