In the realm of bread making, sourdough stands as a testament to the harmonious fusion of culinary art and scientific precision. This ancient bread, crafted with wild yeast and lactic acid bacteria, embarks on a journey of fermentation that imparts a distinctive tang and a symphony of flavors that captivates the senses. As you venture into the world of sourdough, discover the intricacies of creating a sourdough starter, the lifeblood of this remarkable bread. Explore the detailed recipes for Classic Sourdough Bread, a timeless masterpiece with a golden-brown crust and a chewy, airy crumb. Embark on a culinary adventure with Spelt Sourdough Bread, a variation that introduces a nutty flavor and a softer texture. Delight in the rustic charm of Whole Wheat Sourdough Bread, a hearty and wholesome choice that showcases the goodness of whole grains. Indulge in the sweet and tangy symphony of Sourdough Banana Bread, a delightful treat that combines the tang of sourdough with the comforting sweetness of ripe bananas. Let your taste buds dance with joy as you savor the tangy zest of Lemon Sourdough Bread, a refreshing and aromatic twist on the classic. Dive into the world of sourdough and unlock a realm of flavors that will elevate your culinary repertoire to new heights.
Let's cook with our recipes!
SOURDOUGH (WILD YEAST) BREAD
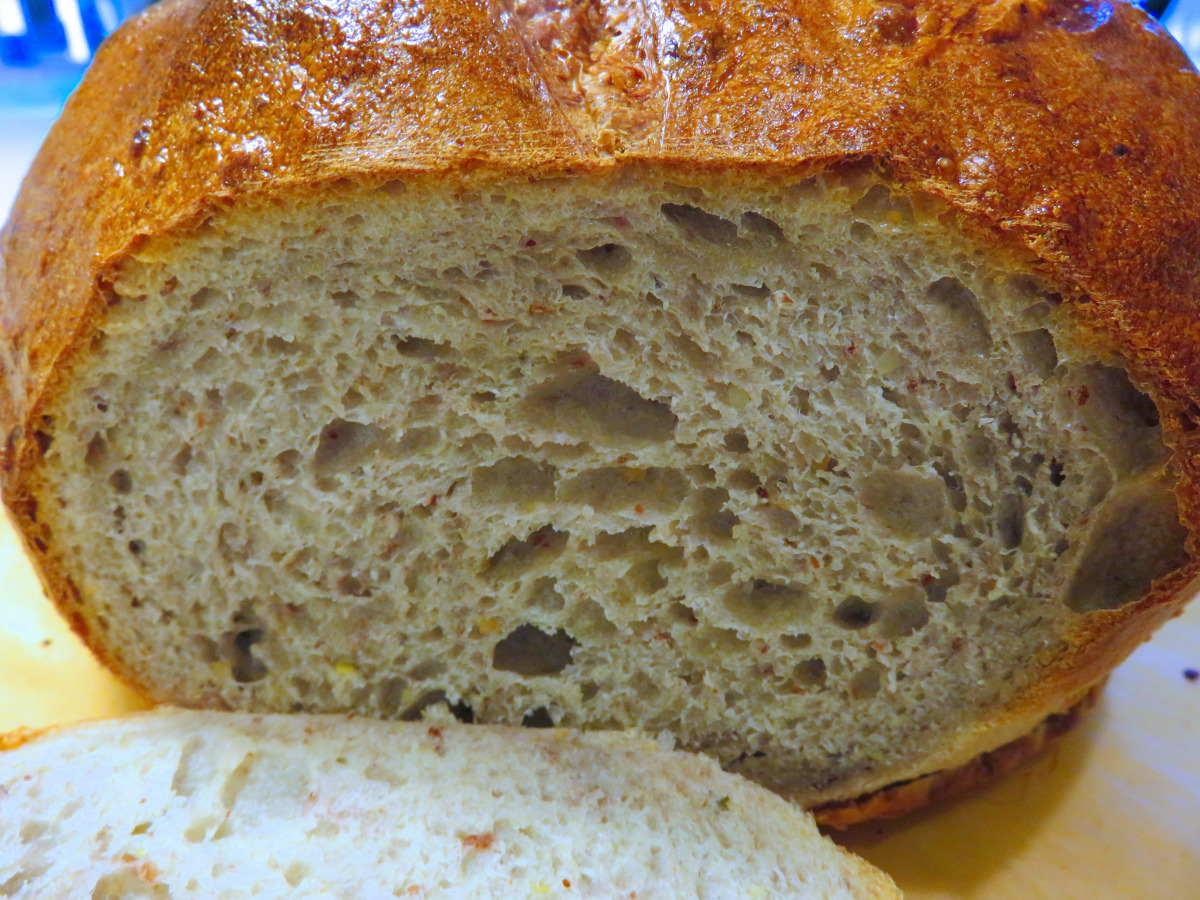
Sourdough is believed to have originated in Ancient Egyptian times around 1500 BC, and was likely the first form of leavening available to bakers. This is definitely a labor of love, but the end result is the most amazing bread! Because of the complex three build process, this recipe probably is not the best choice for the first time bread baker. Besides basic sourdough bread, there are so many possibilities. Just to give you some ideas, check out the Optional Additions; let your imagination be your guide; walnuts and blue cheese together is amazing! It takes a little time and attention, but your efforts will definitely be rewarded. Please read the instructions thoroughly before starting. Note that the special equipment needed is a baking stone, steam pan (see *note at bottom) and spray bottle. This recipe is from Peter Reinhart's book The Bread Baker's Apprentice. If you want to raise your level of bread baking, this is the book you need! PIctured to the left is a loaf where walnuts and blue cheese were added.
Provided by Galley Wench
Categories Sourdough Breads
Time P2DT45m
Yield 2 loaves
Number Of Ingredients 9
Steps:
- DAY ONE: You will need 2/3 cups of active starter so refresh your starter with 2/3 cup flour and 2/3 cup bottled water. Cover and allow to ferment for 6-8 hours. Once the starter has been refreshed you can continue with the recipe, or refrigerate the bowl over night.
- MAKE FIRM STARTER:.
- If you have refrigerated the starter, remove it from the refrigerator and measure out 2/3 cups and place in a small bowl, cover with towel or plastic wrap and allow to warm up for one hour. If the starter is room termperatue then continue as noted below.
- Add one cup flour to the bowl; add the starter and mix together, adding only enough additional water so that you can knead this into a small ball. Should be about the texture of french bread dough. No need to work very long, just be sure that the flour is hydrated and the starter is evenly distributed.
- Place dough in small bowl sprayed with non-stick cooking oi, turn dough once and cover with plastic; allow to rise until doubled in size, approximately 4 hours.
- Place in the refrigerator overnight.
- NEXT DAY:.
- Remove the firm starter from the refrigerator and cut into about 10 small pieces with a pastry scraper. Mist with non-stick spray, cover with a towel or plastic wrap and let sit for 1 hour to take off the chill from the dough.
- To a large mixing bowel stir together the flour and salt.
- With a large spoon, stir in the starter pieces and enough water to bring everything together into a ball.
- Hand Kneading: Sprinkle counter lightly with flour and knead for 12 to 15 minutes.
- Kitchen Aid Mixer: Sprinkle dough lightly and knead with DOUGH HOOK for 4 minutes on medium-low speed; allow dough to rest for 5-10 minutes, and then mix for another 4 minutes.
- Additions such as garlic, nuts or cheese, should be added during the last two minutes of mixing.
- With both methods, adjust the flour and water as needed. The dough should be firm but tacky, like firm French bread dough. The temperature of the bread dough should be between 77º and 81º F.
- Lightly oil a large bowl and transfer the dough to the bowl, rolling around to coat with oil.
- Cover the bowl with plastic wrap and allow to ferment at room temperature for 3 to 4 hours, or until dough has doubled in size.
- Gently remove the dough from the bowl and divide into 2 equal parts (approximately 22 oz. each), being careful not to degas the dough.
- Gently shape dough into a boule, baguette, batard or rolls.
- Proof the dough in bannetons or proofing bowls, or on parchment-lined sheet pans that have been dusted with semolina flour or cornmeal.
- Mist the exposed part of the dough with spray oil and loosely cover the dough with a towel or plastic wrap.
- At this point you can either proof the loaves until doubles (2 to 3 hours), or retard overnight in the refrigerator. Or you may wish to do as I do, bake one now and retard the other for tomorrow.
- If retarding, remove them from the refrigerator approximately 4 hours before you plan to bake them.
- BAKING:.
- Place baking stone on middle shelf.
- Place oven-proof skillet or broiler pan in bottom of oven to use as a steam pan. (*I use a cast iron skillet,but a broiler pan will work just fine.).
- Preheat oven 500º F.
- Ten minutes before baking remove plastic covers.
- Carefully move dough to peel dusted with cornmeal or semolina flour.
- Score the top of the dough.
- Slide the dough onto preheat baking stone.
- Pour 1 cup hot water into the steam pan and close the door.
- After 30 seconds spray the oven walls with water and close the door (careful not to spray glass window).
- Repeat twice more at 30 second intervals.
- After the final spray reduce the temperature to 450º F and bake for 20-30 minutes or until the loaves are done.
- The centers should register 200º in the center on an instant read thermometer.
- When done they will be a rich golden brown and sound hollow when thumped on the bottom.
- Remove from oven and transfer to wire rack and cool for 45 minutes before slicing.
WILD YEAST SOURDOUGH STARTER
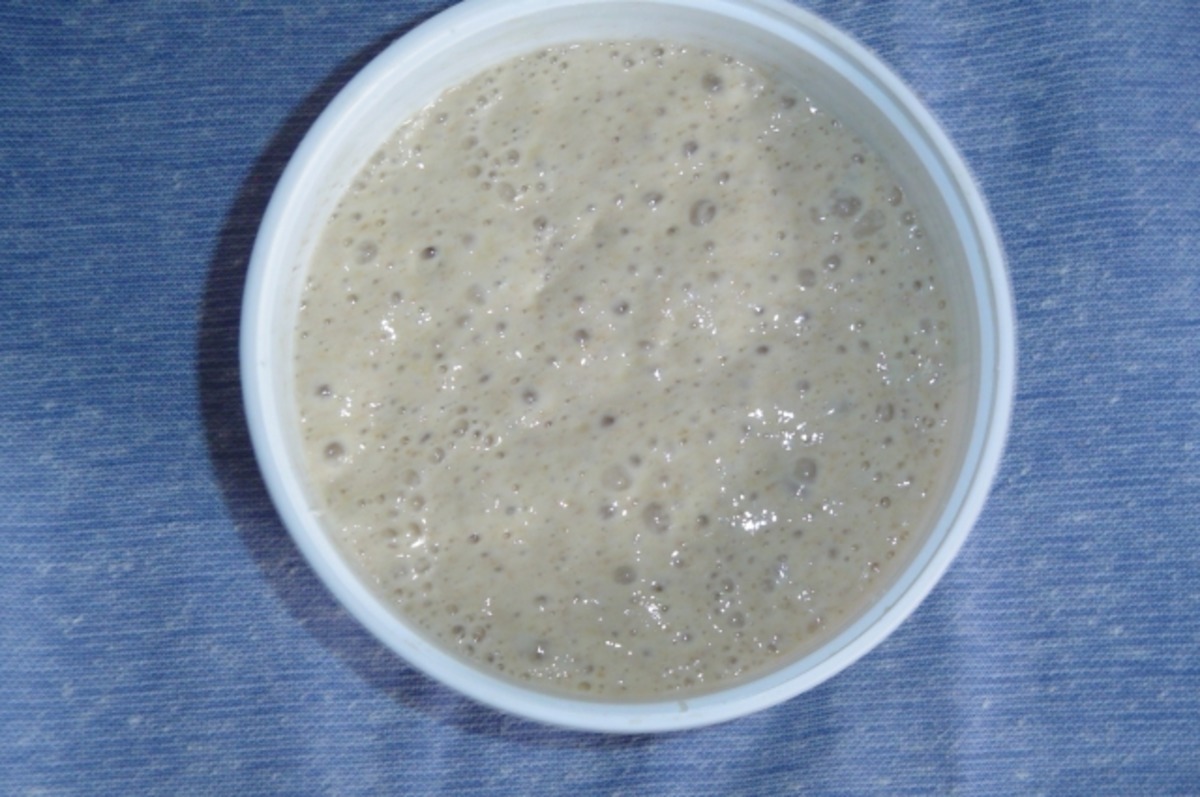
You can make your own wild yeast starter from scratch. The yeast is already on the grains you use in the starter. You just need to create the right conditions to wake them up! The pineapple juice may sound like a strange ingredient, but it is what makes this recipe work so well. The juice creates an acidic environment that prevents bad bacteria from taking over and causing spoilage during the fermentation period.
Provided by Donna M.
Categories Sourdough Breads
Time P5DT10m
Yield 1 Starter
Number Of Ingredients 5
Steps:
- I bought whole wheat berries at the health food store and ground my own flour in a coffee grinder from them because I wanted the yeast on the flour to be really fresh, but this probably isn't really necessary. The pre-ground flour at the health food store is probably quite fresh, also, and you can buy very small quantities in bulk.
- DAY ONE: Mix 2 Tablespoons whole grain flour and 2 Tablespoons pineapple juice. Stir well, cover and let sit for 24 hours at room temperature.
- DAY TWO: Add 2 Tablespoons whole grain flour and 2 Tablespoons pineapple juice. Stir well, cover and let sit another 24 hours at room temperature. You may, or may not start to see small bubbles at this point.
- DAY THREE: Add 2 Tablespoons whole grain flour and 2 Tablespoons pineapple juice. Stir well and let sit 24 hours at room temperature.
- DAY FOUR: Stir mixture and measure out 1/4 cup--discard the rest. To the 1/4 cup, stir in 1/4 cup unbleached AP flour and 1/4 cup water. Let sit 24 hours at room temperature.
- REPEAT Day Four until mixture expands to double its size and smells yeasty. Mixture may start to bubble after a couple of days and then go flat and look totally dead for a couple more days. If this happens, at about Day 6 add the 1/4 teaspoons vinegar with your daily feeding. This will lower the PH and wake up the yeast, which will then start to grow.
- Once the yeast starts growing, starter should be fed equal parts of flour and water in a quantity sufficient to make enough starter for your recipe. Store the starter in the refrigerator when you are not using it. It needs to be fed equal parts flour and water once a week to keep it alive. Either use or discard at least half of it when feeding--THIS IS VERY IMPORTANT to maintian a healthy starter! If you forget to feed it for a few weeks, it probably will be fine but may take several feedings to get it back up to par.
Tips for Baking Sourdough Wild Yeast Bread:
- Use a digital kitchen scale to accurately measure ingredients. This is especially important for sourdough baking, as the ratios of ingredients are crucial for a successful bake.
- Make sure your sourdough starter is active and bubbly before using it. If your starter is not active, it will not be able to properly ferment the dough and the bread will not rise.
- Be patient. Sourdough baking takes time. The fermentation process can take anywhere from 12 to 24 hours, so it's important to be patient and let the dough develop properly.
- Don't be afraid to experiment. Once you've mastered the basics of sourdough baking, you can start experimenting with different flours, seeds, and flavorings. The possibilities are endless!
Conclusion:
Sourdough wild yeast bread is a delicious and nutritious bread that is easy to make at home. With a little patience and practice, you can create a beautiful and flavorful loaf of sourdough bread that your family and friends will love. So what are you waiting for? Get started today!
Are you curently on diet or you just want to control your food's nutritions, ingredients? We will help you find recipes by cooking method, nutrition, ingredients...
Check it out »
You'll also love


