Best 8 Sourdough Bread Starter Recipes


In the realm of bread making, sourdough starter stands as a testament to the harmonious fusion of culinary art and scientific precision. This magical concoction, crafted from a simple blend of flour and water, harbors a vibrant community of wild yeast and lactic acid bacteria, transforming ordinary ingredients into a symphony of flavors and textures. Embark on a culinary adventure as we delve into the world of sourdough starter, guiding you through the process of creating and maintaining this living culture. Discover the secrets of nurturing your starter, ensuring its vitality and consistency. With our carefully curated collection of sourdough bread recipes, ranging from classic loaves to innovative creations, you'll be able to craft artisanal masterpieces that will delight your taste buds and impress your loved ones. From the tangy sourdough boules to the rustic charm of sourdough focaccia, each recipe offers a unique journey into the realm of fermented goodness. So, prepare your ingredients, embrace the beauty of fermentation, and embark on a culinary expedition that will elevate your bread-making skills to new heights.
Check out the recipes below so you can choose the best recipe for yourself!
SOURDOUGH PANCAKES (AMISH FRIENDSHIP BREAD STARTER)

These are great pancakes made with Amish Friendship Bread Starter. I am always looking for new and creative ways to use my starter!!! These pancakes smell fabulous, and are a bit sweet with yeast flavors. I thought they were great with just butter on top. I sometimes add cinnamon or Apple Pie Spice and sub out apple butter for the oil. . .just an idea!
Provided by januarybride
Categories Breakfast
Time 25m
Yield 12 pancakes, 4-6 serving(s)
Number Of Ingredients 7
Steps:
- Beat the egg, then add in wet ingredients.
- Add dry ingredients to the wet ingredients and mix well.
- If batter seems too thick, add more milk 1 Tbsp at a time until desired consistency.
- Preheat griddle pan to med-high, spray with non-stick cooking spray and pour batter onto griddle using 1/4 cup of batter per pancake.
- Once pancake looks set around the edges and a few bubbles are coming up thru the middle of the pancake, turn it over and cook another minute or two until done.
- Serve hot with butter.
SOURDOUGH STARTER AND SOURDOUGH RYE BREAD
A very satisfying and tasty country bread from Eastern Europe, this is not difficult to make. The starter has to be left to ferment for a couple of days, so it does require a little advance planning. This makes 2 large loaves. Enjoy! Adapted from Classic Home Cooking. Prep time does not include time to make the starter or sponge, but does include rising time.
Provided by Sharon123
Categories Sourdough Breads
Time 3h20m
Yield 2 large loaves
Number Of Ingredients 12
Steps:
- Make the starter:.
- Put the flour into a large bowl and stir in yeast. Make a well, pour in the water and mix.
- Cover tightly and leave at room temperature for 2 days. Or you could leave the starter in the refrigerator for up to 1 week.
- Make the sponge:.
- Put the rye flour into a large bowl, add 2 cups of sourdough starter and the water, and stir to mix. Cover tightly and leave at room temperature for 8 hours or chill in the fridge for up to 2 days.
- Make the bread:.
- Put the flour into a bowl, add the sponge mixture , yeast, measured water, caraway seeds(if using), and salt, and mix to a soft and slightly sticky dough.
- Turn the dough into a large ungreased bowl, sprinkle the top with flour, cover loosely with oiled plastic wrap. Leave in a warm place to rise for about 2 hours, until doubled in size.
- Lightly sprinkle 2 baking sheets with cornmeal. Turn out the dough onto a lightly floured work surface and punch down with your fist. Knead for 3-4 minutes, until smooth and elastic. Halve the dough and form each half into a round. Score the tops with a sharp knife.
- Place on the baking sheets, cover loosely with oiled plastic wrap, and leave in a warm place to rise for 45 minutes or until they have doubled in size.
- Place loaves in a 425*F. oven. Fill a roasting pan with boiling water and place at the bottom of the oven. Bake the loaves for about 35 minutes, until they are lightly browned. Tap the bottoms to see if the loaves are cooked; they should sound hollow. Leave to cool on wire racks. Enjoy!
Nutrition Facts : Calories 3517.3, Fat 10.4, SaturatedFat 1.6, Sodium 3518.3, Carbohydrate 739, Fiber 37.8, Sugar 3.3, Protein 100.9
RYE SOURDOUGH STARTER AND BREAD
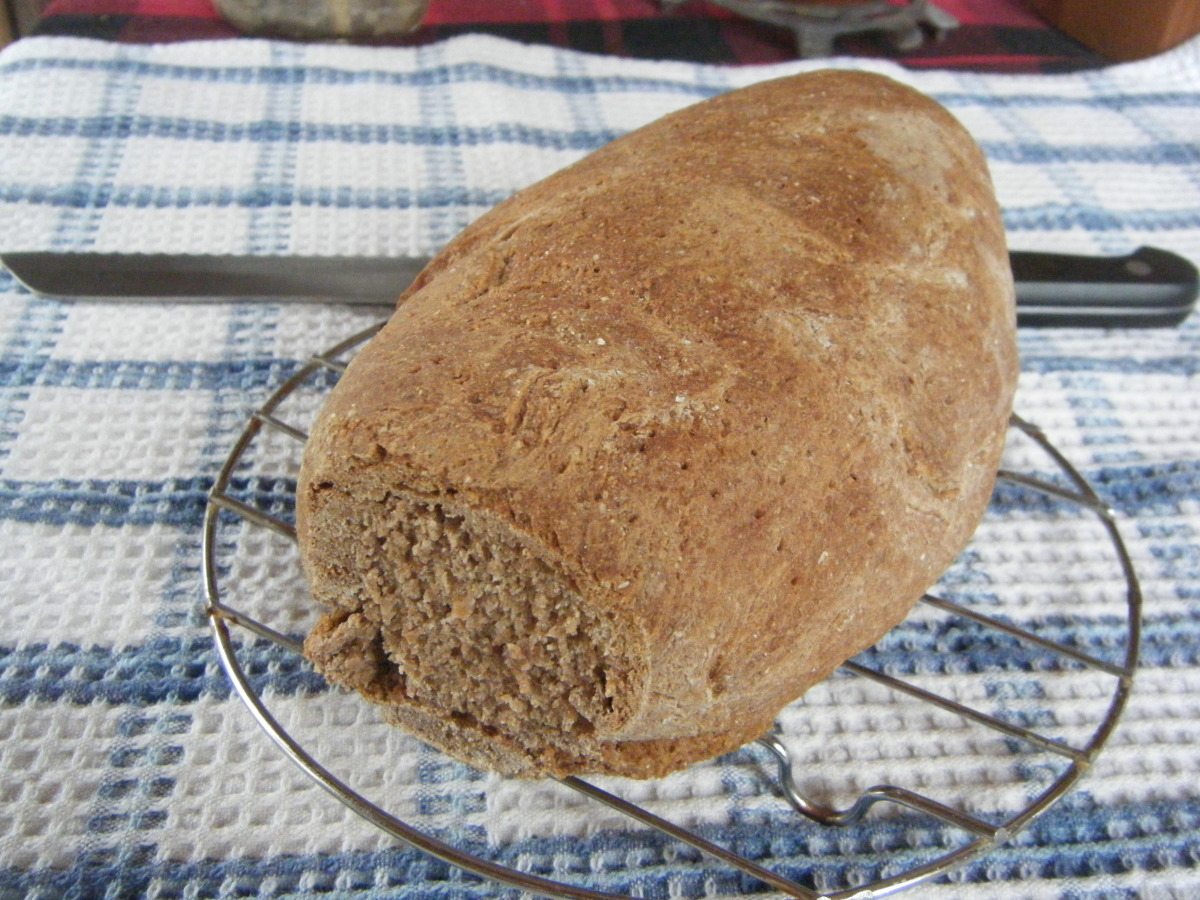
Before going gluten free, I used to make this rye bread as a staple. After some failures I succeeded in making the perfect starter which lasted a very long time and got better every time I used it. The secret of sourdough is that it makes the bread more storable. Bread made with sourdough will not become stale for quite a long time, and due to different fermentation many micronutrients can be better resorbed than from yeast bread. The quality of a sourdough depends on the quality of the grain and the mixture of yeasts and bacteria present in the flour. If the rye flour you use is neither chemically treated so that the natural cultures are killed nor contaminated with wrong bacteria, yeasts or mold, you will have a starter which keeps forever when properly kept and fed. The texture of the starter should be creamy, and the smell slightly sour, but not stinging the nose like vinegar. If it smells like vinegar, it contains too much acetic acid which is not desireable. The ration lactic acid - acetic acid should be about 80 to 20. That makes a delicate sour smell. If it smells rotten or looks reddish, it is rotten and you have to discard it.
Provided by Mia in Germany
Categories Breads
Time P3DT1h
Yield 1 loaf, 1 serving(s)
Number Of Ingredients 9
Steps:
- Starter:.
- Day 1: In a 1 quart jar with a lid mix 100 g rye flour with 100 ml lukewarm water. Stir well to completely mix. Don't mind if it seems not to be enough water and the dough is sticky. Just mix well to have a homogenous dough.
- Close the lid of the jar loosely and let stand for 24 hours at room temperature, maybe not in the coolest room of the house --.
- Day 2: Stir the starter well, close the lid again and let stand for another 24 hours.
- Day 3: Stir in 100 g finely ground whole rye flour and 100 ml lukewarm water, cover again and let stand for another 24 hours.
- Open the jar and check the smell: DON'T stick your nose into the jar! I did that with my first attempt and nearly burnt off my mucosa with the cloud of acetic acid that evaporated from the vinegar starter I produced -- So, open the jar and carefully check the smell. If it doesn't sting but smell pleasantly sour, proceed. The colour of the starter should be greyish brown.
- Bread:.
- Place the flour in a large bowl, make a well and fill the sourdough starter into the well. Hold back about 2 tablespoons of the starter, put it into a glass jar, tightly close the lid and keep the jar in the refridgerator. It will not rise while in the fridge nor produce gas, so don't be afraid of tightening the lid.
- Mix the starter with some of the flour, then add the salt and water and knead for about 15 minutes. The dough is very heavy, so most machines give in and collaps. I always kneaded by hand on a floured surface until the dough was smooth.
- Form a ball and dust with flour, cover and let rest for 2 hours.
- On a dusted surface, knead lightly, form an oval loaf, cover and let rest for another hour.
- Preheat oven to 250 degrees Celsius (220 fan assisted).
- Place bread on a baking tray layered with nonstick parchment paper, prick bread with a fork in a regular pattern all over and brush with water.
- Place an ovenproof bowl with hot water on the bottom of the oven, then slip the baking tray into the oven and bake for 15 minutes.
- After 15 minutes reduce heat to 200 degrees Celsius (180 fan assisted), continue baking for 30 minutes.
- Put off the oven after 30 minutes, but don't open yet. Let the bread rest.
- for another 15 minutes in the hot oven.
- Take it out and knock at the bottom of the bread. It should sound hollow.
- Let completely cool on a wire rack.
- You need not keep the bread in the fridge.
- If you use the starter for the first time, it works better if you add some yeast to the bread dough because the fresh starter is not very strong.
- The starter which you hold back will be strong enough without adding yeast if you feed it again for 3 days like described above.
Nutrition Facts : Calories 3490, Fat 15.2, SaturatedFat 1.8, Sodium 4690.5, Carbohydrate 754.3, Fiber 118, Sugar 11, Protein 108.8
SOURDOUGH BREAD STARTER
This is your basic Sour Dough bread starter to be used over and over again. Look for the sour dough bread recipe to make use of this starter. There are two ways to make sour dough starter one without yeast where you feed the starter daily and this recipe where you just let the yeast do the work and let it sit for 3 or 4 days. Be sure that you clean the jar well before putting the saved starter back in it.
Provided by Bergy
Categories Sourdough Breads
Time P4D
Yield 1 starter
Number Of Ingredients 4
Steps:
- Dissolve yeast in 1/2 cup warm water, rest for ten minutes.
- Mix in flour, sugar& remaining water.
- Allow to stand, loosely covered, in a warm place for 3 or 4 days. Use a large (preferably ceramic) bowl as it will rise considerably.
- Every time the batter is used to make a product set aside 1 cup to be used as a"starter" for another batch.
- Keep covered in the fridge (a pint jar works nicely).
- To make it into a basic batter again, add another 2 cups flour& 2 cups warm water and allow to stand at room temp overnight It is now ready to use, but again reserve a cup of the starter.
DAWSON CITY SOURDOUGH STARTER AND SOURDOUGH BREAD
Straight out of the Klondike, this recipe has been around for a long time. This process takes all day, but the smells that will fill your house while the bread is rising and baking will make it all worthwhile. You'll probably find that at suppertime you'll sit yourself down with a loaf of hot, fresh bread and a pound of butter and wonder how you ever got by without sourdough bread! The Dawson City Historical Complex commemorates the history of the Klondike, including the Gold Rush and the years that followed. Sourdough was an integral part of the harsh life of a miner during the Gold Rush. Sourdough starter was always available, either by borrowing some from a fellow miner or by starting one's own. Food was scarce in the Yukon and winters were long and lonely, so having some sourdough starter and a large bag of flour could greatly increase a miner's quality of life. Up in the Klondike today there are people who still share sourdough starter which originally came over the Chilkoot Trail. It's a great living tradition to keep alive, so share and share alike - pioneer style! Time does not include making the starter but does include rising time for the dough.
Provided by Annacia
Categories Yeast Breads
Time 4h40m
Yield 1 batch
Number Of Ingredients 10
Steps:
- STARTER:.
- Mix equal amounts flour and blood-warm water in a container larger enough for the mixture to double. The container should be glass or crockery. Do not screw the lid on tight; the gases will need to escape. (A plastic container could also be used, just don't fit the lid on tight.)
- Place the container in a warm spot for 2 or 3 days, until it has started to bubble and become smooth. Yes, you're basically waiting for it to go bad! A layer of alcohol - yes, alcohol - will develop on top; stir this down before using. The more potent your sourdough, the more alcohol you'll get, so be proud: you are making yeast, and it will smell like it! If it grows green mold, you can scoop it out or stir it in, it won't hurt you. However, if it turns orange, throw it away and start over.
- Replenish your starter each time you use it, or once a week. Remember: it is a living thing! You have to feed it regularly. If you don't use it, take out one cupful and replace with ½ cup of flour and ½ cup of water.
- Keep the starter on a warm shelf. If you are not going to use it, store it in the fridge, but remove it a day before you want to use it so it will become active again. When you use your sourdough, replace what you took out with 1/2 cup of blood-warm water and 1/2 cup of flour.
- BREAD:.
- In a large bowl, combine the flour, sugar and salt. Make a well in the center, and add the sourdough starter, egg, oil and warm water. Stir together and add more water or flour as necessary to form a pancake batter-like consistency. Cover with greased waxed paper and a towel and set in a warm place to rise.
- When doubled and all bubbly, mix in enough flour (about 4 cups) to enable it to be kneaded into a smooth elastic ball. Let this rise again until doubled, about 4 hours, and then punch down and shape into loaves or biscuits.
- Let this rise again until doubled and then bake in a 400°F (200°C) oven for about 10 minutes and then turn the oven down to 300°F (150°C) and let bake 30-40 minutes longer until the loaves sound hollow when you knock on them. Brush the loaves with butter.
- [b]CREDITS:[/b].
- Recipe tested by Chef David Fairbanks, Algonquin College School of Hospitality and Tourism.
- This traditional recipe was submitted by Parks Canada staff at Dawson Historical Complex National Historic Site.
SOURDOUGH STARTER (FOR CLASSIC SOURDOUGH BREAD)

This is the starter that goes with Classic Sourdough Bread that I posted earlier. Sorry for the oversight. Note: This does not include the 2-3 days feeding time or the wait time for it to become full strength.
Provided by CJAY8248
Categories Sourdough Breads
Time 15m
Yield 8 loaves, 96 serving(s)
Number Of Ingredients 4
Steps:
- Dissolve yeast in water in a large plastic container (gallon size works well). Add sugar. When yeast bubbles (about 10 minutes), stir in flour until you have a smooth paste.
- Cover loosely to allow gases to escape and place in a warm spot in your kitchen 2 to 3 days. The mixture should bubble and give off a sour odor. Stir starter once a day, making sure to stir in any crust that's formed. After this point, you can store starter in the refrigerator or leave it out in a cool, dark area of your kitchen.
- Feed starter by stirring in 1 cup all-purpose flour and 1/2 cup water every day if you leave it out, or every few days if it's refrigerated; otherwise, it will become too acidic and eventually die.
- Once starter has grown a few weeks and has reached full strength, you can decrease feedings to once a week.
- If you don't use your starter regularly, it's going to get unruly and burst the bounds of it's container. Give some away to friends along with feeding and baking instructions.
SOURDOUGH STARTER AND SOURDOUGH BREAD
Make and share this Sourdough Starter and Sourdough Bread recipe from Food.com.
Provided by DrGaellon
Categories Sourdough Breads
Time P11DT40m
Yield 1 starter
Number Of Ingredients 6
Steps:
- Day 1: mix 1/2 ounce flour (about 1 tbsp, packed) and 1 oz water (2 tbsp) in a pint jar. Cover with plastic wrap. (Do not cover tightly at any point in the process.) Stir well several times through the day.
- Day 2: no feeding, just stir whenever you think of it.
- Day 3: add 1 oz flour and 1 oz water (2 tbsp of each) and stir whenever you think of it.
- Day 4: Add 1 oz flour and 1/2 oz water. This now brings the flour and water amounts to a 50/50 ratio, or 100% hydration in bakers' parlance. Continue to stir as often as you think of it.
- Day 5: add 1 oz flour and 1 oz water (2 tbsp of each) and stir whenever you think of it.
- Day 6: add 1 oz flour and 1 oz water (2 tbsp of each) and stir whenever you think of it. By now, you should be seeing plenty of bubbles, but don't worry if you don't.
- Day 7: add 1 oz flour and 1 oz water (2 tbsp of each) and stir whenever you think of it. If you like your sourdough a little more sour, stir LESS often; the bacteria will only produce acid when deprived of oxygen.
- Day 8: add 1 oz flour and 1 oz water (2 tbsp of each) and stir whenever you think of it.
- Day 9: Assuming your starter is bubbling vigorously, you're ready for your first harvest! Remove 1/4 lb (4 oz, 1/2 c) of starter to a bowl, add 2 tbsp flour and 1 tbsp water, stir and cover with plastic wrap. Add the usual 1 oz flour and 1 oz water (2 tbsp of each) to the jar.
- Day 10: Feed starter again with 1 oz each flour and water. To make bread: Transfer prepared starter to the bowl of a stand mixer with a dough hook, then add bread flour and water. Mix on medium-low until elastic, about 5 minutes. Add salt and oil and mix until combined. Form into a ball and place into a oiled bowl. You can let it rise 2-3 hours and bake today, refrigerate overnight and bake tomorrow (let it come up to room temperature, 2 hours or so, before proceeding). Form into desired shape and let rise about 1 hour; slash top in desired pattern. Bake in preheated 350F oven. Bake about 40 minutes until golden brown and hollow-sounding when thumped in the bottom. Cool completely before slicing.
- Day 11: if you continue to bake regularly, you can feed your starter every 1-2 days with 1oz each flour and water, then harvest 4 ounces to cook with. If you don't need to bake that often, refrigerate the starter after a last feeding. It will keep at least a month in the fridge, but can last up to 3 months with proper care. Bring up to room temperature, and feed as usual for 3 days before harvesting to bake.
RUSTIC SOURDOUGH BREAD/WITH STARTER RECIPE
Ok, lets talk sour dough. after playing for days with different recipes on starter and sour dough this is what my husband, lover of sourdough bread deems just a pinch worthy. lol funny how I have been turning to him on this recipe. this is my own and is really easy to set up and make. like other sour dough bread it begins with a...
Provided by michelle 'FLAME' kelley
Categories Savory Breads
Time 4h
Number Of Ingredients 12
Steps:
- 1. Starter:Pour the water into a 3- to 4-quart glass or ceramic container or bowl, and add dissolve the sugar or honey and the yeast in that order. Stir in the flour gradually. Cover the jar or bowl with a clean dishcloth and place it somewhere warm. By using a dishcloth instead of plastic wrap, you'll allow any wild yeast in the area to infiltrate and begin to work with the domestic yeast which itself is beginning to develop "wild" characteristics and flavors. The mixture will begin to bubble and brew almost immediately. Let it work anywhere from 2 to 5 days, stirring it about once a day as it will separate. When the bubbling has subsided and a yeasty, sour aroma has developed, stir your starter once more and refrigerate it until you are ready to use it. The starter should have the consistency of pancake batter. no metal! wood,glass or plastic bowls and or spoons for this batter as metal will break down the yeast and it will not work right.
- 2. you will want to feed the beast (as my children say) one 1/2 cup of flakes,and flour and 1/4 cup of warm water. mix well with a wooden or plastic spoon and separate the amount you will need and store the rest in a air tight none glass container(as this will breath and need room to expand). remember to release the air every day for the first few days as to insure no messes in the fridge from the beast getting out. let batter rest for 30min after feeding as not to over work the batter.
- 3. 1) Combine all of the ingredients, kneading to form a smooth dough. 2) Allow the dough to rise, in a covered bowl, until it's doubled in size, about 90 minutes. punch down and let sit 15 min to rest, 3) Gently divide the dough in half; it'll deflate somewhat. 4) Gently shape the dough into two oval loaves; or, for longer loaves, two 10" to 11" logs. Place the loaves on a lightly greased or parchment-lined baking sheet. Cover and let rise until very puffy, about 1 hour. Towards the end of the rising time, preheat the oven to 425°F. 5) Spray the loaves with lukewarm water. 6) Make two fairly deep diagonal slashes in each; a serrated bread knife, wielded firmly, works well here. 7) Bake the bread for 25 to 30 minutes, until it's a very deep golden brown. Remove it from the oven, and cool on a rack.
- 4. the crust is very hard. i found by brushing with warm water and butter before and during baking it softens the crust. remember to place three splits along top of loaves before baking other wise crust will crack and split . you can sprinkle dried onion or sesame seed on crust before baking. for add flavor. for a onion sourdough sprinkle 1/4 cup dehydrated onion in dough while mixing.
Tips:
- Choose the right flour: Use unbleached, bread flour or all-purpose flour. Bread flour contains more protein, which gives the bread a chewier texture.
- Use filtered or spring water: Chlorinated water can inhibit the growth of wild yeast and bacteria.
- Keep the starter in a warm place: The ideal temperature for the starter is between 75-85°F (24-29°C). You can keep it in a warm spot in your kitchen, or use a heating pad on low.
- Feed the starter regularly: Once a day, or every other day, remove half of the starter and discard it. Then, add equal amounts of flour and water to the remaining starter. Stir until well combined.
- Be patient: It takes about a week or two for a sourdough starter to become active. Don't be discouraged if it doesn't start bubbling right away. Just keep feeding it and it will eventually come to life.
Conclusion:
Making a sourdough starter is a fun and rewarding experience. With a little patience and care, you can create a starter that will produce delicious sourdough bread for years to come. Once your starter is active, you can use it to make a variety of sourdough breads, including classic sourdough, sourdough boules, and sourdough baguettes. You can also use it to make sourdough pancakes, waffles, and muffins. The possibilities are endless!
Are you curently on diet or you just want to control your food's nutritions, ingredients? We will help you find recipes by cooking method, nutrition, ingredients...
Check it out »
You'll also love