Best 3 Roll The Can Ice Cream Recipes


Indulge in a nostalgic journey with our curated collection of ice cream roll recipes. These delightful treats, reminiscent of childhood fairs and carnivals, are crafted using a unique technique that transforms liquid ice cream into delicate, airy ribbons. With a variety of flavors and toppings to choose from, these recipes cater to every palate. From classic vanilla to adventurous combinations like cookies n' cream and peanut butter cup, our selection promises an unforgettable ice cream experience. Whether you prefer a simple treat or a decadent indulgence, these recipes offer a perfect balance of creaminess and texture. So, gather your ingredients, grab your ice cream maker, and embark on a culinary adventure that will leave you craving more.
Let's cook with our recipes!
ROLL-THE-CAN ICE CREAM

I have had this recipe and picture for many, many years. maybe the early 50's! Source, now unknown. This frozen treat is really child's play (fun for grown-ups also) If the kids are feeling rambunctious, let them kick the can! But be careful of the lid!! Nancy 7/1/2012
Provided by Nancy J. Patrykus
Categories Ice Cream & Ices
Time 25m
Number Of Ingredients 10
Steps:
- 1. Ice Cream directions: Mix all the ingredients together... Put in the smaller can. Put cover on little can Sit it inside of larger can. Freezer directions: Layer half the crushed ice alternately with half of the salt in the empty space in between the cans. Cover the larger can. Now the fun begins. Choose a hard level surface like a patio or cement walk and roll th can back and forth for 10 minutes. Open outer can, empty ice and water. Lift out small can, wipe lid dry, and remove can. With a table knife or spatula, scrape ice cream from the sides so it falls into the center. Stir and cover. Return small can. Repack with ice and salt. Roll for about 5 minutes more. Makes 2-1/2 ,cups of delicious ice cream. NOTE: The rollers get the first taste of the ice cream!!
COFFEE CAN ICE CREAM
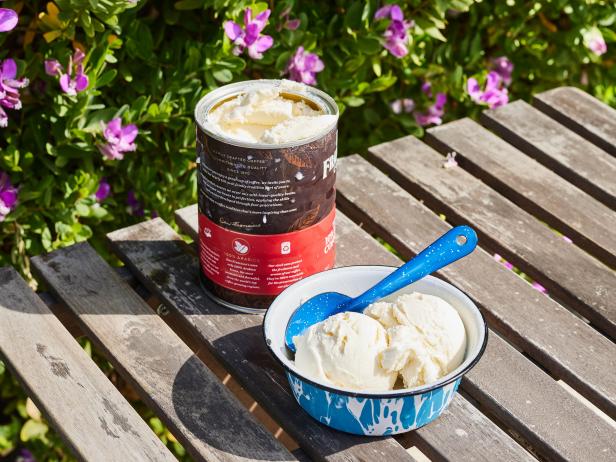
There are few things better than homemade ice cream: You get both delicious flavor and the satisfaction of a job well done. But cooking, cooling and freezing an ice cream base can be difficult and time consuming, and not everyone has an ice cream maker. This simple recipe (cream, milk, sugar, vanilla) is a perfect activity for the kids with rich and creamy results. Start with the delectable vanilla ice cream base, then mix and match your way to your favorite flavor with our easy variations.
Provided by Food Network Kitchen
Categories dessert
Time 45m
Yield 4 servings
Number Of Ingredients 12
Steps:
- For the vanilla ice cream base: Add the heavy cream, milk, sugar and vanilla to a 10-ounce metal coffee can with a lid (see Cook's Note). Close the lid and secure it with duct tape, making sure the can is completely sealed. Shake the mixture lightly to combine. Place the sealed can into an empty 3-pound coffee can with a lid.
- Put on rubber gloves to protect your skin from the ice and salt. Add the ice around and on top of the sealed can, so the can is completely encased in ice. Pour 1 cup of the rock salt over the ice. Close the large can with the lid and secure it with duct tape. Place the large can on its side directly on the floor or a yoga mat, if desired (see Cook's Note). Roll the can back and forth, making sure to make a full rotation with each roll, about 20 minutes. The rolling is easier with a partner, but it can be done alone.
- Open the large can and discard the ice and salt. Rinse the small can with water; this will help keep any salt from getting in the ice cream. Open the small can. The mixture should be partially solid with some liquid with crystals forming. Use a large metal spoon to scrape any solids that have accumulated on the sides and bottom of the can and stir them into the rest of the mixture.
- Seal the small can again with the lid and duct tape. Refill the large can with ice and the remaining 1 cup salt. Seal the large can again with the lid and duct tape. Roll for another 15 to 20 minutes. Open the large can and discard the ice and salt. Rinse the small can and open. Scrape the sides and bottom with the large metal spoon. Serve immediately or transfer to an airtight container.
- For the coffee ice cream: Follow the instructions for the vanilla ice cream base, substituting the cold brew or strong coffee for 1/2 cup of the whole milk.
- For the chocolate ice cream: Follow the instructions for the vanilla ice cream base, substituting the full-fat chocolate milk for the whole milk. In addition, add the chocolate syrup to the milk mixture, if desired, for a richer flavor.
- For the cookies and cream ice cream: Follow the instructions for the vanilla ice cream base. After rolling the mixture for the first 20 minutes and stirring in any solid ice cream, stir in the crushed chocolate sandwich cookies. Seal and continue to roll following the instructions.
- For the chocolate chip ice cream: Follow the instructions for the vanilla ice cream base, adding 1/3 cup finely chopped chocolate (2 ounces) to the cream and milk mixture before rolling.
- For the mint chocolate chip ice cream: Follow the instructions for the vanilla ice cream base, adding 1/4 teaspoon peppermint extract to the cream and milk mixture before rolling.
DIY ROLLED ICE CREAM RECIPE BY TASTY
You've probably seen rolled ice cream all over your Instagram feed, but you can actually make this Thai dessert recipe at home. And the best part: There's no fancy equipment required, just a sheet pan. Oh, and all you need is heavy cream, condensed milk, salt, and whatever toppings you like best. Looks like ice cream dreams do come true.
Provided by Matthew Johnson
Categories Desserts
Yield 4 servings
Number Of Ingredients 4
Steps:
- Whisk the heavy cream, condensed milk, and salt in a bowl.
- Pour the mixture over a half sheet pan, or multiple quarter sheet pans. Make sure the ice cream base just barely covers the bottom. It should be ¼-inch (6 mm) thick or less.
- Sprinkle any chopped-up toppings you would like. With a whisk, mix the toppings into the ice cream base to ensure they're evenly distributed.
- Freeze for at least 4 hours. Make sure to also put your scrapers and ice cream bowls in the freezer so the ice cream doesn't melt while rolling.
- After the ice cream is frozen solid, remove from the freezer and quickly place the metal spatula/paint scraper at an 45° angle against the edge of the pan, pushing carefully forward. If the ice cream needs a little help forming, use a butter knife to push the sheet of cream into the roll.
- Place the rolled ice cream in a chilled bowl and top with any toppings you desire.
- Enjoy!
Nutrition Facts : Calories 743 calories, Carbohydrate 57 grams, Fat 60 grams, Fiber 0 grams, Protein 11 grams, Sugar 57 grams
Tips:
- Select the Right Ice Cream Base: Use high-quality ice cream or a custard base with at least 10% butterfat for a creamy and flavorful result.
- Choose Your Add-Ins Wisely: Pick mix-ins that won't freeze solid, such as chocolate chips, chopped nuts, or crushed cookies.
- Chill the Ice Cream Base: Before churning, chill the ice cream base for at least 4 hours or overnight to ensure it's cold enough to freeze properly.
- Freeze the Canister: Place the canister of your ice cream maker in the freezer for at least 24 hours before churning to ensure it's adequately chilled.
- Churn the Ice Cream: Follow the manufacturer's instructions for your ice cream maker to churn the ice cream until it reaches a soft-serve consistency.
- Transfer and Freeze: Transfer the soft-serve ice cream to a freezer-safe container and freeze it for at least 4 hours or overnight for a firmer texture.
Conclusion:
Roll-the-can ice cream is a fun and easy way to make homemade ice cream without a traditional ice cream maker. With a few simple ingredients and a little patience, you can enjoy delicious and creamy ice cream in no time. Experiment with different flavors, mix-ins, and toppings to create unique and personalized treats that everyone will love. So gather your ingredients, grab a can, and get ready to roll your way to icy goodness!
Are you curently on diet or you just want to control your food's nutritions, ingredients? We will help you find recipes by cooking method, nutrition, ingredients...
Check it out »
You'll also love