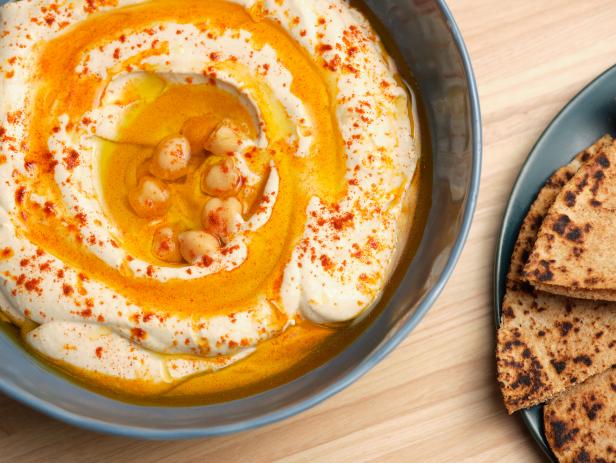
This is a classic tahini-forward, bright and lemony hummus, and is similar to what you would find in Israel. We tried this recipe with from-scratch dried chickpeas as well as with canned, and the flavor and texture were only marginally better with the freshly cooked. And we saved 24 hours of prep time! So for a creamy, satisfying 15-minute hummus, we're going with the can.
Provided by Food Network Kitchen
Categories main-dish
Time 15m
Yield 4 servings
Number Of Ingredients 9
Steps:
- Drain the chickpeas in a medium mesh sieve, reserving the liquid. Reserve about 7 chickpeas for garnish.
- Process the tahini, garlic and cumin in a food processor. With the motor running, slowly drizzle in 2/3 cup of the reserved chickpea liquid (if you don't have exactly 2/3 cup, add water until the total amount is 2/3 cup) and process until light and very creamy, 1 to 2 minutes. The mixture will appear broken at first but will come together after all the liquid is added and has been processed for a minute or two.
- Add the chickpeas, the lemon juice and 1/2 teaspoon salt to the tahini mixture. Process until the mixture is extremely smooth, scraping down the sides occasionally, about 4 minutes. Thin with more water if you prefer a looser consistency. Taste and season with more salt, lemon juice or cumin as desired.
- Spoon the hummus into a shallow bowl, making a well in the center, and drizzle liberally with oil. Top with the reserved chickpeas and sprinkle with paprika. Serve with pita bread, pita chips or cut raw vegetables.
Are you curently on diet or you just want to control your food's nutritions, ingredients? We will help you find recipes by cooking method, nutrition, ingredients...
Check it out »
#15-minutes-or-less #time-to-make #course #main-ingredient #cuisine #preparation #healthy #appetizers #beans #asian #middle-eastern #easy #vegan #vegetarian #dietary #low-cholesterol #low-saturated-fat #chick-peas-garbanzos #healthy-2 #low-in-something #3-steps-or-less
You'll also love


