RED VELVET CHEESECAKE-CAKE


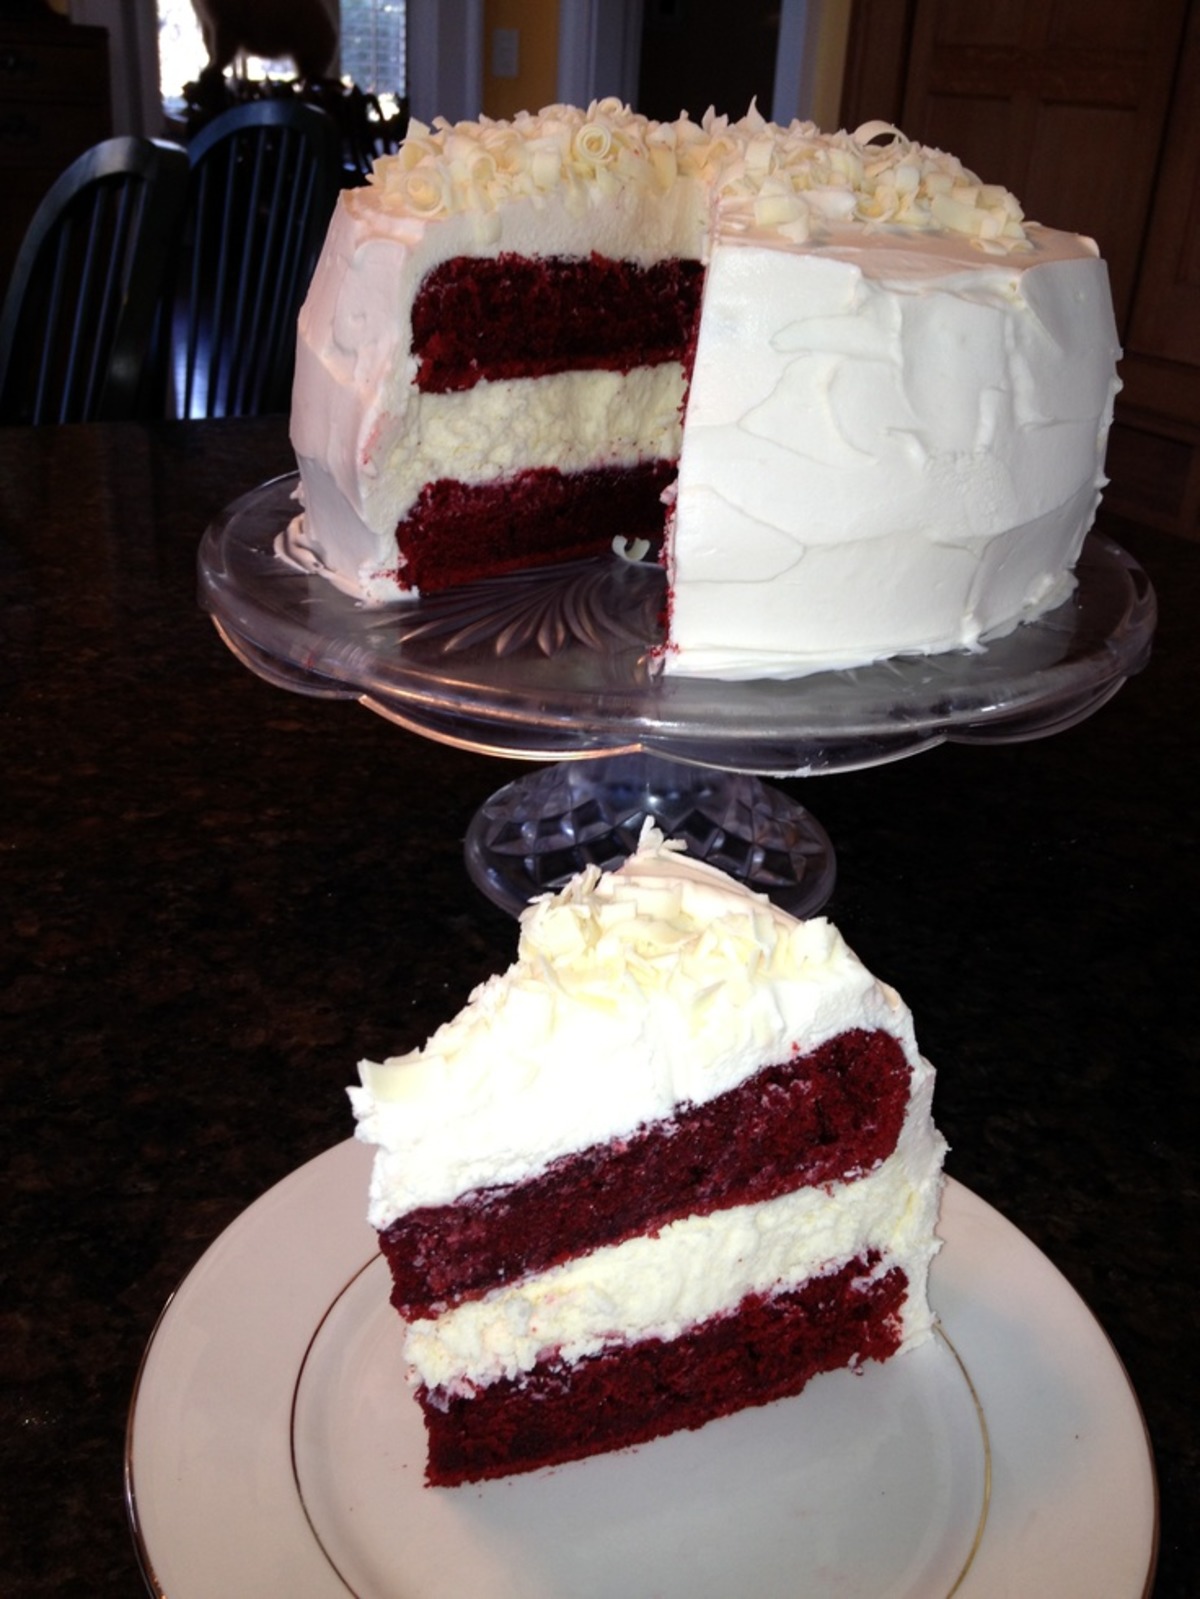
Got this recipe from Recipe Girl. It is unbelievable!!! I made it for my friend 's birthday and his daughter, Emmy, asked it I would make it for her birthday!! It's her favorite dessert!!! It takes some time, but, worth every minute!!
Provided by Carols Kitchen
Categories Cheesecake
Time 2h1m
Yield 1 cake
Number Of Ingredients 22
Steps:
- 1. Prepare the cheesecake layer: Preheat oven to 325 degrees F. Place a large roasting pan on the lower third rack of the oven. Place a kettle of water on the stove to boil. Spray a 9-inch springform pan with nonstick spray and line the bottom with a round of parchment paper. Wrap a double layer of foil around the bottom and up the sides of the pan (you want to seal it so the water from the water bath doesn't seep into the pan). In a large bowl, use an electric mixer to mix the cream cheese- blend until it is nice and smooth and creamy. Mix in sugar and salt and blend for 2 minutes, scraping down sides of the bowl as needed. Add eggs, one at a time, blending after each addition. Finally, mix in sour cream, whipping cream and vanilla. Mix until smooth. Pour the batter into the prepared pan. Set the pan into the roasting pan in the pre-heated oven. Carefully pour the hot water from your kettle into the roasting pan (it will fill the pan surrounding the cheesecake). Pour enough water so that there is about an inch of water coming up the foil along the sides of the cheesecake pan. Bake the cheesecake for 45 minutes. It should be set to the touch and not jiggly. Remove the cheesecake from the roasting pan and let it cool on a wire rack for at least an hour. When it has cooled, place the pan into the freezer and let the cheesecake freeze completely. This can be done in several hours- or overnight.
- 2. Prepare the cake layers: Preheat oven to 350 degrees F. Grease and flour two 9-inch round metal baking pans (or spray with nonstick baking spray with flour). In a large bowl, whisk together flour, sugar, cocoa powder, baking soda and salt. Add eggs, oil, buttermilk, food coloring, vanilla and vinegar to the flour mixture. Using an electric mixer on medium-low speed, beat for 1 minute, until blended. Scrape sides and bottom of bowl with a rubber spatula. Beat on high speed for 2 minutes. Spread the batter evenly into the prepared pans, dividing equally. Bake 30 to 35 minutes or until a toothpick inserted in the center comes out with a few moist crumbs attached. Let cool in pans on a wire rack for 10 minutes. Run a knife around the edge of the pans, then invert cakes onto a rack to cool completely.
- 3. Prepare the frosting: In a large bowl, using an electric mixer on medium-high speed, beat powdered sugar, cream cheese, butter and vanilla until it is smooth and creamy (do not overbeat).
- 4. Assemble the cake: Place one cake layer into the center of a cake plate or platter. Remove the cheesecake from the freezer, take off the sides of the pan, and slide a knife under the parchment to remove the cheesecake from the pan. Peel off the parchment. Measure your cheesecake layer against the cake layers. If the cheesecake layer turns out to be a slightly larger round than your cake, move it to a cutting board and gently shave off some of the exterior of the cheesecake to get it to the same size as your cake layers. Place the cheesecake layer on top of the first cake layer. Place the 2nd cake layer on top of the cheesecake.
- 5. Frost the cake: Apply a crumb coat layer to the cake- use a long, thin spatula to cover the cake completely with a thin and even layer of frosting. Be sure to wipe off your spatula each time you are about to dip it back into the bowl to get more frosting (this way you won't be transferring any red crumbs into the bowl of frosting). Don't worry at this point about the crumbs being visible in the frosting on the cake. When your cake has a thin layer of frosting all over it, place it into the refrigerator for 30 minutes to "set" the frosting. Once the first layer of frosting is set, apply the 2nd layer. Start by adding a large scoop of frosting onto the top of the cake. Use a long, thin spatula to spread the frosting evenly across the top and then spread it down the sides of the cake too. Because you applied a crumb-coat layer, you shouldn't have any red crumbs floating around in the final frosting layer. Decorate, as desired. I recommend white chocolate shavings (see *Tips below). Keep this cake refrigerated.
Nutrition Facts : Calories 11712.3, Fat 801.1, SaturatedFat 312.4, Cholesterol 2145.9, Sodium 7953.5, Carbohydrate 1038.5, Fiber 13.8, Sugar 774.9, Protein 126.8
Are you curently on diet or you just want to control your food's nutritions, ingredients? We will help you find recipes by cooking method, nutrition, ingredients...
Check it out »
You'll also love


Alhassan Monica
[email protected]This is the best red velvet cheesecake cake I've ever had. I'll definitely be making it again!
Addison Whitman
[email protected]This cake is so rich and decadent. It's perfect for a special occasion.
Farooq Mangrio
[email protected]I've never made a cheesecake cake before, but this recipe made it easy. It turned out perfect!
Juan Carlos
[email protected]This cake is definitely a showstopper! It's so beautiful and it tastes even better than it looks.
Carlos A M Barrozo
[email protected]I made this cake for a potluck and it was a huge hit! Everyone raved about how delicious it was.
Wasswa Hamza
[email protected]This cake was a little too sweet for my taste, but my kids loved it.
Dennis Mwangi
[email protected]I'm not a big fan of red velvet cake, but this cheesecake cake was really good. The cheesecake filling was especially creamy and flavorful.
Jordan Lyrics
[email protected]This cake is a bit time-consuming to make, but it's well worth the effort. It's absolutely delicious!
David Velazquez
[email protected]I would definitely recommend this recipe to anyone who loves red velvet cake and cheesecake.
Nunez
[email protected]This cake is perfect for any special occasion. It's sure to impress your guests.
Moishy Oberlander
[email protected]I made this cake for my husband's birthday and he loved it! He said it was the best cake he's ever had.
Emma Mugisha
[email protected]This cake was a lot of work, but it was worth it. It's so beautiful and delicious.
Adekunle Adegboyega
[email protected]I've made this cake several times and it's always a crowd-pleaser. The combination of red velvet cake and cheesecake is irresistible!
burntd0uun agenda
[email protected]The red velvet cake was a little dry, but the cheesecake filling was delicious.
Adams Anas
[email protected]This cake is absolutely stunning! I made it for my daughter's birthday and she was so happy.
Moises Gonzalez
[email protected]I'm not much of a baker, but this recipe was easy to follow and the results were amazing! The cake was so moist and the cheesecake filling was perfect.
rasel Yahoo
[email protected]This cheesecake cake was a hit at my party! The red velvet cake was moist and flavorful, and the cheesecake filling was creamy and tangy. Everyone loved it!