Best 9 Quick And Easy Stump Hole Cake Recipes


Indulge in the delectable goodness of Stump Hole Cake, a classic dessert with a captivating history and enticing variations. This iconic cake is characterized by its unique hole in the center, which is traditionally filled with a sweet and creamy custard. While the classic recipe reigns supreme, Stump Hole Cake has evolved over time, giving rise to an array of tempting renditions that cater to diverse palates. From the traditional vanilla custard filling to more adventurous options like chocolate ganache, salted caramel, or tangy lemon curd, each variation offers a distinct flavor experience. Additionally, the cake itself can be customized to suit individual preferences, with options ranging from a simple sponge cake to richer chocolate or red velvet batters. Embark on a delightful culinary journey as we delve into the secrets of creating this timeless dessert, exploring the nuances of each recipe and uncovering the perfect Stump Hole Cake to tantalize your taste buds.
Let's cook with our recipes!
CHOCOLATE DULCE DE LECHE STUMP CAKE
Provided by Food Network Kitchen
Categories dessert
Time 1h30m
Yield 12 slices of cake
Number Of Ingredients 19
Steps:
- Preheat the oven to 350˚. Brush the bottom and sides of two 8-inch round cake pans with vegetable oil and dust with flour, tapping out the excess. Whisk the flour, cocoa powder, salt, baking powder and baking soda in a medium bowl. Whisk the vegetable oil, buttermilk and vanilla in a large liquid measuring cup.
- Beat the granulated sugar and eggs in a large bowl with a mixer on medium speed until combined. Increase the speed to medium high and beat until very fluffy and light, 4 to 5 minutes. Reduce the speed to medium and beat in the flour mixture in three batches, alternating with the buttermilk mixture, until combined, stopping to scrape down the bowl occasionally. Divide the batter evenly between the prepared pans.
- Bake until the tops of the cakes are firm and spring back when gently pressed and the sides begin to pull away from the pan, about 45 minutes. Transfer to a rack and let cool 15 minutes, then run a thin spatula around the cakes to loosen and invert onto the rack to cool completely.
- Meanwhile, make the frosting: Beat the butter, cream cheese, vanilla and salt in a large bowl with a mixer on medium-high speed until light and fluffy, 3 to 5 minutes. Beat in the dulce de leche until well combined. Reduce the mixer speed to low and beat in the confectioners' sugar until combined, then increase the speed to medium high and beat until the frosting is thick and fluffy, about 1 more minute. Refrigerate until the frosting is slightly firm but still spreadable, about 1 hour.
- Trim the domed tops of the cakes with a long serrated knife to make them level, if necessary. Cut each layer in half horizontally to make 4 thin layers. Put 1 layer on a cake plate and spread with a heaping 1/2 cup frosting all the way to the edges. Repeat with 2 more cake layers, then top with the remaining cake layer. Cover the top and sides of the cake with a thin layer of frosting (this is the crumb coat-it doesn't have to be perfect). Refrigerate until set, about 1 hour. Reserve the remaining frosting.
- Mix the cocoa powder and hot water in a small bowl until smooth. Add 1/2 cup of the remaining frosting and stir well to combine. Refrigerate the chocolate frosting and remaining dulce de leche frosting along with the cake.
- Cover the cake with the remaining dulce de leche frosting. Using a small offset spatula, add swipes of the chocolate frosting in concentric circles over the top of the cake, plus some swipes around the sides of the cake. Use a large offset spatula to smooth the chocolate frosting into the dulce de leche frosting, slightly marbling the two. Run the tines of a fork around the top of the cake in concentric circles. Refrigerate until set, at least 30 minutes or overnight.
- Meanwhile, make the chocolate curls: Run the palm of your hand on one side of the chocolate block to soften slightly. Working over a piece of parchment paper, scrape along the softened side with a paring knife or a wide vegetable peeler to make about 2 cups large chocolate shavings. Freeze on the parchment until set, 10 minutes.
- Remove the cake from the refrigerator. If the frosting is too hard, let stand until softened, about 15 minutes. Gently press the chocolate shavings into the sides of the cake.
QUICK AND EASY STUMP HOLE CAKE

I had this cake for the first time today...it was the most delicious, sweet and moist cake I have ever had.
Provided by kjb9455
Categories Dessert
Time 35m
Yield 6-8 serving(s)
Number Of Ingredients 6
Steps:
- Mix cake mix, margarine and 1 egg well; add pecans.
- Press into a 13x9-inch pan.
- Beat cream cheese, powdered sugar and 1 egg; pour over top of cake mix.
- Bake at 350°F for 30 minutes.
Nutrition Facts : Calories 1015.9, Fat 46.5, SaturatedFat 13.7, Cholesterol 113.8, Sodium 872, Carbohydrate 144.3, Fiber 1.8, Sugar 111.4, Protein 9.7
THE BEST TREE STUMP CAKE
The Best Tree Stump Cake dessert, with its irresistible chocolate buttercream frosting and the beauty of a true show stopper. It's perfect for Christmas, any holiday, or a woodland theme party.
Provided by Valya's Taste of Home
Time 5h30m
Number Of Ingredients 17
Steps:
- Preheat the oven to 350 F. Grease and line a 16x22 inch baking sheet with parchment paper.
- In a medium bowl, whisk together flour, baking soda, baking powder, and sea salt.
- Beat eggs and sugar on high for 5 minutes or until light, fluffy and pale yellow in color. Reduce the mixing speed to medium/low and add vanilla extract and buttermilk. Mix for a minute for the ingredients to blend well. The batter will be a little thin and that's what you actually want.
- Remove the bowl from the mixer stand and add in the prepped dry ingredients (flour, baking soda, baking powder, and sea salt) into the egg mixture, 1/2 cup at a time. Using a hand whisk, gently mix in the dry ingredients with each addition, trying not to deflate air pockets as much as possible.
- Transfer the batter into the earlier greased 16x22 inch baking sheet lined with parchment paper.
- Bake in a preheated oven at 350 F (180 C) for 15 minutes.
- Remove from the oven. Allow the cake sponge to cool on the baking sheet for about 10 minutes before transferring it from the baking sheet onto a cooling rack.
- Make another batch of this sheet cake sponge using the same ingredients for this cake.
- Cool both sheet cake sponges completely before frosting.
- While the cake sponges are cooling, make the frosting.
- First, you will need to make the chocolate ganache (my favorite NO FAIL recipe) and cool completely before proceeding with the rest of the frosting instructions.
- Start by beating softened butter until creamy and smooth. Add softened cream cheese and beat again until both are well combined.
- Then add cooled chocolate ganache and mix until well combined, for a minute or so. Scrape down the cream off the sides of the mixer bowl halfway through.
- Mix in cocoa powder and then add powdered sugar, half a cup at a time. Once the powdered sugar is well blended in, increase the mixing speed to high and beat for a minute.
- NOTE: This entire batch of frosting is for the inside of the cake only. You will need to make another batch of this frosting recipe to decorate the top and the sides of the cake later on after the cake sets for at least 4 hours, or overnight.
- You should have your 2 sheets of 16x22 cake sponges cooled completely before frosting them.
- Split each sheet cake sponge in half vertically to have four 7x20 inch cake sponges (even though the photo below is showing just one sheet).
- Using a half-cup ice cream scoop, add 4 scoops of frosting to each of the 4 strips of sponge cake.
- Using a cake spatula spread out the frosting evenly over all 4 strips of cake sponges. (The image below shows only one sheet cake sponge, repeat the same frosting steps with the second sheet).
- This is a tricky and very important step. Start rolling the first strip like you would roll a regular cake roll. Firmly roll the sponge while at the same time focusing on preventing the cake sponges from breaking. Add the next strip by lining it up the short sides next to each other as soon after the previous one ends.
- Use the parchment paper for stability to help hold the roll together during the rolling process so that it does not unroll. Use all 4 strips of sheet cake sponges as one continuous long roll. When rolling up the last strip leave the parchment paper on and wrap additional strips of parchment paper (the ones you baked the cakes on) around the entire perimeter to hold this cake in place.
- Flip the cake log upright. You will need an assistant to hold both ends of the parchment paper snug around the cake, while you secure the parchment papers together by taping a long strip of 2" wide clear scotch tape over the parchment paper all the way around the cake.
- If you have some frosting left (usually a cup or so), use it up by spread it over the top of the cake. Then refrigerate the cake for 4 hours or overnight (my preference).
- Make the Frosted Cranberries the night before to give them time to dry and be ready for decorating the cake the next day.
- The next day I start by making another batch of the frosting. Once the frosting is done, cut the clear tape and peel the parchment paper off the cake. The cake should be set, firm, and stable at this point. It is ready to be decorated.
- Add about one and a half cup more of the frosting on top of the cake. Spread it out evenly. Then using a cake spatula, make the swirl design.
- Then fit a piping bag with a Wilton 1M attachment and fill with chocolate buttercream. First, pipe rose shape spread out randomly all around the cake. Then pipe vertical strips of cream in between the rose-shaped design starting from the base of the case to the top around the perimeter to represent the bark of the tree.
- Decorate the cake with fresh pine tree stems and frosted cranberries. You may also decorate the cake with meringue mushrooms (using this meringue cookies recipe) or however you like.
- Place the cake into the fridge for a couple more hours.
- Just before serving the cake sprinkle some powdered sugar to resemble the snow.
- If you like to see nice and clean slices of cake as I do, it is important to know a few tips that will deliver that satisfying look for you. Slicing the cake with a warmed clean knife will turn out each and every slice of the cake clean and beautiful.
- Place a long knife into a tall cup filled with hot water for 15 seconds or so. Remove the knife from the water and dry it using a paper towel. The hot knife will melt away stickiness and cleanly slice through the layers if you cut only in one downward direction, and pull the knife out at the base of the cake.
- Repeat the same instruction each time you make a slice and you've got a drool-worthy presentation with each slice of this deliciousness you worked so hard on. Happy slicing and eating!
- Enjoy with a cup of hot tea or latte!
STUMP DE NOEL CAKE
Provided by Food Network
Categories dessert
Time 1h10m
Yield 10 to 12 servings
Number Of Ingredients 14
Steps:
- Put the cake on a slightly larger lazy Susan or cardboard cake plate.
- Frost the top of the cake: Mix approximately three-quarters of the dulce de leche with 1/4 cup of the vanilla frosting; transfer to a piping bag fitted with a large round tip (this will be your darker frosting). Mix the remaining dulce de leche with the remaining 3/4 cup vanilla frosting; transfer to a piping bag fitted with a large round tip (this will be your lighter frosting).
- Starting in the center of the cake, pipe concentric circles of the darker frosting out to about a 2-inch circle. Using a small offset spatula, spread out the frosting to about a 3-inch circle.
- With the lighter frosting, pipe concentric circles around the 3-inch circle, leaving about a 1-inch margin around the edge of the cake. Using a clean offset spatula, smooth the lighter frosting to the edge of the cake, so the entire top of the cake is covered. Smooth everything with a clean offset spatula.
- Line the point of a cake comb with the center of the cake and slowly rotate the cake to create concentric tree rings. When the lines of the circle meet, gently lift the comb (if you don't have a cake comb, this effect can be recreated using the tines of a fork).
- Make the chocolate bark: Line a baking sheet with a silicone baking mat and set aside.
- Separately melt the dark and milk chocolates over a double boiler or in the microwave. Pour the dark chocolate over the prepared baking sheet, using an offset spatula to spread to the width of the baking sheet but not smoothing out the chocolate. Drizzle the melted milk chocolate on top. Using the edge of a small offset spatula or a butter knife, make vertical lines and swirls running through the chocolate to create the look of tree bark. Be sure to apply various levels of pressure as the offset spatula is pulled through the chocolate to create a textured look. Let cool at room temperature until firmly set, at least 30 minutes.
- Break the chocolate into large vertical pieces of varying heights to form pieces of bark. Use these pieces to cover the sides of the cake.
- Make the berry mushrooms: Roll 1/2-inch pieces of marzipan between your fingers into stem shapes, making them wider at the base so they can stand upright. Place a stem inside the hollow of each raspberry and strawberry, using a skewer to secure the marzipan to the fruit if needed and to secure them down into the cake. Make mushrooms of various sizes and shapes to give a more natural effect and use the mushrooms to decorate the tops and sides of the cake, pressing gently to adhere the marzipan to the surface.
- Make the pistachio moss and marshmallow stones: Put the pistachios in a mini food processor and add approximately 8 drops each of the green and yellow food coloring. Pulse the food processor to chop the pistachios to a coarse grind the texture of moss. Adjust the food coloring as needed to achieve the desired color. Spoon the moss around the cake plate alongside the bottom of the cake.
- Mix the mini marshmallows and cocoa in a small bowl. Rough up the marshmallows between your fingers to create texture, shaking off the excess cocoa powder. Add the stones to the base of the cake on the pistachio moss.
- Using a fine-mesh strainer, shake confectioners' sugar over the top of the cake, creating a snowy effect.
STUMP ON A LOG CHOCOLATE CAKE
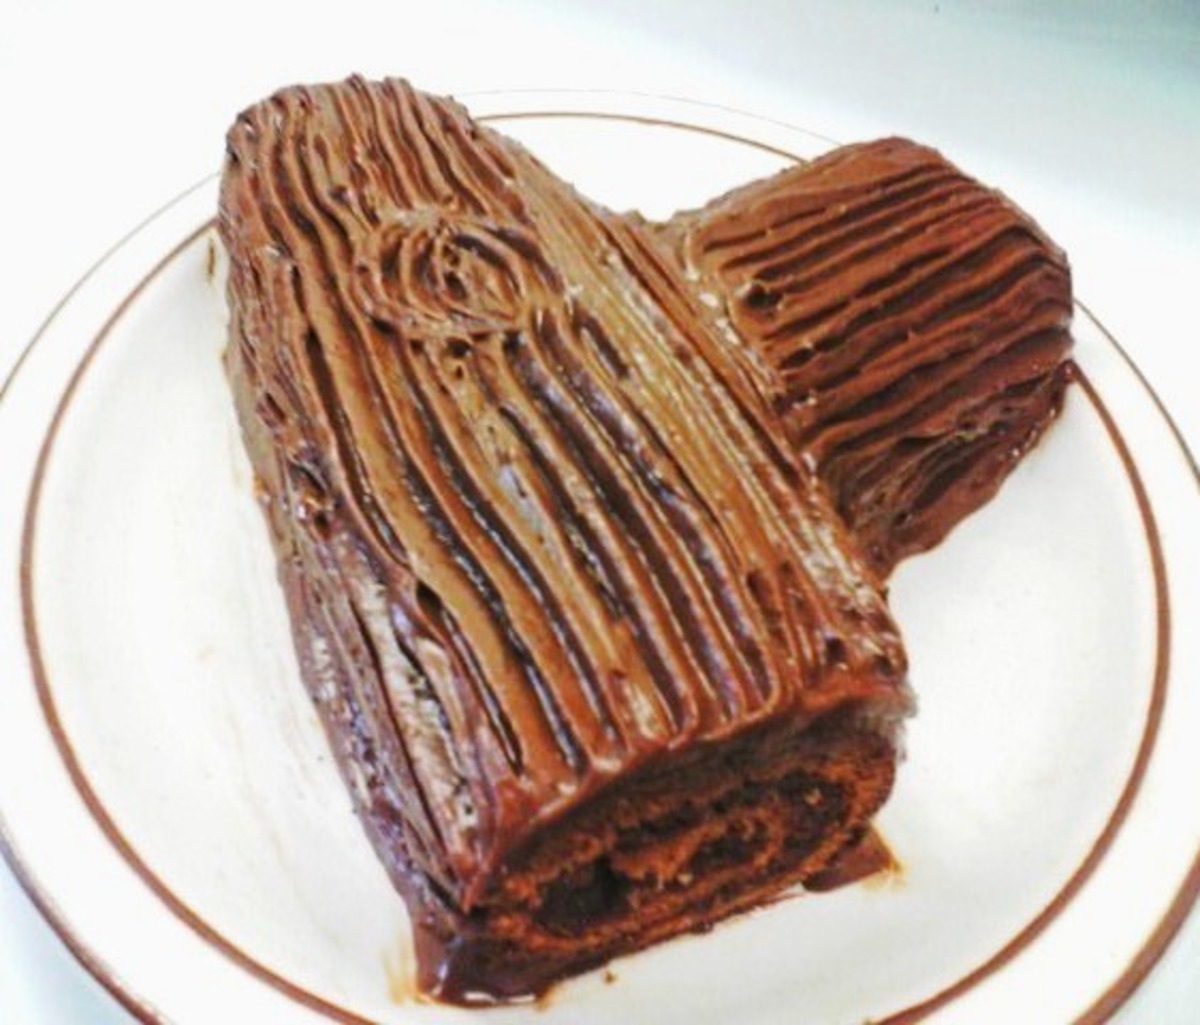
Chocolate lovers, this one's for you! Mmmm..... A chocolate cake made jelly roll fashion, with yummy chocolate cheesecake filling and covered with a delicious mocha frosting. You could even use Nutella in place of the melted chocolate chips or for the frosting. Yum! Dress this log up with maraschino cherries and Recipe #273965 for a Yule Log Cake during the holidays or for a scout or camping theme, try Chef #182010's Recipe #79403.
Provided by 2Bleu
Categories Dessert
Time 35m
Yield 1 cake, 12 serving(s)
Number Of Ingredients 20
Steps:
- MOCHA FROSTING: Combine all the ingredients together in a bowl and then slowly add milk, (adding more if necessary). Mix until well blended to a smooth consistency. Refrigerate til needed.
- CHEESECAKE FILLING: Place chocolate chips in small microwave-safe bowl. Microwave 30 seconds; stir. If necessary, microwave at an additional 15 seconds at a time, stirring after each heating, just until chips are melted when stirred. Set aside.
- Beat cream cheese, sugar and butter in large bowl on medium speed of mixer until creamy. Gradually add melted chips, beating on low speed until blended. Fold in whipped topping until blended. Refrigerate until needed.
- CAKE: Preheat oven to 350°F Line the bottom of a rimmed cookie sheet with parchment paper.
- In small bowl, combine flour, cocoa, baking powder and salt. Set aside.
- In large bowl, beat eggs, sugar, and vanilla until thick and creamy, about 4 minutes. Beat in flour mixture and melted butter. Spread in prepared pan and bake 10-14 minutes or until done.
- Sprinkle a clean kitchen towel generously with confectioners sugar. Immediately invert cake onto towel. Gently peel off parchment paper. Roll warm cake from the long end with towel inside. Place seam side down on wire rack to cool.
- Unroll cake. Stir cheesecake filling and spread onto cake within 1/2" of edges. Roll back up using the towel to help guide a good seal (like making sushi with a bamboo sheet). Cover with plastic wrap. Refrigerate for one hour, seam side down.
- ASSEMBLY: Cut of 1/4" of each end. Cut off 1/3 of an end of the cake on the diagonal. Place the longer piece onto the platter you will be serving on. Place the short end on the side of the long piece to resemble a log with a thick branch sticking out.
- Stir frosting to get it creamy again as this will make it easier to frost the cake. Spread frosting all over the cake with frosting except the ends. Using the tines of a fork, create the bark of the tree. Keep cake refrigerated.
Nutrition Facts : Calories 344.4, Fat 19.3, SaturatedFat 12, Cholesterol 89.5, Sodium 176.2, Carbohydrate 42.1, Fiber 1.8, Sugar 34.6, Protein 4.6
WINTER TREE STUMP CAKE
Provided by Buddy Valastro
Categories dessert
Time 1h30m
Yield 1 winter tree stump cake
Number Of Ingredients 14
Steps:
- For the tree stump cake: Put about 1/2 cup of the buttercream frosting into a bowl and dye it to look like the inside of a tree stump (a few drops of yellow and brown food dye). Spread a thin layer of the colored buttercream onto the top of your prepared 6-inch cake and smooth out into a flat layer. Using a cake comb in a clockwise motion, create concentric circles on the top of the cake to represent the rings of a tree.
- Dust the bench with cornstarch and roll out the dark chocolate modeling chocolate so it is approximately 1/2 inch taller than the height of your cake and at least 20 inches long. The modeling chocolate should be kept fairly thick, approximately 1/2-inch.
- Using the sculpting tools, start texturing the modeling chocolate with scrapes, lines, divets, etc.
- After it is textured, trim the bottom edge so that you have a straight line. Wrap the modeling chocolate around the outside of the iced cake.
- For the cardinal: Roll some of the red modeling chocolate into a ball a little larger than a golf ball. Rolling one end between two hands, taper the ball to a teardrop shape. The pointed end of the teardrop will be the head. Pinch the top of the head and pull backward to make the tuft of feathers on the cardinal's head. With a rolling pin, flatten the remaining red modeling chocolate to 1/8-to-1/4-inch thick. Cut out 3 teardrop shapes about 2 inches long using either a craft knife or a teardrop-shaped cookie cutter. These will be the wings and tail.
- Dampen one side of each wing with a drop of water and stick them to the sides of the body. Do the same with the tail and stick it to the back. Use a tool to add feather details to the wings and tail if desired.
- Using a rolling pin, roll out a small amount of black modeling chocolate to about 1/8-inch thick. Cut it into a diamond shape to make the black part of the cardinal's face. Dampen one side of the black chocolate and stick it to the face area of the cardinal. Use the dragees for eyes. (If you don't have dragees roll 2 small balls of black modeling chocolate with your hands to about 1/4-inch diameter. Stick them to the cardinal's head.)
- Using ivory modeling chocolate, make a teardrop shape about 1/2-inch long. Stick it to the cardinal between its eyes to form a beak. Use a sculpting tool or a butter knife to add the mouth detail to the beak.
- For the mouse: Choose a modeling chocolate color for your mouse - white, tan, grey, brown or a more fanciful color. Roll some of the mouse color modeling chocolate into 2 balls; 1 about the size of a golf ball, the other a little smaller. Dampen a small area of each ball with water and stick them together. These will form the head and body of the mouse. The larger ball is the body.
- Roll 2 balls of mouse color modeling chocolate about the size of peas and stick them to the front of the mouse's head. Roll a small tube, 1/4-to-1/2-inch long and lay it between and on top of the 2 small balls. This will be the nose part of the mouse's muzzle.
- Roll 2 tubes of the mouse color modeling chocolate about 1-inch long each for the mouse's forelegs. Attach them to the side of the body and head.
- Roll 2 small balls of the mouse color modeling chocolate about the size of grapes and partially flatten them. These will be the haunches of the mouse's back legs. Attach them to the rear of the body on either side.
- Make the mouse's 4 paws by rolling 4 balls out of pink modeling chocolate about 1/2-inch in diameter. Attach them to the ends of the forelegs and the front of the haunches. Use a sculpting tool or knife to add toe details to the paws.
- Roll a very small ball of pink modeling chocolate and apply it to the tip of the nose.
- Roll a "snake" of pink modeling chocolate between your hands for the tail and attach it to the mouse's behind.
- Using a rolling pin, flatten out some pink modeling chocolate and some mouse color modeling chocolate. Using a 3/4-inch cookie cutter, cut 2 circles of each color. Dampen the backs of each pink circle and attach them to the mouse colored chocolate circles. These will be the mouse's ears. Attach them to the mouse's head.
- Attach a very small piece of white or ivory modeling chocolate to the underside of the mouse's muzzle to make the protruding incisors.
- For the mouse's eyes, use the dragees. (If you don't have dragees roll 2 small balls of black modeling chocolate with your hands to about 1/4-inch diameter. Stick them to the mouse's head.)
- Add your sculptures to the cake.
- Use the extra buttercream to add a snow effect to the top of the trunk and the board or plate your cake is on. Accent the snow with some clear crystal sugar.
AMAZING SOLAN FAMILY CHOCOLATE CAKE (AKA 3-HOLE CAKE)
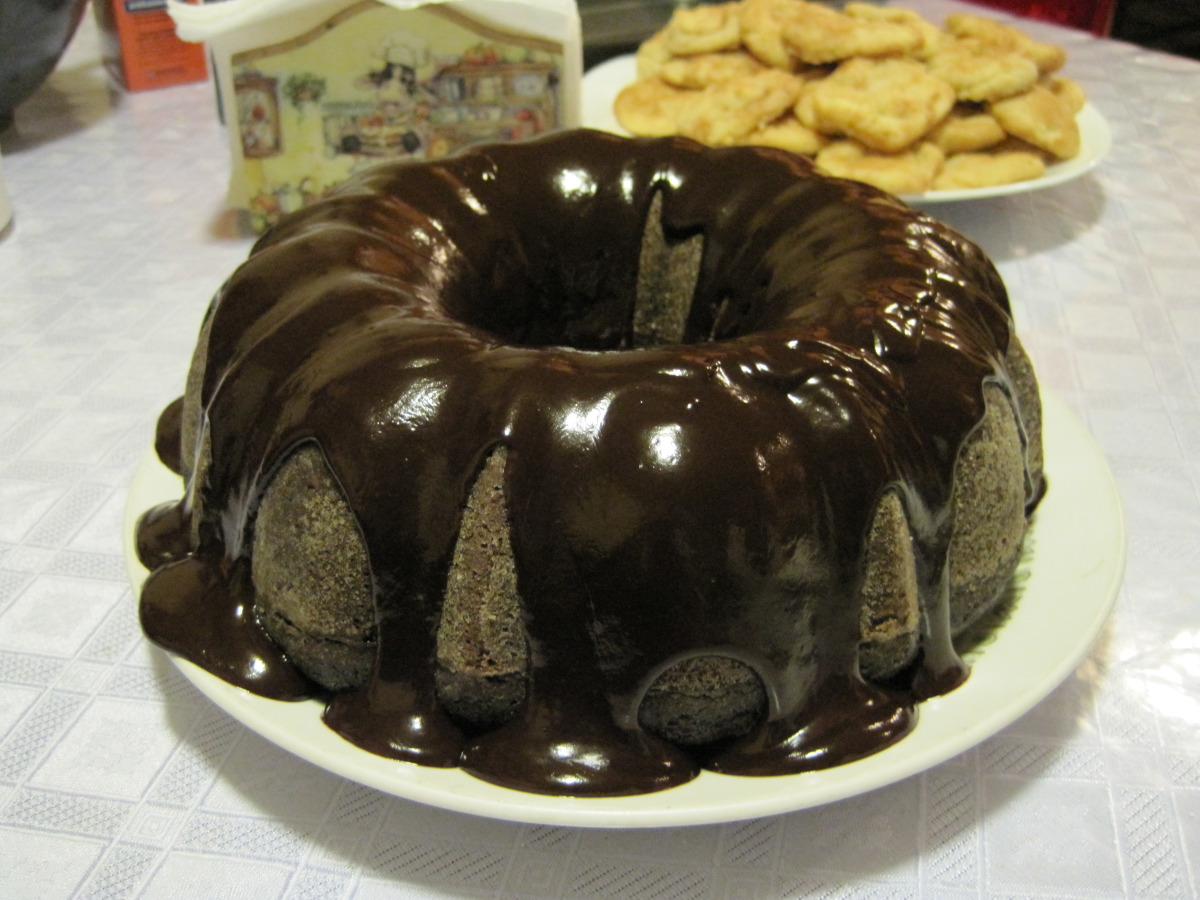
This is a Swedish cake recipe; I got it from a dear friend who made it at several parties during college and always got rave reviews. Now I'm the one who gets all the credit when I make it : ) My family loves it; I play the "guess-the-secret-ingredient" game (the vinegar) and no one ever has... though they've guessed everything from peanut butter to cheese! I love it because it's relatively "healthy" (no dairy, no eggs, low-fat), while it's still amazingly moist and chocolaty and dense. (You can make it even lower fat if you use only 1/4 C oil and sub. 1/2 C applesauce).
Provided by brittmarie
Categories Dessert
Time 55m
Yield 12 serving(s)
Number Of Ingredients 14
Steps:
- Instructions for Cake:.
- Mix dry ingredients together in large bowl.
- Mix wet ingredients together in separate bowl.
- Add wet to dry a little at a time, stirring as you add.
- Pour batter into WELL-GREASED bundt cake pan (well-greased is key--this is a sticky cake; I use Pam with great results), bake at 350 for 35-40 minute.
- Serving suggestions: with fresh whipped cream& strawberries, or drizzle with warm caramel or Kahlua, or glaze with mocha glaze (or some combo thereof!).
- Instructions for Glaze:.
- Mix dry ingredients together in bowl.
- Dissolve coffee in 1 tablespoon of milk; add extract.
- Whisk coffee liquid into dry ingredients; whisk until all blended and if needed, add 1/2 tablespoon more milk.
- USE GLAZE IMMEDIATELY OVER CAKE. It will harden quickly.
Nutrition Facts : Calories 373, Fat 14.3, SaturatedFat 2, Sodium 406.5, Carbohydrate 58.9, Fiber 1.7, Sugar 33.5, Protein 3.8
WOODLAND STUMP CAKE

Martha's modern version of the traditional yule log cake, or buche de noel, calls for rolling and filling chiffon cake with chocolate-hazelnut cream, covering in chocolate "tree bark," and decorating with candied "mushrooms" and pistachio "moss."
Provided by Martha Stewart
Categories Food & Cooking Dessert & Treats Recipes Cake Recipes
Yield Makes one 11-to-12-inch cake
Number Of Ingredients 21
Steps:
- Chiffon Cake: Preheat oven to 350 degrees. Brush two rimmed baking sheets with butter. Line with parchment; butter parchment.
- In a large bowl, whisk together flour, 3/4 cup granulated sugar, baking powder, and salt. In another large bowl, whisk together oil, egg yolks, milk, and vanilla seeds. Whisk egg-yolk mixture into flour mixture.
- In the bowl of an electric mixer fitted with the whisk attachment, beat egg whites on high speed until frothy. Add cream of tartar and beat until soft peaks form. Gradually add remaining 3/4 cup granulated sugar, beating until stiff, glossy peaks form, about 5 minutes. Whisk one-third of egg-white mixture into batter. Gently but thoroughly fold in remaining egg-white mixture with a rubber spatula.
- Divide batter evenly between prepared sheets and spread to edges with a spatula. Bake until tops spring back when lightly touched, about 18 minutes. Dust two kitchen towels with confectioners' sugar. Invert one cake onto a towel; remove parchment. Dust with more confectioners' sugar. Starting at one short side, roll into a log, incorporating towel. Repeat with remaining cake. Let cool completely.
- White Modeling Chocolate: Stir together white chocolate and 3 tablespoons corn syrup until mixture has consistency of thick batter or very soft dough. If mixture is too thick, add remaining 1 tablespoon corn syrup. Pour mixture into center of a large piece of plastic wrap; use edges of plastic to gather into a disk. Wrap tightly and let stand until firm, about 1 hour or up to overnight. When ready to use, transfer to a surface dusted with confectioners' sugar; knead until smooth and pliable.
- Semisweet Modeling Chocolate: Stir together semisweet chocolate and corn syrup until mixture has consistency of thick batter or very soft dough. Pour mixture into center of a large piece of plastic wrap; use edges of plastic to gather into a disk. Wrap tightly and let stand until firm, about 1 hour or up to overnight. When ready to use, transfer to a surface dusted with cocoa; knead until smooth and pliable.
- Chocolate-Hazelnut Filling: In a small bowl, whisk together chocolate-hazelnut spread and 1/4 cup cream until thickened. In a large bowl, whisk together remaining 3 cups cream and confectioners' sugar until soft peaks form. Add chocolate mixture and continue whisking until stiff peaks form.
- Assembly: Unroll cooled cakes, remove kitchen towels, and reroll. Cut each cake crosswise into thirds. Unroll one piece of cake and spread with about 1 cup filling. Roll into a tight spiral and place, cut-side up, in center of a large serving platter. Unroll a second piece of cake, spread with another 1 cup filling, and wrap around perimeter of first piece. Repeat with remaining 4 pieces of cake. Spread remaining filling over top and sides of cake.
- Roll white modeling chocolate into a 1/4-inch-thick round, about 11 inches in diameter. Place on top of cake and fold overhanging edges down sides of cake. Lightly brush overhanging edges with water. Roll 1 1/2 cups semisweet modeling chocolate into a 6-by-8-inch rectangle. Use the handle of a wooden spoon to press a pattern crosswise on semisweet chocolate to resemble bark. Use a pizza wheel to cut a straight edge along one long side of semisweet chocolate. Affix bark to perimeter of cake, cut-side up, and gather bottom to resemble roots, placing small balls of semisweet chocolate in between bark and cake to create more dimension. Continue in this manner, working around sides of cake. Repeat process with remaining semisweet chocolate, then seam pieces of semisweet chocolate together by pinching and folding over each other to create a gnarled appearance.
- Using a paring knife, score lines onto surface of tree stump, radiating out from center, to resemble cracks. Use a soft bristled brush to dust white chocolate with cocoa. Mix a small amount of cocoa with water, one drop at a time, until it has consistency of thick paint. Dip the tip of a 2-inch-wide coarse brush into cocoa mixture; dry-brush tree rings onto surface of tree stump. Brush sides and roots of stump in some spots with corn syrup; sprinkle pistachios over brushed spots to create appearance of patches of moss. Place a few candy mushrooms on sides of cake. Decorated cake can be stored in refrigerator, covered, up to 1 day.
STUMP
Make and share this Stump recipe from Food.com.
Provided by Millereg
Categories Lunch/Snacks
Time 50m
Yield 4 serving(s)
Number Of Ingredients 5
Steps:
- Simmer the vegetables in boiling water in a saucepan for 30 minutes or until soft.
- Drain well.
- Mash the vegetables with the butter and milk.
- Reheat gently and season to taste.
- Serve hot.
Nutrition Facts : Calories 137.3, Fat 4.6, SaturatedFat 2.7, Cholesterol 13, Sodium 73.1, Carbohydrate 21.8, Fiber 4.3, Sugar 6.2, Protein 3.6
Tips:
- For a richer flavor, use dark chocolate chips instead of semi-sweet chocolate chips.
- If you don't have a chocolate bar, you can use 1 cup of chocolate chips and 1/4 cup of cocoa powder.
- To make the cake extra moist, add 1/2 cup of sour cream to the batter.
- For a fun twist, top the cake with a scoop of vanilla ice cream and a drizzle of chocolate sauce.
- If you don't have a 9x13 inch pan, you can use two 8-inch round pans.
Conclusion:
This quick and easy stump hole cake is the perfect dessert for any occasion. It's moist, chocolatey, and sure to be a hit with everyone who tries it. With just a few simple ingredients, you can have this delicious cake ready in no time. So next time you're in need of a sweet treat, give this stump hole cake a try. You won't be disappointed!
Are you curently on diet or you just want to control your food's nutritions, ingredients? We will help you find recipes by cooking method, nutrition, ingredients...
Check it out »
#60-minutes-or-less #time-to-make #course #preparation #desserts #easy #cakes
You'll also love