**Introducing the Culinary Journey of Perfect Short-Grain White Rice: A Taste of Japanese and Korean Delights**
Embark on a culinary adventure with our exploration of perfect short-grain white rice, a staple ingredient in many Asian cuisines. Discover the secrets to achieving the ideal texture and flavor, whether you prefer the fluffy tenderness of Japanese rice or the chewy bite of Korean rice. Our curated collection of recipes guides you through the process, from selecting the right rice to perfecting the cooking technique. With step-by-step instructions and helpful tips, you'll learn to prepare fluffy Japanese white rice, savory Korean white rice, and even a delightful variation with mixed grains. Whether you're a seasoned cook or a beginner in the kitchen, our recipes will help you elevate your rice-cooking skills and create a flavorful foundation for your favorite dishes. So, let's dive into the world of short-grain white rice and savor the essence of Japanese and Korean culinary traditions.
PERFECT SHORT-GRAIN WHITE RICE BY LISTENING (JAPANESE, KOREAN, C

I never could cook short-grain East Asian-style rice until I learned this method from Japanese cookbooks. I knew what I was after: the rice should stick together enough that mouthfuls can easily be picked up with chopsticks, but not be at all sticky or gummy. Each grain should be white and smooth, almost pearl-like, and should taste subtly not just of starch but of delicious grain. For a long time, my short-grain rice was not only not perfect, it often turned out gummy or scorched. I had been able to cook any kind of long-grain rice quite well for years; with that I seem to pick up on some cues I can't quite put into words, maybe just the timing, or some change in the smell. This knack didn't translate to short-grain rice, and I continued to struggle until I read some Japanese cookbooks. As soon as I tried this method, I was able to produce nearly perfect short-grain white rice right away. The cues for how to cook the short-grain rice are in the sounds it makes while cooking. A Japanese nursery rhyme explains: Hajime choro choro (At first it bubbles) Naka pa ppa (And then it hisses) Akago naite mo (Even if the baby is crying (from hunger)) Futa toru na (Don't remove the lid)
Provided by Nose5775
Categories White Rice
Time 52m
Yield 3-6 serving(s)
Number Of Ingredients 3
Steps:
- You will probably want to start preparing the rice before the rest of the meal; if it is ready first, it will stay hot for a while in the pot.
- First, wash the rice with water, by swishing the water through with your hands or a wooden spoon, and then draining-- some older cookbooks will tell you to rinse thoroughly, but most modern rice says on the package"no talc," (that's what they use to polish it), so all you are doing is washing off the surface dust.
- Put the rice and measured water into a medium flat-bottomed pot with a tight-fitting lid.
- Ideally, you will soak the rice for 15 minutes to 3 hours before starting to cook it, but if you are pressed for time, you can add an extra tablespoon of water and skip the soak.
- Cover the pot, turn the heat on high, and bring the rice to a boil (about 4 minutes): you will know it is boiling because you will hear it bubbling and"dancing" inside the pot.
- Do not remove the lid.
- Turn the heat to low (if you have an electric stove you may need to switch to another burner) and simmer (about 15 minutes): you will hear the rice burbling a bit.
- Do not remove the lid.
- When the water is all absorbed, the sound will change to a low hiss.
- When you hear the hissing sound, turn the heat up to high again for just 20-30 seconds to help"dry off" the bottom of the rice.
- Do not remove the lid.
- Turn off the heat completely (especially if you have an electric stove, remove the pot from the heat altogether) and let the rice stand covered (do not remove the lid!) and steam itself for another 10-20 minutes.
- Dampen a wooden spoon or wooden rice paddle.
- Now remove the lid!
- Toss the rice lightly with the spoon or paddle so that it is fluffed a bit but still clumps enough to be picked up with chopsticks.
- If you need to keep the rice hot a while longer, hold a kitchen towel to the lid of the pot to absorb the moisture, then put the lid back on the pot.
- Serve in individual rice bowls.
STEAMED ASIAN WHITE RICE

Provided by David Chang
Categories Rice Side Vegetarian Dinner Lunch Gourmet Fat Free Sugar Conscious Low Sugar Kidney Friendly Vegan Pescatarian Dairy Free Wheat/Gluten-Free Peanut Free Tree Nut Free Soy Free No Sugar Added Kosher
Yield Makes 8 servings
Number Of Ingredients 2
Steps:
- Rinse rice in a fine-mesh sieve until water is almost clear. Drain well and transfer to a 3-quart heavy saucepan. Add water and bring to a boil over medium-high heat. Cover tightly with lid, then reduce heat to low and simmer 20 minutes.
- Remove from heat and let stand, covered, 10 minutes. Gently fold rice from top to bottom with a rubber spatula before serving.
SHORT-GRAIN RICE

Steps:
- 1. Put the rice in a large bowl (or in the insert that fits into the rice cooker) and add enough water to submerge it by an inch. Use your fingers to stir the rice-stirring the rice like this will loosen the powdery rice starch from the grains and cloud the water. Tilt the bowl to drain the rice, using your hand to keep the rice from going down the drain with the water, and repeat until the rice no longer clouds the water.
- 2. If using a rice cooker, cook the rice according to the manufacturer's instructions. If cooking on the stovetop, put the rice in a medium saucepan with a lid, add the water, cover the pan, and bring to a boil over medium-high heat. Once the water boils, reduce the heat to low and cook, covered, until the rice has absorbed all the water in the pot, about 20 minutes.
- 3. Regardless of whether you've cooked it on the stove or in a cooker, when the rice is ready, paddle it: we use a short, wide, wooden rice paddle to do so, but any wooden spoon will work. Just stir and fluff the rice, letting the steam escape, then let it sit for another 10 minutes with the lid of the pan or the cooker slightly ajar before serving.
HOW TO MAKE JAPANESE MOCHI

Mochi is Japanese rice cake made of mochigome, a short-grain japonica glutinous rice. The rice is pounded into paste and molded into the desired shape. Learn how to make mochi's today by following this easy recipe.
Provided by Fanaledrinks
Categories Dessert
Time 20m
Yield 4-6 serving(s)
Number Of Ingredients 7
Steps:
- In a pot combine water and sugar bring it to a boil then turn heat off, set aside.
- Divide liquid into 4 parts then add drops of food colour on each container.
- Combine cornstarch and glutinous rice flour then place ¾ cups of this mixture to each container with liquid while still hot.
- Mix the each container until it forms a smooth dough. Form a small flat circle dough roughly the size of the diameter of a drinking glass, place a heaping tablespoon of the red bean paste then seal to form a sphere. Do it with the remaining dough.
- Place in a lightly greased steamer then steam for 5 minutes.
- Remove from steamer then roll in lightly toasted flour to avoid them from sticking together. Serve, you can enjoy them hot or cold.
Nutrition Facts : Calories 632.9, Fat 1.7, SaturatedFat 0.4, Sodium 5, Carbohydrate 142.6, Fiber 3.4, Sugar 25.1, Protein 9.2
SESAME RICE
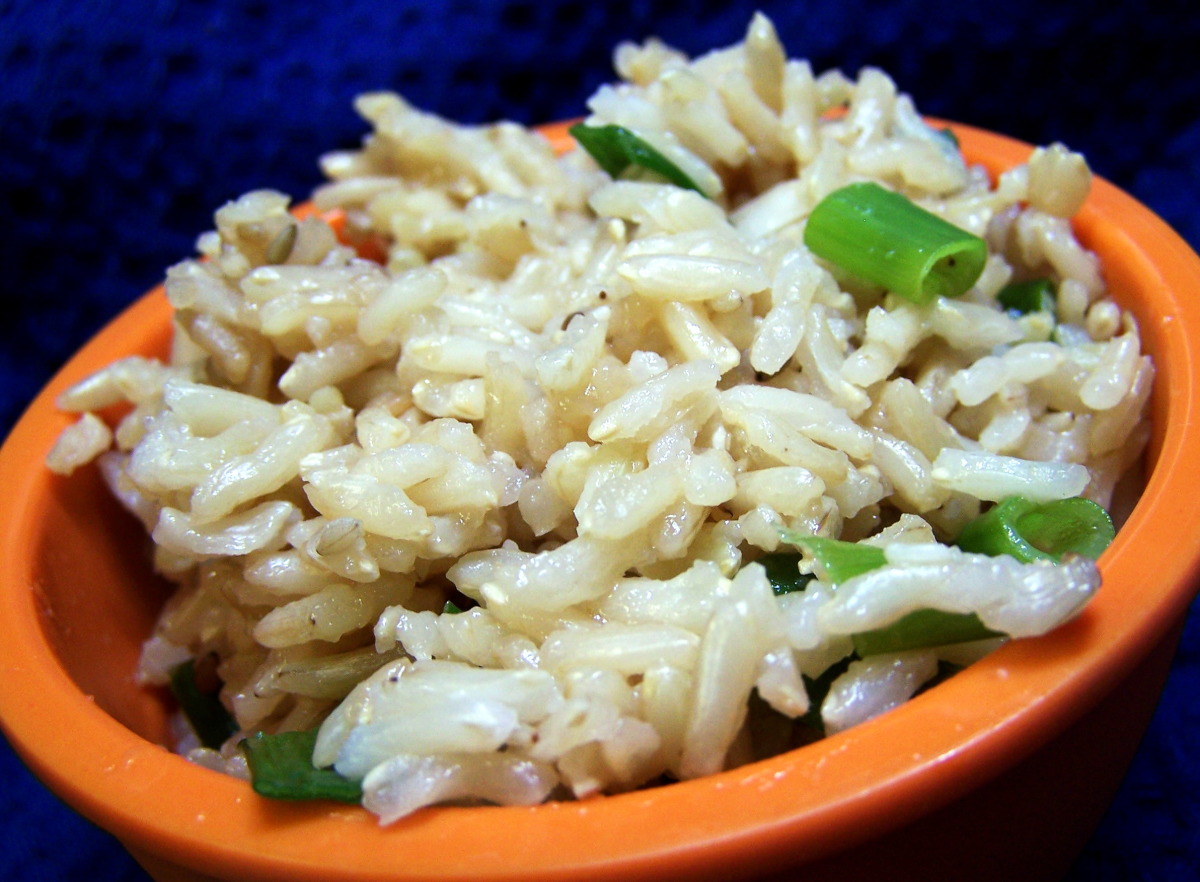
This is how I love my brown rice. I always use short grain rice, adding about 1/2 cup more water than called for. With a splash of soy sauce, I'm in heaven!
Provided by Sharon123
Categories Brown Rice
Time 1h
Yield 6 serving(s)
Number Of Ingredients 6
Steps:
- In a saucepan with a tight-fitting lid, toss the rice with 1/2 teaspoons of the sesame oil to coat the grains.
- Add the water, cover, and bring to a boil, then reduce the heat and simmer until the rice is tender, about 40 to 45 minutes.
- Stir in the scallions, sesame seeds, the remaining sesame oil, and soy sauce to taste.
- Enjoy!
- Note:.
- Toast sesame seeds in a single layer on an unoiled baking tray at 350*F for 2 to 3 minutes, until fragrant and golden.
- Watch carefully, so as not to burn!
Tips:
- Use the right type of rice. Short-grain white rice is the best choice for this recipe. It has a higher starch content than other types of rice, which makes it more sticky and flavorful.
- Rinse the rice thoroughly. This removes the excess starch and helps prevent the rice from clumping together.
- Use the proper ratio of water to rice. The general rule of thumb is 1 cup of rice to 1 1/4 cups of water. However, you may need to adjust this ratio slightly depending on the type of rice you are using and the desired consistency.
- Bring the water to a boil, then reduce the heat to low. This will help prevent the rice from becoming mushy.
- Cover the pot and cook the rice for 18-20 minutes. Do not lift the lid during this time, as this will release steam and prevent the rice from cooking evenly.
- Once the rice is cooked, remove it from the heat and let it stand for 5 minutes. This will allow the rice to absorb any remaining moisture.
- Fluff the rice with a fork before serving. This will help separate the grains and make the rice light and fluffy.
Conclusion:
Making perfect short-grain white rice is a simple process, but it does require a little bit of patience. By following the tips in this article, you can cook delicious, fluffy rice that is perfect for any occasion.
Are you curently on diet or you just want to control your food's nutritions, ingredients? We will help you find recipes by cooking method, nutrition, ingredients...
Check it out »
You'll also love


