**Oven-Dried Onion and Garlic Flakes: A Culinary Symphony of Savor and Convenience**
In the culinary world, few ingredients possess the transformative power of onion and garlic. These aromatic bulbs lend their distinctive flavors to countless cuisines, adding depth, complexity, and an irresistible savory essence. While fresh onions and garlic are culinary staples, their dried counterparts offer a unique set of advantages. Oven-drying these ingredients concentrates their flavors, making them incredibly potent and versatile. They can be easily stored for extended periods, eliminating the need for frequent shopping trips.
This comprehensive guide presents two distinct recipes for oven-dried onion and garlic flakes. The first recipe yields crispy, golden-brown flakes, while the second produces a more delicate, paper-thin texture. Both methods are straightforward and require minimal hands-on time, making them accessible to home cooks of all skill levels. Whether you're a seasoned chef or a novice cook, these recipes will empower you to create your own flavorful seasonings, adding a touch of culinary magic to your favorite dishes.
HOW TO MAKE GARLIC FLAKES
Steps:
- Peel the garlic cloves.
- Slice the peeled garlic using a garlic slicing tool, mandoline, or a sharp knife. Try to keep the pieces even in thickness and no thicker than 1/8 inch at absolute maximum, 1/16 inch if you can manage it.For dried minced garlic you can use a food processor/chopper for just a few seconds to roughly chop the garlic or mince the garlic by hand with a sharp knife.
- Lay the garlic slices/ mince onto the dehydrator trays, making sure that they are in a single layer. The more space between the pieces, the quicker they will dry.Dry in the dehydrator at 66ºC/150ºF for 6-8 hours (if high humidity, around 80%) or 4-6 hours (if low humidity).To check if they're ready, pick one up. If it's bendy at all, then it's not ready. If it snaps, then it's ready.
- Spread the garlic over parchment-lined baking sheets, making sure the pieces don't touch.Place the trays in the oven at the lowest temperature your oven goes to. It's best if it's between 54-66ºC/130-150ºF. If your oven doesn't go as low as that, then choose the lowest temperature and prop open the door a few mm's with a wooden spoon, to allow the steam to escape as the garlic dries and help the process along.Check the garlic every hour (it takes 4-6 hours for me at 66ºC/150ºF) and remove it from the oven when it is either dry and snappable or at the very least barely bendy and lightly golden. It will continue to crisp up as it dries on the baking sheet.Once cool, it should snap rather than bend. If not, then it'll have to go back into the oven again.
- You can place the garlic pieces on a cloth or paper-lines baking sheet. I prefer to use a kitchen cloth.Leave in a well-ventilated area, even better if it's next to a window that gets plenty of sunshine. This is best for warmer, non-humid climates, as the weather and humidity will affect the amount of time they take to dry completely.
- Turn over the garlic a couple of times. This will help speed up the drying process and stop them from sticking to the cloth/tray.
- This method can take between 2-3 days based on the garlic slices' thickness, the weather, and the humidity.
- Store the homemade garlic flakes in airtight containers like glass jars, and keep them in a cool, dry, and dark location - like a cupboard.The flakes will keep well indefinitely in an airtight jar in your kitchen, as long as it remains dry. You can also place some uncooked rice or beans into the container, which will absorb excess moisture and stop them from clumping. They're best when used within the first year, though, as the flavor will deteriorate after that, I've found.
Nutrition Facts : ServingSize 1 tsp, Calories 1 kcal, Carbohydrate 1 g, Protein 1 g, Fat 1 g, SaturatedFat 1 g, Sodium 1 mg, Sugar 1 g
HOME MADE ONION POWDER & DRIED ONION BITS (FOR GARLIC TOO) !!!
In the summer I have so many onions and green onions! This is one of the things we do to use them up... There are no preservatives in these.. and I know how long they have sat on the shelf! *** Use same method to make minced dried garlic and garlic powder!!!
Provided by Colleen Sowa
Categories Marinades
Time 20m
Number Of Ingredients 1
Steps:
- 1. Preheat oven to 150 degrees. (or use a food dehydrator).
- 2. Spread the very finely minced onions out on baking sheets. Place in the oven and Scrape and loosen the onion bits several times as they are drying. (Humidity and the amount of moisture in the onions is what will determine how long it takes them to dry, so I am not giving a time... other than hours).
- 3. The onions are dry when you can easily crumble the minced pieces with your fingers. Remove from oven. Let cool.
- 4. When completely cooled, place half of the onions into an airtight container until you have a recipe that calls for dehydrated onions.
- 5. Grind the remaining onion bits by hand or using a spice grinder, coffee grinder or food processor. Take the ground onion powder and store it in an airtight container until needed.
- 6. ****The amounts that you get depends on the size of the onions and moisture content of them. *** This is a great recipe to start in the evening or very early in the morning when you don't need to use your oven. *** I also do this with green onions to make chives.
DRIED ONION FLAKES & SALT

I've never bought onion flakes but could see how it could be useful. Here is a recipe I found from recipecenter.com
Provided by Heystopthatnow
Categories Low Protein
Time P1DT10m
Yield 1 salt shaker, 10 serving(s)
Number Of Ingredients 3
Steps:
- ONION FLAKES.
- mince onions.
- boil for 2 to 3 minutes.
- cool in cold water.
- dry on paper towel.
- place on oven tray and dry in a slow oven until dry.
- Store in airtight containers once completely dry and cold.
- Add to soups and stews while dry, but for salads, rehydrate by soaking in boiling water for a few minutes. Once dry, they can be crushed as finely as desired.
- ONION SALT.
- measure out 4 TB dried onion and 2 tb unrefined coarse salt.
- if the onion has any moisture in it at all, some of the mixture will have to be scraped from the sides of the blender with a rubber spatula.
- store in a small jar, tightly sealed.
Nutrition Facts : Calories 13.3, Sodium 1396.2, Carbohydrate 3.2, Fiber 0.4, Sugar 1.4, Protein 0.3
THE MOST EASY AND DELISH MEATLOAF EVER!
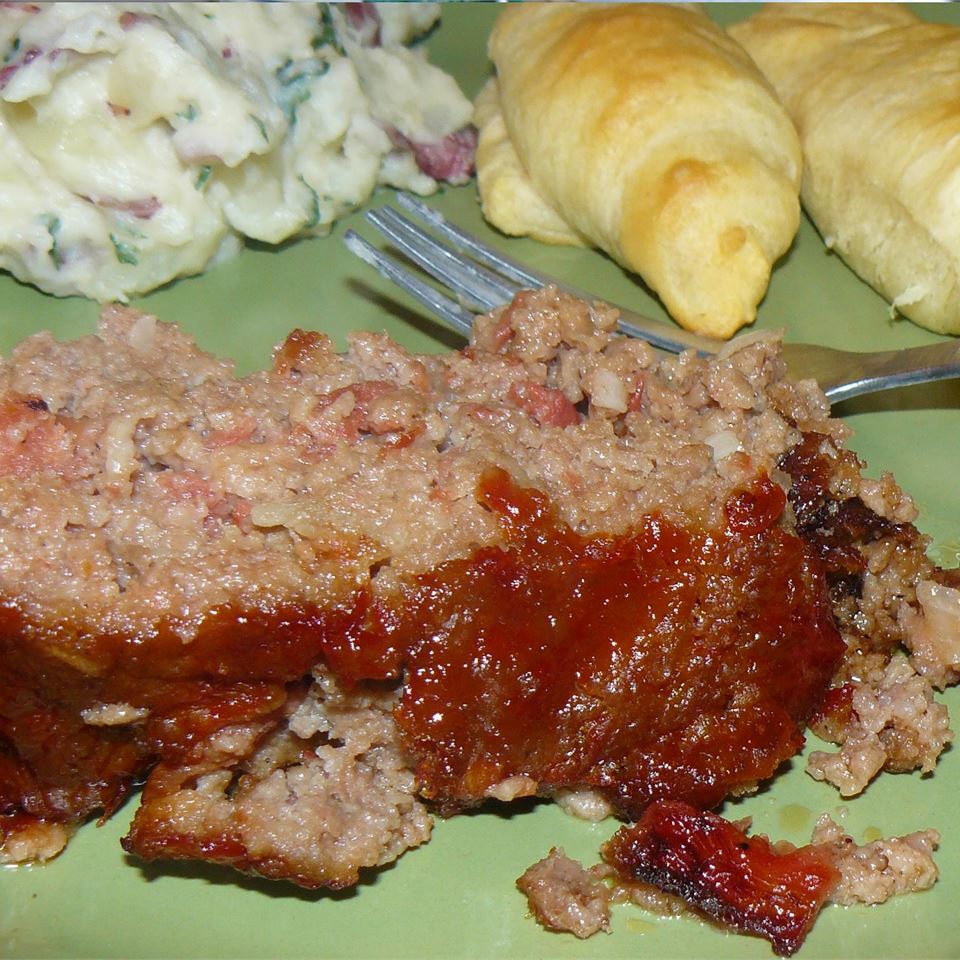
This meatloaf only calls for a few easy ingredients, no chopping whatsoever! If you wish to add ketchup on top, remove the meatloaf at 50 minutes, add ketchup, then return to oven for the remaining 10 minutes.
Provided by Jillian
Categories Main Dish Recipes Meatloaf Recipes Beef Meatloaf Recipes
Time 1h10m
Yield 8
Number Of Ingredients 8
Steps:
- Preheat an oven to 375 degrees F (190 degrees C).
- Beat the egg in a mixing bowl, then add the ground beef, tomatoes, and crushed crackers. Season with onion flakes, garlic powder, seasoned salt, and pepper. Mix until evenly combined. Pack into a 9x5 inch loaf pan.
- Bake in the preheated oven until no longer pink in the center, about 1 hour. An instant-read thermometer inserted into the center should read at least 160 degrees F (70 degrees C).
Nutrition Facts : Calories 246.3 calories, Carbohydrate 10.9 g, Cholesterol 76.5 mg, Fat 14.9 g, Fiber 0.9 g, Protein 16.5 g, SaturatedFat 5 g, Sodium 557.6 mg, Sugar 1.1 g
Tips for Making Oven-Dried Onion and Garlic Flakes:
- Choose firm, dry onions and garlic bulbs. Avoid any that are bruised or have soft spots. - Slice the onions and garlic as thinly as possible. This will help them dry evenly and quickly. - Spread the onion and garlic slices in a single layer on a baking sheet. Do not overcrowd the pan, or the slices will not dry properly. - Bake the onion and garlic slices at a low temperature (140-150°F) for several hours, or until they are completely dry and brittle. - Store the dried onion and garlic flakes in an airtight container in a cool, dry place. They will keep for several months.Conclusion:
Oven-dried onion and garlic flakes are a versatile ingredient that can be used in a variety of dishes. They add a delicious flavor to soups, stews, casseroles, and other savory dishes. They can also be used as a topping for pizzas, salads, and sandwiches. Making your own oven-dried onion and garlic flakes is easy and inexpensive. With a little planning, you can have a supply of this flavorful ingredient on hand whenever you need it.
Are you curently on diet or you just want to control your food's nutritions, ingredients? We will help you find recipes by cooking method, nutrition, ingredients...
Check it out »
You'll also love


