Embark on a culinary adventure with roasted peppers, a delightful and versatile dish that tantalizes the taste buds. These vibrant gems, bursting with natural sweetness and a hint of smokiness, can be effortlessly prepared in the convenience of your NuWave oven. Discover a collection of delectable recipes that showcase the culinary prowess of roasted peppers. From the classic simplicity of Roasted Red Peppers to the tantalizing flavors of Roasted Pepper and Feta Dip, each recipe promises a unique gustatory experience. Unleash your creativity and explore the diverse applications of roasted peppers in salads, pasta dishes, sandwiches, and even delectable desserts. Get ready to elevate your meals with the vibrant colors and irresistible flavors of roasted peppers, all made possible with the magic of your NuWave oven.
Let's cook with our recipes!
NUWAVE OVEN ROASTED PEPPERS NUWAVE/FLAVORWAVE OVENS
This is from Cook Eat share: from Carolyn S. Weddington. My recipe for roasting small quantities of peppers is simple and quick. We enjoy these roasted peppers in sandwiches, salads and casseroles.
Provided by Starfire aka Wendy
Categories Peppers
Time 20m
Yield 5 serving(s)
Number Of Ingredients 2
Steps:
- Wash, core and halve peppers
- Remove pepper seeds and pith
- Arrange pepper halves in shallow baking pan skin side up, quartering pepper(s) if necessary to fit one layer in pan
- Lightly brush or spray oil on skin side of pepper halves, for easier pepper skin removal after roasting
- Place baking pan on 4" rack
- Cook on High power 15 minutes
- (Pepper skins should blister and blacken in spots)
- Remove NuWave cover; use tongs to rearrange peppers skin side up in pan as necessary to ensure even roasting
- Re-cover and cook on High power additional 10 minutes or until pepper skins are fairly evenly roasted
- Leave peppers in pan in covered NuWave Oven about 30 minutes or until cool enough to handle (This step steams the peppers, completing the cooking process. Alternatively, using tongs immediately transfer roasted peppers to bowl and cover bowl with plastic wrap until cool enough to handle)
- Lay peppers on cutting board and slip off skins, scraping off any remaining skin with paring knife (Pepper skins remove easier while still warm, rather than chilled)
- Leave peppers halved, quartered or slice in strips to use as desired
- To freeze prepared peppers after skin removal, wrap cooled portions in plastic wrap, or separate layers with wax paper Place portions in a quart-size freezer bag or other freezer container
- Label bag or container and freeze.
BAKED CHICKEN AND STUFFING - NUWAVE/FLAVORWAVE OVENS

This is a tried an true family recipe. You never have left overs when you make this one! It is warm and conforting, with out all the work. One of my top recipes, easy! People will think you spent all day making this. Make a great presenation. You can add 2 slices of cheese to each breast. However, I lighten it up with one slice. Still has good flavor.
Provided by Starfire aka Wendy
Categories Chicken
Time 40m
Yield 4 serving(s)
Number Of Ingredients 7
Steps:
- In a baking pan: place chicken & add slice of cheese to each breast.
- In seperate bowl combine chicken soup and 1/4 water. Place soup mixture on top of chicken and cheese.
- Then crunch up stuffing into small bits, add to chicken.
- The last step is to add the butter over the top (drizzle). This way the stuffing gets moist and crunchy. (cover with foil for the first 15-20 minutes. Remove the last 10 - 15 minutes so top will cook.
- Bake on HI for 30-35 minutes.
ENGLISH MUFFINS BREAD MACHINE/NUWAVE/FLAVORWAVE OVEN
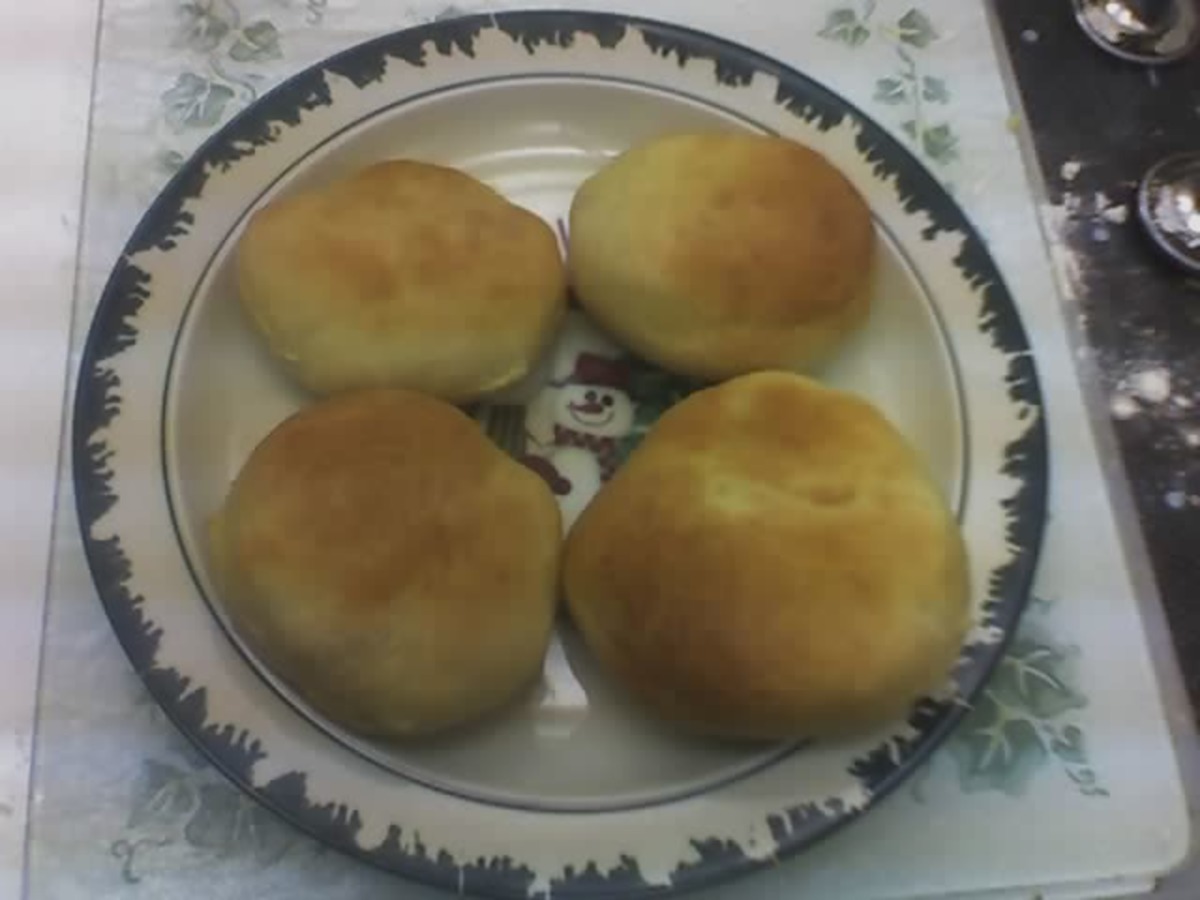
These are light and airy just like their counter parts. When cooked in the Nuwave/Flavorwave ovens, muffins will be "puffy". I make these every week and freeze them. They are wonderful! This is a converted recipe from Dustbunni, and a recipe she found on the internet. This is what she had to say about them: When I landed on this recipe while surfing the web, I had to try it. I'm so glad it did. They are delicious. Tip I: The dough should be soft but not sticky. It took me two attempts to get that just right. Tip II: I posted the recipe as written. After, several batches, I don't press the dough into a rectangle anymore. I divide it into eight equal pieces and pat each piece into a 1/2" thick round. Then, turn each round in dish of cornmeal. . There are a lot of really good reviews on this one. I converted it to be used in the Nuwave/Flavorwave Ovens. Enjoy!
Provided by Starfire aka Wendy
Categories Breads
Time 3h8m
Yield 10-12 serving(s)
Number Of Ingredients 8
Steps:
- Start the dough cycle.
- When the cycle is finished.
- Sprinkle corn meal over your work area.
- Use your hands to pat the dough into a 1/2 inch thick.
- Turn the dough so that each side gets lightly coated with cornmeal.
- Cut into 8 to 10 rounds.
- An empty large tuna can works well When you run out of dough gather up the trimmings and cut more rounds. (I use a large mouth glass).
- Place the rounds on a baking sheet, cover and let rise for 20- 30 minutes--until not quite double.
- (Nuwave/Flavorwave Directions) - Once dough as risen, place in Nuwave/Flavorwave in round pan. Set the timer for 8 min on * 8 for temp or 80 % heat *. For theses you do no want to use hi heat, as they will brown to fast and will burn.
- Note: they will come out "puffy". I have left in traditional cooking if you want them "flatter". Either way they come out wonderful!
- Normal cooking directions: in frying pan, or on low flame. Cook on Medium heat for 7 minutes on each side. This will give the flat look for the English muffins.
- Heat a dry cast iron skillet or griddle over a low flame.
- (I do spray mine with Pam).
- Cook the muffins about 5 to 7 minutes on each side.
- They should be golden brown when you turn them.
- Split the muffins with a fork or serrated knife and serve warm.
- These freeze well and can be reheated in the microwave or toasted.
- Note: these will be "puffy" if made in the nuwave/flavorwave ovens. If you like the traditional ones, I have left the conventional cooking as well.
Nutrition Facts : Calories 206.1, Fat 5.3, SaturatedFat 3, Cholesterol 33.7, Sodium 161.9, Carbohydrate 33.2, Fiber 1.4, Sugar 1, Protein 5.8
RED LOBSTER CHEDDAR BISCUITS - NUWAVE/FLAVORWAVE OVENS

These are Red Lobsters Cheddar Buscuits with a twist, they are made in your Nuwave/Flavorwave Ovens. Note: I add all together. If I have extra cheese I top with a bit of shredded cheese. You want to take these out as soon as they are done. Otherwise they will keep cooking!
Provided by Starfire aka Wendy
Categories Breads
Time 13m
Yield 12 serving(s)
Number Of Ingredients 6
Steps:
- Combine the baking mix, milk and cheddar cheese in a medium bowl.
- Mix by hand until well combined.
- Divide the dough into 12 equal portions (about 3 tbsp each) and spoon onto a lightly greased or nonstick cookie sheet.
- Flatten each biscuit a bit with your fingers.
- Bake in Nuwave for 8 -10 mins on 8 (or 80 percent heat). Until the tops of the biscuits begin to brown.
- In a small bowl, combine the buttery spread with the garlic powder and the parsley flakes.
- Heat this mixture for 30 seconds in the microwave, then brush a light coating over the top of each biscuit.
Nutrition Facts : Calories 146.8, Fat 8.2, SaturatedFat 3.2, Cholesterol 10.9, Sodium 352, Carbohydrate 13.6, Fiber 0.4, Sugar 3.1, Protein 4.5
BAKED REUBEN SANDWICH - NUWAVE/FLAVORWAVE OVENS

Make and share this Baked Reuben Sandwich - Nuwave/Flavorwave Ovens recipe from Food.com.
Provided by Starfire aka Wendy
Categories Lunch/Snacks
Time 16m
Yield 1 serving(s)
Number Of Ingredients 6
Steps:
- Lightly butter one side of each slice of bread. On the unbuttered side, place corned beef, sauerkraut, and cheese. Spread with dressing. Top with second slice of bread, buttered side up.
- Place directly on 4" rack and Nu-Wave on HI for 7 minutes or until the top is lightly toasted and the cheese is melted.
- Place directly on the 4" rack and Nu-Wave on HI for 4 minutes or until well heated and cheese melts.
Nutrition Facts : Calories 815.8, Fat 67, SaturatedFat 37.2, Cholesterol 179.8, Sodium 1575.8, Carbohydrate 36.5, Fiber 4.9, Sugar 5.9, Protein 19.1
NU-WAVE BREAD CRUMB CHICKEN FOR NUWAVE/FLAVORWAVE OVENS

This is a great Recipe from Cook Eat Share - from Jennifer Tesalone This is an easy and tasty dish that cooks well in a Nuwave oven.
Provided by Starfire aka Wendy
Categories One Dish Meal
Time 26m
Yield 5 serving(s)
Number Of Ingredients 6
Steps:
- Tear bread into pieces and in a food processor pulse until finely ground.
- In a large bowl stir together 2 cups bread crumbs, Parmesan, sage, and salt and pepper to taste.
- Melt butter and stir in mustard and salt and pepper to taste.
- With a sharp knife cut chicken thighs from legs.
- Pat chicken dry and brush all over with butter mixture.
- Roll chicken in bread-crumb mixture, pressing gently to adhere, and arrange chicken, without crowding, on 4" rack.
- On level Hi in nuwave oven, bake chicken until cooked through and golden, 14 to 16 minutes.
EASY BAKED CHICKEN CORDON BLEU (NUWAVE/FLAVORWAVE OVENS)

This is a fast and easy way to make dinner in your Nuwave/Flavorwave Oven. Made it tonight for my friends and have raves. Made up of "pre made" Garlic Mash potatoes and you have a great dinner in under 25 min (cooking time). 6-10 min to bread & roll them up. Note; You can defrost the chicken for 5 min on 1/2 power or 5 on Nuwave oven. I used defrosted chicken. Note: if your chicken is frozen you and defrost in your Nuwave oven/fFlavorwave oven. I have used 5-8 mins to defrost. Also, a quick way is to put your chicken breast into a full sized freezer bag prior to pouding it thinn. I hope this helps. Note: I use italian style bread crumbs, I also add some granulated garlic, salt & pepper, and some assiago cheese if I have some on hand. Enjoy!
Provided by Starfire aka Wendy
Categories Chicken
Time 20m
Yield 6 serving(s)
Number Of Ingredients 9
Steps:
- Cook on high heat for 10 -12 minutes. (can also use chicken tenders). Lay out the pounded chicken breasts on a clean surface. Place a slice of ham on each piece, then one stick of cheese. Roll the chicken up around the cheese and ham, and secure with toothpicks. Dip each roll in melted butter, then roll in bread crumbs. Place on wire rack (lowest). Cook until Outiside of chicken is is browned (crispy) and juices run clear.
- Cook until chicken starts to become golden brown but not too dark! Remove lid asap. As it will keep cooking!
Tips:
- For perfectly roasted peppers, choose ripe, firm peppers with smooth skin and no blemishes.
- Slice the peppers into even-sized pieces to ensure even cooking.
- Toss the pepper slices with olive oil, salt, and pepper before roasting to enhance their flavor.
- Roast the peppers in a single layer to prevent steaming and promote even browning.
- Keep an eye on the peppers during roasting to prevent burning. The roasting time may vary depending on the type of pepper and the desired level of doneness.
- Once roasted, transfer the peppers to a bowl and cover them with plastic wrap. This will help steam the peppers and make them easier to peel.
- Once the peppers are cool enough to handle, peel off the charred skin and remove the seeds.
- Use roasted peppers in various dishes, such as salads, sandwiches, pizzas, and pasta.
Conclusion:
Nuwave ovens offer a convenient and efficient way to roast peppers. With their powerful air circulation system, Nuwave ovens can quickly and evenly roast peppers, resulting in tender and flavorful roasted peppers. By following the tips and instructions provided in this article, you can easily create delicious roasted peppers using your Nuwave oven. Whether you are looking for a simple side dish or a versatile ingredient for your favorite recipes, roasted peppers are a great option. So, fire up your Nuwave oven and start roasting peppers today!
Are you curently on diet or you just want to control your food's nutritions, ingredients? We will help you find recipes by cooking method, nutrition, ingredients...
Check it out »
You'll also love


