Best 3 Nigella Chocolate Torte Recipes


Indulge in the ultimate chocolate experience with Nigella's Chocolate Torte, a culinary masterpiece that tantalizes taste buds with its rich, decadent flavor and velvety texture. This compilation of recipes unveils the secrets behind this iconic dessert, guiding you through the process of creating a symphony of chocolatey goodness. Embark on a journey of culinary exploration as we delve into the intricacies of this classic torte, uncovering variations that cater to diverse preferences, from gluten-free adaptations to the unique charm of a chocolate orange torte. Discover the magic of Nigella's Chocolate Torte, a timeless dessert that promises to leave a lasting impression on your palate and elevate any occasion to a moment of pure indulgence.
Check out the recipes below so you can choose the best recipe for yourself!
CHOCOLATE TORTES RECIPE BY TASTY

Here's what you need: chocolate biscuit, butter, sugar, chocolate, double cream, chocolate spread, raspberry, mint
Provided by Ellie Holland
Categories Desserts
Yield 12 serving
Number Of Ingredients 8
Steps:
- In a small bowl, combine the chocolate biscuit crumbs with the butter and sugar.
- Spoon into a mini cupcake tray and freeze for 10 minutes, until set.
- Pour the hot double cream and chocolate spread over the chocolate and allow the heat of the cream to melt the chocolate. Whisk to combine.
- Pour the ganache over the biscuit bases.
- Chill in the fridge for 1 hour, until set.
- Garnish with raspberries and a sprig of mint.
- Enjoy!
Nutrition Facts : Calories 180 calories, Carbohydrate 15 grams, Fat 13 grams, Fiber 0 grams, Protein 1 gram, Sugar 12 grams
SALTED CHOCOLATE TART
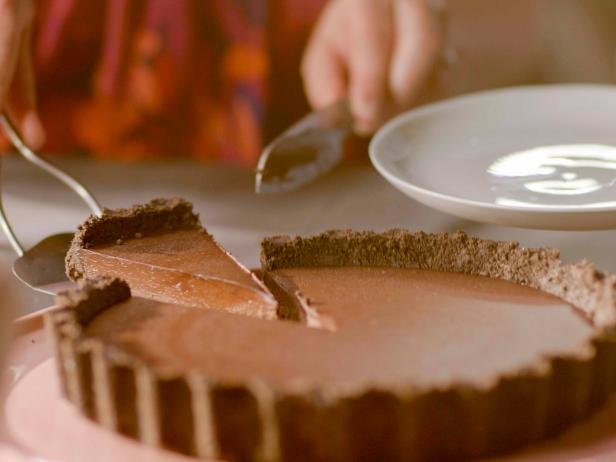
I have always avoided making chocolate tarts, not out of laziness (I love a bit of pastry-making, in the right mood), but because I have never really felt that the pastry served the chocolate, or was worth the effort here. This is my simple solution: make a base out of chocolate cookies. And the filling is just as easy to make, too. Not that you'd know from the taste. I never lie about how effortless something is to make, but no one will believe me on this one. I think the hit of salt is crucial: it subtly counters the richness of all the chocolate, so even if you don't normally go in for the sweet-salt combo, don't be tempted to leave it out. Halve the amount of salt, if you must. I am having a bit of a smoked salt moment and urge you to try the flakes in general and, in particular, here. If you want to, of course, you can use Bourbon biscuits for the base: Oreos give that dramatic espresso-blackness, but the more Aztec-earth brown of the Bourbon base will highlight the darkness of the filling.
Provided by Nigella Lawson : Food Network
Categories dessert
Time 10h
Yield 14 slices
Number Of Ingredients 14
Steps:
- For the base: Snap the oreos into pieces and drop them into the bowl of a food processor. Do likewise with the chocolate, then blitz them together until you have crumbs. Add the butter and salt, and blitz again until the mixture starts to clump together. If you're doing this by hand, bash the cookies in a freezer bag until they form crumbs, finely chop the chocolate and melt the butter, then mix everything, along with the salt, in a large bowl with a wooden spoon or your hands encased in disposable gloves.
- Press the mixture into a 23-centimeter/10-inch deep-sided, loose-bottomed flan or tart pan. Pat down on the bottom and up the sides of the pan with your hands or the back of a spoon, so that the base and sides are evenly lined and smooth. Put into the fridge to chill and harden for at least 1 hour, or 2 hours if your fridge is stacked. I wouldn't keep it for longer than a day like this as the Oreo crust tends to get too crumbly.
- For the filling: Finely chop the chocolate. Put the corn starch into a cup and whisk in the milk until smooth. Pour the cream into a heavy-based saucepan into which all the ingredients can fit and be stirred without splashing out of the pan, then add the finely chopped rubble of chocolate, the sieved cocoa (or just sieve it straight in), espresso or instant coffee powder, sugar, vanilla paste or extract, olive oil and smoked salt. Place over a medium to low heat and whisk gently--I use a very small whisk for this, as I'm not aiming to get air in the mixture, I'm just trying to banish any lumpiness--as the cream heats and the chocolate starts melting.
- Off the heat, whisk in the corn starch and milk mixture until it, too, is smoothly incorporated, and put the pan back on a low heat. With a wooden spoon, keep stirring until the mixture thickens, which it will do around the 10-minute mark, but be prepared for it to take a few minutes more or less. Take the pan off the heat every so often, still stirring, so that everything melds together, without the cream coming to a boil. When ready, it should be thick enough to coat the back of a wooden spoon, and if you run your finger through it (across the back of the spoon) the line should stay.
- Pour the mixture into a wide measuring jug or batter jug (it should come to about the 600 milliliter/2 1/2 cup mark). Now run a piece of baking parchment or greaseproof paper under cold water, wring it out and place the damp, crumpled piece right on top of the chocolate mixture, then put the jug into the fridge for 15 minutes. The mixture will still be warm, but will be the right temperature to ooze into the base without melting it.
- Pour and scrape the mixture into the cookie-lined tart pan and put it back in the fridge overnight. Don't leave it longer than 24 hours, as the base will start to soften.
- Take the tart out of the fridge for 10 minutes before serving, but unmould straight away. Sit the tart pan on top of a large tin or jar and let the ring part fall away, then transfer the dramatically revealed tart to a plate or board. Leave the pan base on.
- Slice modestly--this is rich and sweet, and people can always come back for more--and serve with creme fraiche; the sharpness is just right here. Leftovers will keep in the fridge for 4 to 5 days, but the base will soften and the sides crumble a bit. That will not detract from your eating pleasure too much, but I still like to give it its first outing at optimal stage!
TORTA ALLA GIANDUIA (CHOCOLATE HAZELNUT CAKE)
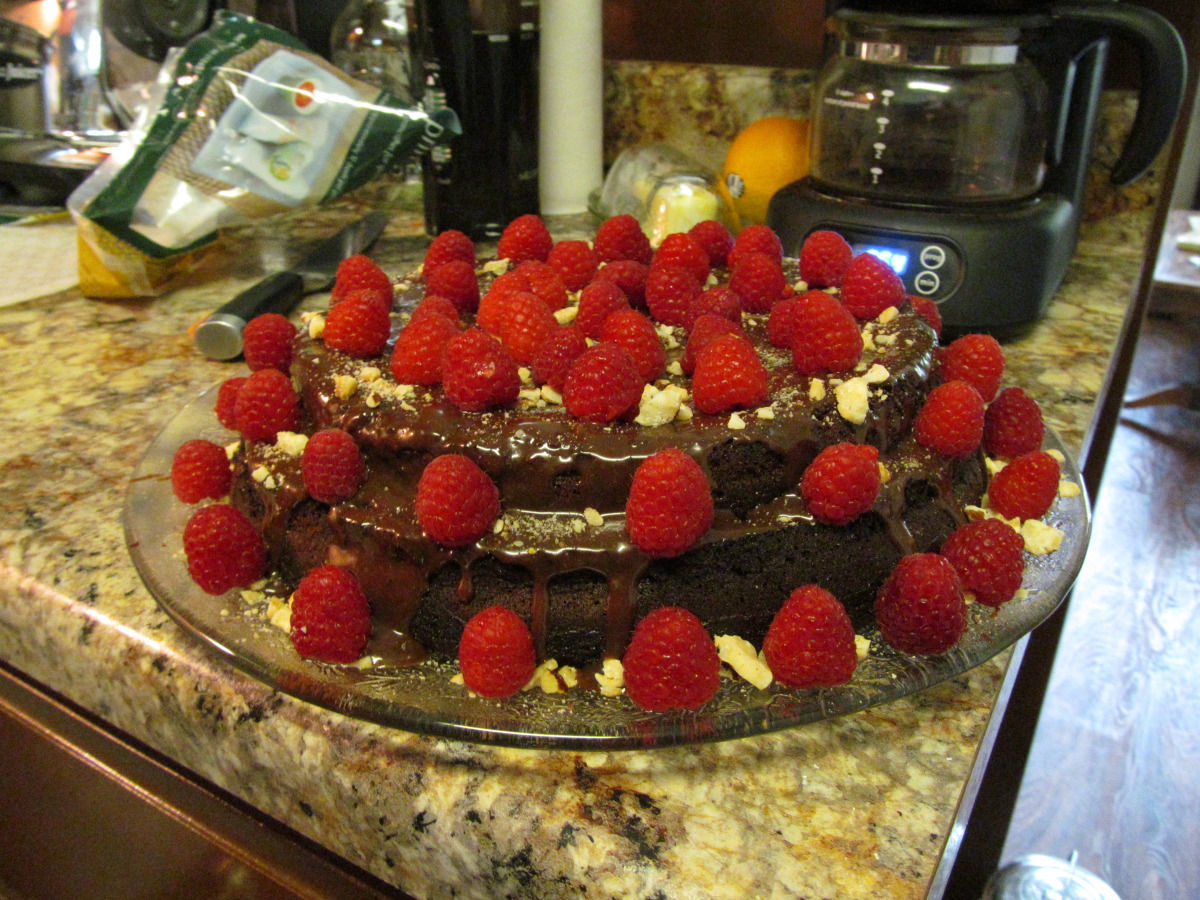
This is from Nigella Lawson's book, How to be a Domestic Goddess. It's quite easy to make, yet looks drop-dead impressive. Definately a cake that will cheer the soul of any adult. I used my KitchenAide mixer, so if you aren't using one, your prep time may be a bit longer.
Provided by skat5762
Categories Breads
Time 2h10m
Yield 8 serving(s)
Number Of Ingredients 11
Steps:
- Preheat oven to 350-degrees.
- Prepare a 9-inch springform pan: grease and line with parchment or wax paper.
- In a large bowl, whisk the eggs whites and salt until stiff but not dry (this means that they will hold their peaks, yet still appear glossy and smooth).
- In a separate bowl, beat the butter and Nutella together, then add Frangelico (or what you have chosen to use), egg yolks, and ground hazelnuts.
- Fold in the cooled, melted chocolate, then lighten the mixture with a dollop of egg white, which you can beat in as roughly as you want, before gently folding the rest of them in a third at a time.
- Pour into the prepared pan and cook for 40 minutes or until the cake's beginning to come away at the sides, then let cool on rack.
- Toast the hazelnuts in a dry frying pan until the aroma wafts upward and the nuts are golden brown in parts: keep shaking the pan so they don't burn on one side and stay too pallid on others.
- Transfer to a plate and let cool.
- This is imperative: if they go on the ganache while hot, it'll turn oily (believe me I speak from experience).
- In a heavy-bottomed sauce pan, add the cream, liquer or water, and chopped chocolate and heat gently.
- Once the chocolate's melted, take the pan off the heat and whisk until it reaches the right consistency to ice just the top of the cake.
- Unmold the cooled cake carefully, leaving it on the base as it will be too difficult to get such a damp cake off in one piece.
- Ice the top with the chocolate icing, and dot thickly with the whole, toasted hazelnuts.
- If you have used Frangelico, put shot glasses on the table and serve it with the cake.
Tips:
- Use good quality dark chocolate with a cocoa content of at least 70% for the best flavor.
- Make sure the butter and eggs are at room temperature before you start baking. This will help the ingredients to combine more easily and create a smoother batter.
- Do not overmix the batter. Overmixing can make the cake tough.
- Bake the cake until a toothpick inserted into the center comes out with just a few moist crumbs attached.
- Let the cake cool completely before frosting it. This will help the frosting to set properly.
- If you don't have a springform pan, you can use a regular 9-inch round cake pan. Just be sure to grease and flour the pan well before adding the batter.
Conclusion:
Nigella's Chocolate Torte is a rich, decadent, and delicious chocolate cake that is perfect for any special occasion. It is easy to make and can be prepared in advance, making it a great option for busy cooks. The cake is also very versatile and can be served with a variety of toppings, such as whipped cream, ice cream, or fresh berries. Whether you are a chocolate lover or just looking for a special dessert to impress your friends and family, Nigella's Chocolate Torte is sure to be a hit.
Are you curently on diet or you just want to control your food's nutritions, ingredients? We will help you find recipes by cooking method, nutrition, ingredients...
Check it out »
You'll also love