**
Indulge in the delectable flavors of Italy with our authentic Ciabatta bread recipe. This classic Italian bread is renowned for its golden-brown crust, airy interior, and slightly tangy flavor. Perfect as a sandwich bread, a base for bruschetta, or simply enjoyed on its own, Ciabatta is a versatile culinary delight that adds a touch of Italian charm to any meal. With three variations – Classic Ciabatta, Cheese Ciabatta, and Olive Ciabatta – there's a recipe for every taste preference. Embrace the art of Italian baking and impress your loved ones with homemade Ciabatta that will transport them to the heart of Italy.
** Let's cook with our recipes!
CIABATTA (ITALIAN SLIPPER BREAD)
DH and I buy at least one loaf a week of ciabatta and eat it with olive oil. I finally decided to see it I could make a better bread than the brands we've tried from the store. We agreed that this is the best bread we've EVER had! The first loaf was gobbled before the second one came out of the oven! :) Can't wait to make it again!! Note: The dough will be VERY sticky - do not add more flour. The bread itself is not tall and fluffy. It has a wonderfully crisp, tender crust. It would be perfect for an Italian sandwich, if cut horizontally, of mozzarella, basil, tomatoes, olive oil, balsamic vinegar and s&p.
Provided by Lisa Pizza
Categories Yeast Breads
Time 16h20m
Yield 2 loaves, 4-6 serving(s)
Number Of Ingredients 10
Steps:
- Make sponge: Stir together, warm water and yeast.
- Let stand 5 minutes, until creamy.
- Transfer yeast mixture to another bowl and add room-temp water and flour.
- Stir for 4 minutes.
- Cover bowl with plastic wrap.
- Let stand at cool room temp at least 12 hours and up to 1 day.
- Make bread: Stir together yeast and milk in small bowl and let stand 5 minutes, until creamy.
- In bowl of standing electric mixer, with dough hook, blend together milk mixture, sponge, water, oil and flour at low speed until flour is moistened.
- Beat on medium for 3 minutes.
- Add salt and beat for 4 more minutes.
- Scrape dough into oiled bowl and cover with plastic wrap, until doubled- about 1 1/2 hours.
- Note: Dough will be VERY sticky and full of bubbles.
- Cut two pieces of parchment paper, approx 12 inches by 6 inches.
- Place on baking sheet and flour well.
- Turn dough out onto a well-floured surface and cut in half.
- Transfer each half to paper and form irregular ovals approx 9 inches long.
- Dip fingers in flour and dimple loaves.
- Dust tops with flour.
- Cover with dampened kitchen towel and let rise 1 1/2 to 2 hours, until almost doubled.
- At least 45 minutes before baking bread, pre-heat pizza stone on lowest oven rack position at 425°F.
- Transfer 1 loaf, along with parchment paper, onto stone and bake for 20 minutes or until pale golden.
- Remove to cooling racks and repeat with second loaf.
CIABATTA DELI SANDWICHES: A HEARTY ITALIAN-STYLE SANDWICH
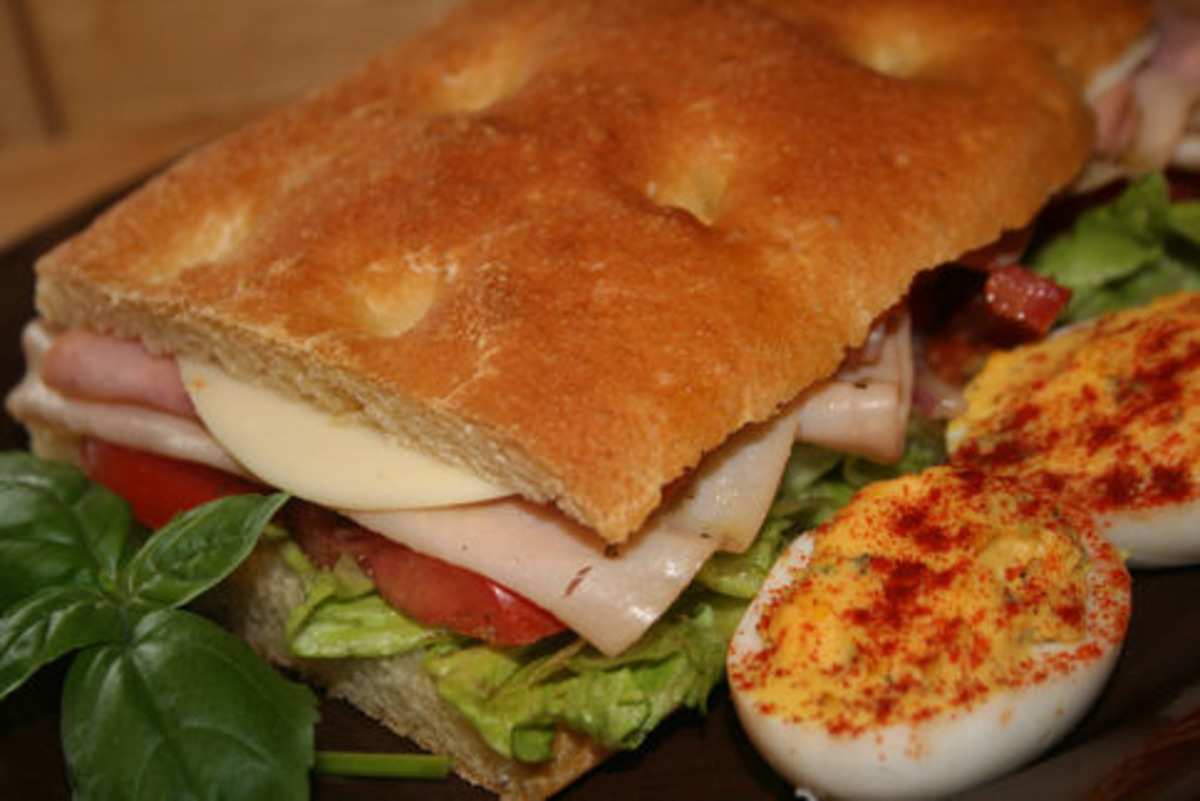
This two-fisted sandwich boasts a variety of colors and flavors. Like red, plump tomatoes; fresh basil and mozzarella; red onions and green peppers; salami, ham and capacolla - drizzled with homemade Italian vinaigrette. These classic Italian flavors make a great combination for this well-loved Italian American sandwich. Chips or a scoop of potato salad and a piece of seasonal fruit make this a delicious, satisfying meal.
Provided by Feast Your Eyes
Categories Lunch/Snacks
Time 20m
Yield 4 serving(s)
Number Of Ingredients 13
Steps:
- Spread desired amount of mayonnaise on each ciabatta's top and bottom.
- Layer the ciabatta bottoms with shredded lettuce, salt and peppered tomato slices, onion and pepper rings, mozzarella, basil leaves, the deli meats, and sliced olives. (NOTE: You can mix-up the order of these ingredients to your liking.)
- Drizzle with vinaigrette and sprinkle with red pepper flakes. Cover with the ciabatta tops.
- Cut the ciabatta sandwiches in half on the diagonal and wrap in plastic wrap or waxed paper. Take a few books and set on top of the sandwiches to weigh them down and soak in the vinaigrette.
- Unwrap and enjoy!
- ITALIAN VINAIGRETTE: 1/2 cup olive oil, 1/4 cup vinegar, 1 tablespoon sugar, 1/2 teaspoon garlic powder, 1/2 teaspoon Italian seasoning, 1/8 teaspoon coarse ground black pepper, and 1/8 teaspoon salt.
- Mix all ingredients in medium bowl with wire whisk until well blended. Cover. Refrigerate until ready to serve. Makes 6 (2-tablespoon) servings. Prep Time: 5 minutes.
ITALIAN CIABATTA BREAD
This Italian bread is good cut into long slices or split open for sandwiches.
Provided by Martha Stewart
Categories Food & Cooking Breakfast & Brunch Recipes Bread Recipes
Yield Makes 3 loaves
Number Of Ingredients 7
Steps:
- In an electric mixer, combine 1 cup water and yeast. Let stand until yeast is creamy, about 10 minutes. Add remaining water and sponge, and mix, using paddle attachment, on low speed until combined, about 2 minutes.
- In a medium bowl, combine flour, powdered milk, and salt; add to yeast mixture, and mix on low speed for 1 minute. Change to dough hook, and mix on medium-low speed until dough is smooth and sticks to fingers slightly when squeezed, about 8 minutes. Or knead by hand, 15 to 20 minutes.
- Transfer dough to a floured surface, and knead four or five turns into a ball. Place dough, smooth side up, in a lightly oiled bowl, and cover with plastic wrap; let rise in a warm place until dough has doubled in bulk and is slightly blistered and satiny, about 1 hour.
- Punch dough down, and fold over onto itself four or five times. Turn folded side face down in the bowl. Cover, and let rise again in a warm place until doubled in bulk and satiny, about 50 minutes.
- Turn dough onto a floured surface, flour the top, and cut into three pieces.
- Line three baking sheets with parchment; flour generously. Transfer a piece of dough to each baking sheet. Gently pull each piece into a rough rectangle (about 7-by-11 inches). Cover loosely with oiled plastic wrap; let rise in a warm place until doubled in bulk and small air pockets appear, about 30 minutes.
- Dimple the surface of the bread with your fingertips. Cover with plastic wrap, and let rise again for 30 minutes. Sprinkle with flour, and dimple again; cover, and let rise in a warm place for 30 minutes more. Thirty minutes before the rising is completed, place a baking stone, if using, in the lower third of the oven and a baking pan on the lowest shelf. Heat oven to 450 degrees.
- Slide loaves, along with parchment, onto baking stone. If not using a stone, cook on the parchment-lined baking sheets. Quickly pour 2 cups very hot water into the baking pan to create steam, and close the oven door. Bake until bread is golden brown and hollow sounding when tapped on the bottom, 20 to 25 minutes. Cool on a wire rack for at least 30 minutes before slicing.
CIABATTA A OLD ITALIAN BREAD
Take five minutes today to make the starter, also called sponge, and tomorrow you can bake two loaves of this marvelous, slightly sour, rustic Italian bread that has a hearty crust. I cannot tell you how AMAZING this bread is. 3 loaves were gone in under a day and a half! It is crunchy on the outside, soft and moist on the inside and filled with all these lovely bubbly craters! I replaced the milk with water and just baked on a greased and floured baking sheet and it was still wonderful. I cannot rate this recipe highly enough. I served with olive tapenade and caprese salad for appetizers and it was wonderful. My family/friends could not get enough of it! They beg for it EVERYDAY. Will certainly make again! First, the sponge is amazing. Tastes just as good after only sitting for a few hours as it does after 24+. I made it once and left it for 24 hours in a cool place and that made nice fluffy bread without many air pockets. * See My Note Below
Provided by CHEF GRPA
Categories Breads
Time 20h20m
Yield 15 serving(s)
Number Of Ingredients 10
Steps:
- 1. To Make Sponge: In a small bowl stir together 1/8 teaspoon of the yeast and the warm water and let stand 5 minutes, or until creamy. In a bowl stir together yeast mixture, 1/3 cup of the water, and 1cup of the bread flour. Stir 4 minutes, then over bowl with plastic wrap. Let sponge stand at cool room temperature for at least 12 hours and up to 1 day.
- 2. To Make Bread: In a small bowl stir together yeast and milk and let stand 5 minutes, or until creamy. In bowl of a standing electric mixer fitted with dough hook blend together milk mixture, sponge, water, oil, and flour at low speed until flour is just moistened; add salt and mix until smooth and elastic, about 8 minutes. Scrape dough into an oiled bowl and cover with plastic wrap.
- 3. Let dough rise at room temperature until doubled in bulk, about 1 1/2 hours. (Dough will be sticky and full of air bubbles.) Turn dough out onto a well-floured work surface and cut in half. Transfer each half to a parchment sheet and form into an irregular oval about 9 inches long. Dimple loaves with floured fingers and dust tops with flour. Cover loaves with a dampened kitchen towel. Let loaves rise at room temperature until almost doubled in bulk, 1 1/2 to 2 hours.
- 4. At least 45 minutes before baking ciabatta, put a baking stone on oven rack in lowest position in oven and preheat oven to 425*F. (220*C).
- 5. Transfer 1 loaf on its parchment to a rimless baking sheet with a long side of loaf parallel to far edge of baking sheet. Line up far edge of baking sheet with far edge of stone or tiles, and tilt baking sheet to slide loaf with parchment onto back half of stone or tiles. Transfer remaining loaf to front half of stone in a similar manner. Bake ciabatta loaves 20 minutes, or until pale golden. Cool loaves on a wire rack.
- My Note: * The second time I made the sponge I left it right next to a warm stove top and it rose very quickly and made these HUGE air pockets in my finished product. I only left this for 4 hours but the taste and texture were FANTASTIC and the sponge almost spilled over the rim of the bowl! It was a bit difficult to get out of the bowl because of its stickiness but that was to be expected. For those that thought the sponge needed water, it doesn't. It will look just like a clump of dough in the beginning but if you leave it you'll be pleasantly surprised with a bubbling, frothy, sticky sponge. Secondly, I made this recipe cautiously because I expected it to be very difficult to handle, but it was not.
- I prepared the sponge two days in advance and kept it in the fridge. I had no problems with it being too sticky. I cooked it on a pizza stone and basted with water every 5 minutes for a brown, crunchy crust. The parchment did burn a little around the edges while baking, but it was reminiscent of an old Italian bakery.
- The easiest 'real sourdough' recipe; those without 'aging' of dough lack the genuine ciabatta taste, even though they may get the consistancy right. This one gets even better with more than one days aging of the 'sponge'.
- I have fallen in love with making bread these past few months, and this is the best recipe I have have did, by far. I have made at least 12 loaves with this, and every time I make it, my friends devour it instantly. I have modified it a little, though. I found the original recipe to be too dry for my tastes when it came out of the over, so I tripled the olive oil, and it came out moist and delicious. Add more oil to the recipe and you're in great shape. I love this bread! It was a little involved as far as prep time but it was easy, GOOD, and tasted just like what we had eaten in Florence! I will make it again. For 15 people I made 6 loaves with enough left over for dinner the next night.
CIABATTA (AN ITALIAN BREAD)
I love using ciabatta to make feta and tomato sandwiches - it's a good, sturdy bread and the porous texture is great for juicy sandwiches. Making ciabatta sounds tricky, but it's really quite easy - just remember to keep the dough wet! Rising times are not included.
Provided by evelynathens
Categories Yeast Breads
Time 50m
Yield 3 loaves, 12 serving(s)
Number Of Ingredients 10
Steps:
- Sponge: In a mixer bowl, add the yeast to the water, allow to stand for 3-4 minutes, stirring gently. Sift the flour and add to the yeast. Combine ingredients well, cover and let stand at room temperature for 12 hours.
- Dough: Add the yeast to the milk, stir and let it stand 3-4 minutes to be sure the yeast is working (it should foam up).
- Add the yeast mixture, water and oil to the sponge and mix with a dough hook.
- Add 2 cups of flour and the salt and knead for 2 minutes at low speed. Add the remaining flour slowly and knead for 3 more minutes, adding more water, until the dough begins to pull from the sides of the bowl.
- The dough should be quite soft and wet - a lot like a thick mud - this is why it cannot be kneaded by hand. Add the last of the flour slowly. Add a little more water, if necessary. (You may have to stop the mixer to scrape the sides of the bowl once or twice. As the dough kneads, you will see it turn from a puddle of mud to a sticky dough with long, long strings of gluten forming and stretching from the sides of the bowl to the ball of dough on the hook).
- Cover or place in a large, oiled bowl and let rise in a warm place for about 1 to 1 1/2 hours or until TRIPLED in size and bubbly.
- Get three baking sheets and sprinkle them with flour. Take a spatula and carefully spoon out a third of the still very sticky dough onto each. Try not to deflate the dough too much, although it will deflate some, you can't really help it.
- Since ciabatta means slipper in Italian, try to make each loaf the length of a man's shoe. If you spoon the dough out to one edge, and sort of use your spatula to guide it in a ribbon down the baking sheet you can preserve the light strands or striations in the dough, which will look nice when it's proofed and baked. The loaves will probably be about an inch thick. If you want to give them a nicer shape, flour your hands lightly and neaten up the edges into an oblong. Think shoe, not loaf! Think rustic - don't make the loaves overly neat and perfect, you want a rustic look. Flour your hands again and very gently pat the tops of the loaves to flour them, or sprinkle them with flour if you're afraid of smushing them.
- The dough will still be like glue at this point, so don't even try to handle it much. It's a mess, and that's the way it needs to be. Let them proof for 30-40 minutes, or until a little less than double.
- Preheat oven to 220°C/425°F.
- Bake the bread for 25-30 minutes (22-25 minutes if using stones or tiles) or until bread just begins to turn light golden-brown. During the first 10 minutes, brush or spray the bread lightly with water twice (spraying is faster - you don't want the heat escaping from the oven).
- Enjoy!
BAKED OYSTERS ITALIAN-STYLE WITH CIABATTA CROUTON

Provided by Food Network
Categories main-dish
Time 40m
Yield 4 to 6 servings
Number Of Ingredients 18
Steps:
- For the croutons: In a small saucepan, over low heat, gently cook garlic in oil and wine until tender and golden. Remove garlic cloves and place in a food processor. To the juices in the pan, add enough olive oil to give you 1/4 cup of liquid. Add white beans, sherry vinegar, and lemon juice to the food processor and puree. With the motor running, add in garlic/olive oil mixture. Remove from processor and stir in crispy pancetta, salt, pepper, and a sprinkle of red pepper flakes. Spread mixture on bread slices and broil or toast in a hot oven until heated and slightly bubbly.
- For the oysters: Preheat oven to 400 degrees F.
- Put oysters into a bowl and check for bits of shell. Butter the bottom of an 8 or 9-inch pie pan and place oysters in pan. Mix the bread crumbs with all remaining ingredients and distribute evenly over the oysters, patting a little. Place pan in the hot oven and bake for about six to eight minutes or until crumbs are brown and bubbling. Remove from oven and serve immediately.
- To serve: Mound a serving of oysters attractively on each plate and flank with two croutons.
ITALIAN CIABATTA
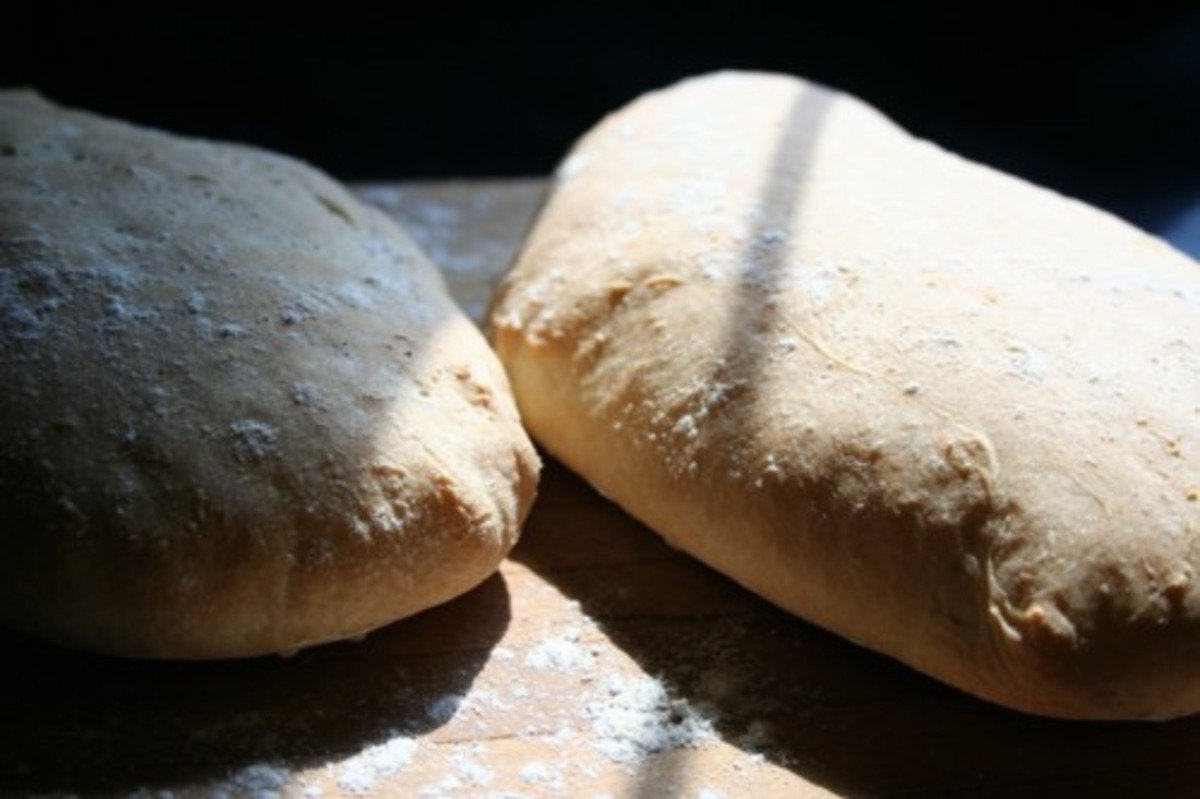
This recipe produces an extremely light, air pocket-riddled loaf, wonderful for dunking in soup or splitting lengthwise, to make a sandwich. The bread begins with an overnight biga (starter), which improves both this simple loaf's texture, and its taste.. The use of a biga will also increase the loaf's shelf life. I found this recipe on King Arthur Flour's site while researching baking with poolish and biga (starters). Time includes prefermentation and rise. NOTE: I experimented and baked one loaf (the one on the right in photo) as directed and the other (loaf on the left) I baked it covered in a Romanetopf Clay Pot. Flavor was very similar but definitely preferred the crust of the loaf that was baked in the clay pot.
Provided by Galley Wench
Categories Yeast Breads
Time 15h45m
Yield 2 loaves
Number Of Ingredients 10
Steps:
- BIGA (Italian Starter):.
- Mix the biga ingredients, in a small bowl until well combinedL.
- Cover the bowl with plastic wrap and allow to rest for up to 15 hours.
- It will expand and become bubbly so leave room in the bowl for it to expand.
- CIABATTA DOUGH:.
- Place all of the dough ingredients together with the biga into the bowl of your mixer or bread pan of your bread machine.
- Beat at medium speed (mixer) using the flat.beater (not dough hook), for 5-8 minutes.
- The dough will never completely clear the sides of the bowl, though it'll begin to acquire some shape. The dough will be very wet.
- Cover the bowl with plastic wrap, and allow the dough to rise for 1-1 1/2 hours; it will get very puffy.
- Midway through the rising period, gently deflate the dough and turn it over in the bowl; this will help it rise, and will also strengthen its gluten, making it easier to shape.
- (Note: If using the dough cycle on bread mahine, check the consistency after 10 minutes (it should be very tacky, but should be holding its shape somewhat), adding more flour or water s needed. Midway through the rising period, gently deflate the dough and turn it over in the bowl; this will help it rise, and will also strengthen its gluten, making it easier to shape. Allow the dough to rest an additional 30 minutes after the dough cycle ends).
- Which ever method you use. your dough will be wet and sticky, but don't worry, it's suppose to look like that.
- Transfer the dough to a well-oiled work surface.
- Lightly grease a large cookie sheet, and your hands.
- Using a bench knife or your fingers, divide the dough in half.
- Handling the dough gently,; stretch it into a log about10-inches long, and place it on the baking sheet.
- Flatten the log with your fingers till it's about is about 10 inches long and 4-5 inches wide.
- Repeat with the remaining piece of dough.
- Lightly cover the dough with heavily oiled plastic wrap, and allow it to rise for 1 hour.
- Oil your fingers, and gently poke deep holes all over the dough.
- Re-oil the plastic wrap, re-cover the dough, and allow it to rise for an additional hour.
- At this point, the dough will be very puffy; it should jiggle like gelatin when you very gently shake it.
- Preheat oven to 425 degrees.
- Spray the loaves very heavily with water, and dust them lightly with flour (if desired).
- Bake for 25-30 minutes, or until they're golden brown.
- Turn off the oven, remove the ciabatta from the baking sheet, and return them to the oven, propping the oven door open a couple of inches.
- Allow the ciabatta to cool completely in the oven; this will give them a very crisp crust.
- Your bread should have large, irregular holes, ideal for trapping the olive oil/balsamic drizzle.
Nutrition Facts : Calories 830.9, Fat 15.5, SaturatedFat 2.2, Cholesterol 0.8, Sodium 1772.4, Carbohydrate 148.1, Fiber 5.6, Sugar 4.5, Protein 21.7
Tips:
- To get the best flavor, use a high-quality olive oil that is fresh and flavorful. You can find great olive oil at specialty food stores or online. - Make sure your water is warm enough to activate the yeast. If the water is too cold, the yeast will not activate and your dough will not rise. - If you don't have a stand mixer, you can make the dough by hand. Just be sure to knead it for at least 10 minutes, or until it is smooth and elastic. - Let the dough rise in a warm place until it has doubled in size. This will take about 1-2 hours. - When shaping the dough, be gentle and don't overwork it. Overworking the dough will make it tough. - Bake the bread in a preheated oven. This will help the bread to rise evenly and get a nice crust. - Let the bread cool completely before slicing it. This will help the bread to keep its shape and flavor.
Conclusion:
Ciabatta bread is a delicious and versatile bread that can be used for a variety of dishes. It is easy to make at home, and it is a great way to use up leftover bread. Whether you are making it for a special occasion or just for a quick snack, ciabatta bread is sure to please everyone.
Are you curently on diet or you just want to control your food's nutritions, ingredients? We will help you find recipes by cooking method, nutrition, ingredients...
Check it out »
#course #cuisine #healthy #breads #european #italian #dietary #low-cholesterol #low-saturated-fat #yeast #low-in-something
You'll also love


