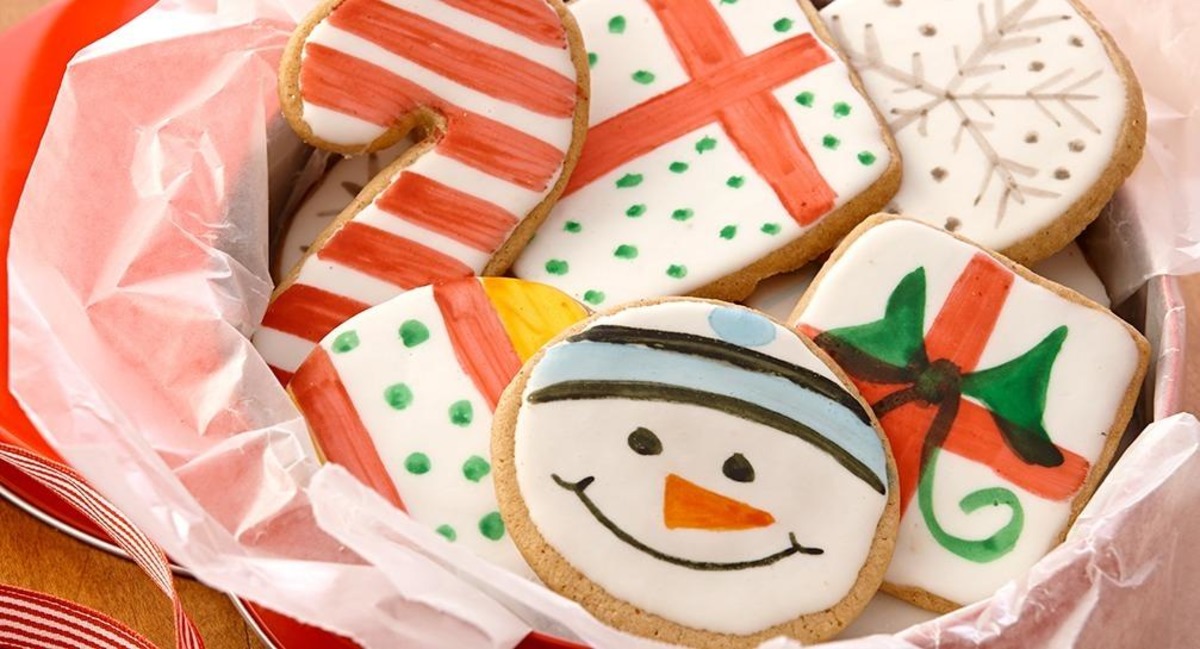
Best 2 Holiday Painted Cookies Recipes


Indulge in the festive spirit with our delightful Painted Holiday Cookies, a collection of delectable treats that will add a touch of charm to your holiday celebrations. Embark on a culinary journey with our three unique recipes, meticulously crafted to tantalize your taste buds and impress your loved ones. Get ready to create captivating Candy Cane Cookies, mesmerizing Gingerbread Men, and enchanting Christmas Tree Cookies, each adorned with vibrant colors and intricate designs that capture the magic of the season. These cookies are not just a feast for the eyes; they are an explosion of flavors that will leave you craving more.
**Candy Cane Cookies:**
These classic Christmas treats are transformed into edible art with their vibrant red and white swirls. The crisp and buttery cookie base provides the perfect canvas for intricate candy cane designs, giving you a delightful crunch with every bite.
**Gingerbread Men:**
Experience the timeless charm of gingerbread cookies, adorned with intricate details and a sweet, spicy kick. The warm and cozy flavors of ginger, cinnamon, and nutmeg fill your kitchen as these little men bake, creating a festive atmosphere.
**Christmas Tree Cookies:**
Celebrate the joy of the season with these enchanting Christmas tree cookies. The vibrant green frosting and shimmering sprinkles evoke the beauty of a snow-covered evergreen. Each bite offers a delightful balance of sweetness and a hint of piney flavor.
HOLIDAY PAINTED COOKIES

My family has been making these for years. The kids love painting them, and the shiny cookies make great edible ornaments for home or gifting. Ordinary sugar or butter cookies tend to spread too much, and the chilling time is essential. If they still spread too much, try chilling the painted cookies for 30 min before baking.
Provided by mary134e
Categories Dessert
Time 2h38m
Yield 36-48 3-4 dozen cookies, 18-24 serving(s)
Number Of Ingredients 11
Steps:
- For cookies: in a large bowl combine butter with sugar, then egg whites, then vanilla extract; beat using an electric mixer on high speed until light and fluffy.
- In another bowl combine the flour with baking powder, mace and salt; gradually stir into the butter mixture until well blended.
- Divide dough in half, cover with plastic wrap and chill for 2 hours.
- Set oven to 400°F Line cookie sheets with parchment paper (do not grease cookie sheets use parchment paper or silpat liner only).
- On a very lightly floured surface roll out the dough into about 1/4-inch thickness. Cut into desired shapes using cookie cutters. (For children, place each cookie on parchment for painting.).
- For the paint: blend egg yolks and water (one yolk to one teaspoon of water if you need more colors) to a smooth consistency. Divide into as many separate bowls as you wish for different colors. Add in food coloring until desired intensity is achieved.
- Paint the cookies using one brush for each color (I use children's watercolor type brushes).
- Carefully move painted cookies and place them 2-inches apart on lined cookie sheet. (Unless you painted them on parchment, then just transfer the parchment to the pan.) Bake 5-8 minutes, until just browned on the edges.
- Remove cookies to wire racks to cool completely.
- Note: to make cookies into ornaments, use a drinking straw to punch a hole near the top center of the cookie before baking, leaving enough room to insure the integrity of the cookie. Thread a ribbon through finished cookie to make a loop for hanging.
Nutrition Facts : Calories 231.4, Fat 11.4, SaturatedFat 6.8, Cholesterol 64, Sodium 179.2, Carbohydrate 28.6, Fiber 0.6, Sugar 11.2, Protein 3.8
HOLIDAY PAINTED COOKIES
Make a quick and easy glaze for cookies by warming canned white frosting in the microwave. Then paint colorful designs on the cookie shapes using Flavor Paints - a fragrant mix of vanilla or lemon extract and food color.
Provided by McCormick Kitchens
Categories Dessert
Time 55m
Yield 24 serving(s)
Number Of Ingredients 10
Steps:
- Mix flour, baking soda, cinnamon, nutmeg and salt in medium bowl. Set aside. Beat sugar and butter in large bowl with electric mixer on medium speed until light and fluffy. Add egg and vanilla; mix well. Gradually stir in flour mixture on low speed until well mixed. Refrigerate 2 hours or until firm.
- Preheat oven to 375°F. Roll dough on generously floured surface to 1/4-inch thickness. Cut out shapes with holiday cookie cutters. Place on ungreased baking sheets.
- Bake 8 to 10 minutes or until lightly browned. Cool on baking sheets 1 minute. Remove to wire racks; cool completely.
- Spoon 1 container of the frosting into medium microwavable bowl. Microwave on HIGH 20 to 30 seconds, stirring every 10 seconds. (Frosting should be a pourable consistency.) Dip tops of cookies into frosting. Microwave remaining container of frosting as needed. Place frosted cookies on wire rack set over foil-covered baking sheet. (The baking sheet will catch drips.) Let stand 10 minutes or until frosting is dried.
- Prepare desired colors of Holiday Flavor Paints (see tip). Using small clean paint brushes, paint designs on cookies.
Nutrition Facts : Calories 313.4, Fat 14.1, SaturatedFat 6.1, Cholesterol 28.1, Sodium 217.1, Carbohydrate 45.4, Fiber 0.3, Sugar 34.3, Protein 1.6
Tips:
- Use a toothpick or a small paintbrush to apply the edible paint or food coloring.
- Let each layer of paint dry completely before adding the next layer.
- Use a variety of colors to create different designs.
- If you make a mistake, simply wipe it off with a damp cloth and start over.
- Have fun and be creative!
Conclusion:
Holiday painted cookies are a fun and festive way to celebrate the season. They are also a great way to get creative and express your artistic side. With a little practice, you can create beautiful and delicious cookies that will impress your friends and family. So grab your supplies and get started!
Are you curently on diet or you just want to control your food's nutritions, ingredients? We will help you find recipes by cooking method, nutrition, ingredients...
Check it out »
You'll also love