Best 7 Fried Shallot Or Garlic Flakes Recipes


Crispy fried shallots and garlic flakes are versatile pantry staples that add a delicious savory crunch to any dish. Made with a simple process of thinly slicing shallots or garlic and frying them in hot oil until golden brown, these crispy bits are a flavorful addition to everything from salads and soups to stir-fries and pasta dishes. This article provides two easy recipes for making fried shallots and garlic flakes at home, along with tips for achieving the perfect crispy texture and storing them for later use. Whether you're looking to elevate your everyday meals or impress your friends at your next gathering, these recipes have you covered. Discover the secrets to making the crispiest shallots and garlic flakes that will transform your cooking.
Check out the recipes below so you can choose the best recipe for yourself!
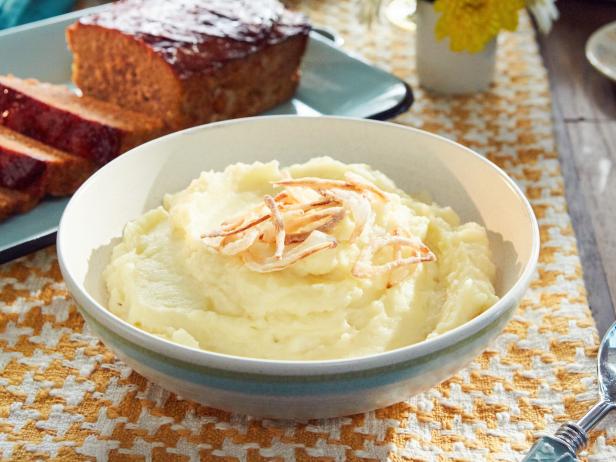
GARLIC MASHED POTATOES WITH CRISPY FRIED SHALLOTS
Provided by Food Network
Categories side-dish
Time 1h15m
Yield 6 to 8 servings
Number Of Ingredients 9
Steps:
- Put the potatoes in a large saucepan and fill with water to cover by 1 inch. Salt the water until it tastes salty. Bring to a boil over medium heat and cook until potatoes are tender when pierced with the tip of a knife, 25 to 30 minutes. Drain in a colander, shaking off the excess water. Return the potatoes to the pot.
- Combine the clarified butter and garlic in a small saucepan over medium-low heat. Gently roast until the garlic is soft and lightly golden, taking care not to let the cloves brown too much, 10 to 15 minutes. Add the milk, bring to a simmer over medium heat and then remove the pan from the heat. With a slotted spoon, transfer the garlic cloves to the drained potatoes.
- Break down the potatoes and roasted garlic slightly using a potato masher. Pour in the hot milk-butter mixture and mash until combined and smooth. Season to taste.
- Heat 1 inch of oil to 350 degrees F in a high-sided pan.
- In a small bowl, soak the sliced shallots in the buttermilk. Place the rice flour in a medium bowl and season with salt and pepper. Using tongs, transfer the shallots from the buttermilk to the rice flour and toss to coat. Fry the shallots in batches until just golden brown, 2 to 3 minutes. With a slotted spoon or spider, remove to a paper-towel-lined plate to drain.
- To serve, mound the mashed potatoes in a serving bowl and sprinkle with the fried shallots.
CRISPY SHALLOTS AND GARLIC
This gently-fried topping takes a little patience, but leaves you with sweet, aromatic, crunchy bits that will elevate salads, sandwiches, pasta or noodles. And the oil you fry it in also takes on terrific flavor - also great for drizzling on most anything you can think of.
Provided by Francis Lam
Categories vegetables
Time 1h
Yield 1 1/2 cups fried shallots, plus 2 cups infused oil
Number Of Ingredients 4
Steps:
- Add the shallots and oil to a large saucepan. Cook over high heat, stirring occasionally, until the oil bubbles intensely, about 7 minutes; turn heat to medium-low to maintain a spirited simmer. 6 minutes later, add the garlic. Cook, stirring often, and more frequently as it darkens, until the shallots turn from sticky to fluffy and medium golden brown, 20 to 25 minutes later.
- Strain, keeping the oil, and drain the shallots and garlic in one layer on a paper-towel-lined baking sheet. Season with salt, and let cool until crisp. Fried chips will hold in an airtight container for 3 days, or for 2 months in the refrigerator. The oil, which is great for dressings or drizzling, holds for 2 months in the refrigerator.
Nutrition Facts : @context http, Calories 330, UnsaturatedFat 29 grams, Carbohydrate 11 grams, Fat 32 grams, Fiber 2 grams, Protein 2 grams, SaturatedFat 2 grams, Sodium 230 milligrams, Sugar 5 grams, TransFat 0 grams
FRIED SHALLOT OR GARLIC FLAKES

These are a very crisp and tasty topping or addition to everything from soups and salads to curries and stir-fries. You can find these commercially prepared in Asian markets, but you can't beat the taste of freshly homemade. I love them with seafood (trying serving crab over a bed of garlic flakes!)
Provided by GeeWhiz
Categories Vegetable
Time 13m
Yield 1/2 cup, 2-4 serving(s)
Number Of Ingredients 2
Steps:
- In a frying pan over medium heat, pour in peanut or vegetable oil to a depth of 1/2 inch.
- When the oil is moderately-hot (about 325 degrees), add the shallot or garlic slices.
- Fry slowly, stirring, just until golden brown, 2 to 3 minutes.
- Using a slotted spoon, transfer the slices to paper towels to drain.
- Let cool, then store the flakes in an airtight container at room temperature for up to several weeks.
Nutrition Facts : Calories 57.6, Fat 0.1, Sodium 9.6, Carbohydrate 13.4, Protein 2
GARLIC-SHALLOT CRUNCH
In Southeast Asian cooking, crispy fried shallots and garlic add irresistible crunch and a subtle toasted sweetness to everything from curries and noodles to refreshing herb- laden salads. I like them so much and end up wanting them on everything, so making a big batch is the way to go for me. This recipe requires more knife work than any other in my book. I apologize for that, but know that the payoff is worth it. Also, once the shallots and garlic are sliced, the hard part is over. These get crunchier and cook faster if the shallot and garlic are sliced evenly and as thin as possible. If you have a mandoline, use it here. It's not totally necessary, but it makes for easier and faster work. If you're scared of the sharp blade, use a dish towel to hold on to whatever you're slicing or wear a rubber glove (the kind you might wear to wash dishes). Take. Your. Time. You'll be left with a jar of intensely flavorful oil to boot. Use that to sear fish or make dressing.
Provided by Food Network
Categories condiment
Time 40m
Yield 1 cup crunchies and 3/4 cup tasty oil
Number Of Ingredients 4
Steps:
- Combine shallots and garlic in a small pot. Add enough vegetable oil just to cover and place over medium heat. When shallots and garlic are sizzling vigorously, about 4 minutes in, reduce the heat to low. Continue to cook, stirring occasionally, until golden brown, 15 to 20 minutes. Use a slotted spoon to transfer shallots and garlic to a paper towel-lined plate and season with a little salt. Let oil cool, then store in an airtight container in the fridge for up to 1 week. Crunchies will keep in an airtight container at room temperature for about 1 month.
OVEN DRIED ONION / GARLIC FLAKES
This is a good way to use up extra onions/garlic and store them for future uses. Be sure to store in cool, dry places at room temperature in AIRTIGHT containers out of sunlight. With no moisture to be allowed to enter the container...ever ever. FYI-Temperatures too high will result in the onions being cooked instead of dried and when overdried will lose its flavor and nutritive value. Onions/garlic that are underdried will spoil so be sure they are crisp when removed. 1 small clove = 1/8 teaspoon garlic powder 1/2 teaspoon dried garlic slices. 1 small or 1/4 cup chopped,fresh onion = 1 tablespoon dried onion.
Provided by Rita1652
Categories Onions
Time 8h15m
Yield 40-80 serving(s)
Number Of Ingredients 3
Steps:
- Preheat the oven to 140 degrees Fahrenheit (71 degrees Celsius), and then add the loaded trays. Prop the door open at least 4 inches.
- Dry onions/garlic in single layers on trays. Depending of drying conditions, drying times make take longer.
- Place on trays that are at least 1 1/2 inches narrower than the inside of the oven to allow for air circulation.
- Allow at least 2 1/2 inches between trays and 3 inches of free space at the top of the oven. Be sure there is lots of air space between the pieces of onions/garlic and placed in a single layers.
- Optional but good to do. Place a fan outside the oven in such a position that air is directed through the opening and across the oven.
- Change the position of the fan frequently during drying to vary the circulation of the air.
- Maintain the temperature at 140 degrees Fahrenheit (60 degrees Celsius). It takes less heat to keep the temperature at 140 degrees Fahrenheit as drying progresses, so watch the temperature carefully at the end of the drying. Check the onions/garlic often, and turn the trays frequently. At the start of the drying process, there is worry of scorching, but when nearly dry, the product may scorch very easily. Even slight scorching destroys the flavor and may lower the nutritive value, so be careful not to allow the temperature to rise above 140 degrees Fahrenheit, especially during the end of drying.
- The onions will be brittle when dry and will crumble when crushed.
- This should take between 6 and 10 hours.
SAUTEED ESCAROLE WITH FRIED SHALLOTS
Escarole, a juicy member of the chicory family, is popular in southern Italy. Like other pot greens, it's at its best in winter.
Provided by Martha Stewart
Categories Food & Cooking Healthy Recipes Gluten-Free Recipes
Time 15m
Number Of Ingredients 7
Steps:
- Heat 1/4 inch vegetable oil in a small saute pan over medium heat until shimmering. Working in 3 batches, fry shallots, stirring occasionally, until golden brown, about 2 minutes. Transfer to a paper-towel-lined plate to drain, and season with 1/4 teaspoon salt.
- Heat olive oil and garlic in a large saute pan over medium heat. Cook, stirring occasionally, until garlic turns golden brown, about 5 minutes. Remove and discard garlic. Add red-pepper flakes to pan, and cook 15 seconds. Fill pan with escarole, and cook, carefully stirring and adding more escarole, a handful at a time, as space allows. Once all of the escarole is in the pan, season with remaining teaspoon salt, and stir just until escarole begins to wilt and turn a vibrant green. Remove from heat, transfer to a serving dish, and top with fried shallots.
SPAGHETTI AGLIO E OLIO E FRIED SHALLOT

Adding homemade or store-bought fried shallots to classic garlic spaghetti gives it extra caramelized sweetness and depth of flavor, along with crunch. Add the shallots in two stages so that some of them soften and give their flavor to the sauce, and the rest remain crispy. Cooking the spaghetti in a relatively small amount of water concentrates its starch, making it easier to form a creamy, emulsified sauce. If you can't have your pasta without cheese, feel free to grate some Parm or pecorino on top at the table.
Provided by J. Kenji López-Alt
Categories pastas, main course
Time 25m
Yield 4 servings
Number Of Ingredients 8
Steps:
- If using homemade shallots, skip to Step 2. If using store-bought shallots, toast them in a dry 12-inch skillet over medium heat until deep caramel brown and aromatic, about 3 minutes. Season generously with salt and transfer to a bowl.
- Smash the garlic cloves with the side of a knife and roughly mince. Set aside. Add a couple of inches of water and a large pinch of salt to the skillet, and bring to a rolling boil over high heat. Add the pasta and cook, stirring occasionally, until just shy of al dente (about a minute less than the package directions).
- Meanwhile, combine ¼ cup oil, the minced garlic, red-pepper flakes and a large pinch of salt in a large saucepan or skillet. Heat, stirring frequently, over medium-low until the garlic is very aromatic and just starting to turn pale gold in parts, about 5 minutes. It should maintain a very gentle sizzle the whole time it is cooking (adjust heat as necessary). When the garlic is done, shut off the heat, then, using a ladle or spoon, add a large splash of the pasta water to the pan with oil to halt the cooking. Add half the toasted shallots and stir.
- When the pasta is just shy of al dente, using tongs, transfer it to the pan with the garlic oil, allowing any liquid that clings to it to come along; reserve a bit of the pasta water. Add the remaining 2 tablespoons olive oil. Return the pan with the pasta and garlic oil to high heat, and cook, stirring and tossing constantly, until a creamy, emulsified sauce coats the pasta. (If the sauce looks watery, continue tossing and cooking. If it looks broken and oily, add some more pasta water a few tablespoons at a time and continue cooking until it emulsifies.) Stir in the parsley and chives (if using), season to taste with more salt (it can take quite a bit of salt), transfer to a serving bowl, sprinkle with reserved toasted fried shallots and serve.
Tips:
- Use fresh shallots or garlic for the best flavor. If using shallots, trim off the root end and any papery skin. If using garlic, remove the papery skin and the green sprout in the center.
- Slice the shallots or garlic thinly. This will help them to fry evenly and quickly.
- Heat the oil over medium-high heat. If the oil is not hot enough, the shallots or garlic will not fry properly and will become soggy.
- Add the shallots or garlic to the hot oil and cook, stirring constantly, until they are golden brown and crispy. This should take about 2-3 minutes.
- Remove the shallots or garlic from the oil and drain them on a paper towel-lined plate.
- Season the shallots or garlic with salt and pepper, or other desired seasonings.
- Use the fried shallots or garlic as a topping for soups, salads, pasta dishes, or other recipes.
Conclusion:
Fried shallots or garlic are a delicious and versatile ingredient that can be used to add flavor and texture to a variety of dishes. They are easy to make and can be stored in an airtight container for up to a week. So next time you're looking for a way to add some extra flavor to your dish, reach for some fried shallots or garlic. You won't be disappointed!
Are you curently on diet or you just want to control your food's nutritions, ingredients? We will help you find recipes by cooking method, nutrition, ingredients...
Check it out »
You'll also love