Best 6 Four Flavor Mochi Cheesecakes Recipes


Indulge in a delightful culinary journey with our curated collection of Four-Flavor Mochi Cheesecakes. These exquisite treats combine the delicate chewiness of mochi with the creamy richness of cheesecake, resulting in a symphony of textures and flavors that will tantalize your taste buds.
Embark on a flavor adventure with four distinct variations: the classic Original Mochi Cheesecake, a timeless favorite with its smooth, velvety texture and subtle sweetness. The Chocolate Mochi Cheesecake captivates with its decadent chocolate ganache topping, while the Matcha Mochi Cheesecake offers a unique twist with its vibrant green hue and earthy, slightly bitter notes. Last but not least, the Ube Mochi Cheesecake enchants with its vibrant purple color and sweet, nutty flavor.
Each recipe is meticulously crafted with step-by-step instructions, ensuring that even novice bakers can achieve picture-perfect results. Whether you prefer the classic simplicity of the Original Mochi Cheesecake or the indulgent decadence of the Chocolate Mochi Cheesecake, these recipes cater to diverse preferences and skill levels.
So, gather your ingredients, preheat your oven, and embark on a delightful baking journey. Create unforgettable moments with your loved ones as you savor these Four-Flavor Mochi Cheesecakes, each bite a testament to the culinary artistry that lies within your kitchen.
4-FLAVOR CHEESECAKE RECIPE BY TASTY
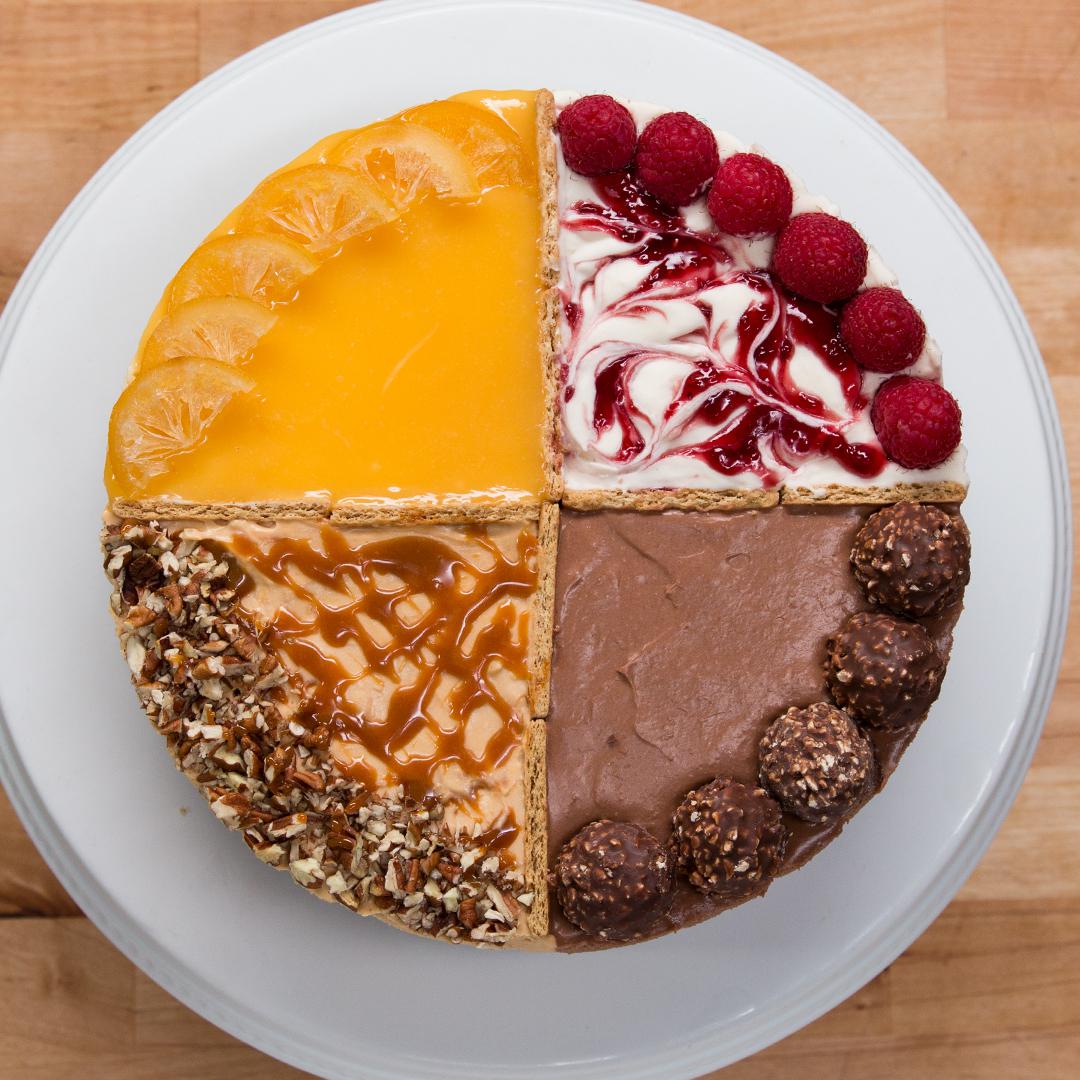
Here's what you need: graham crackers, sugar, unsalted butter, gelatin powder, water, cream cheese, sugar, heavy whipping cream, vanilla extract, lemon curd, dulce de leche, chocolate hazelnut spread, raspberry jam, fresh raspberries, chocolate hazelnut truffles, pecans, candied lemon slice
Provided by Kiano Moju
Categories Desserts
Yield 8 servings
Number Of Ingredients 17
Steps:
- In a large bowl, mix together the graham cracker crumbs, sugar, and melted butter until combined.
- Pour the crust mixture into a 9-inch (23 cm) springform cake pan. Press crumbs down firmly with the bottom of a small ramekin or glass to form an even base.
- Carefully break the remaining graham crackers in half, so that you have 8 squares.
- Push the graham crackers into the crust with the split line facing upwards to form an X shape, dividing the crust into four equal sections.
- Press down on the crust one more time to ensure the graham crackers are secure. Cover and chill in the freezer for at least 10 minutes while preparing the fillings.
- In a small bowl, dissolve the gelatin in the water. Set aside to bloom.
- In a large bowl, beat together the cream cheese and sugar until smooth.
- Add 2½ cups (720 ml) whipping cream and beat until the batter is light and fluffy.
- Warm the gelatin in the microwave for about 15 seconds so that it's fluid, and incorporate into the batter.
- Divide the cheesecake batter evenly between 4 medium bowls.
- In the first bowl, whisk in the vanilla extract and remaining whipping cream.
- In the second bowl, whisk in ⅓ cup (80 grams) lemon curd.
- In the third bowl, whisk in the dulce de leche.
- In the fourth bowl, whisk in the chocolate hazelnut spread.
- To assemble the cheesecake, slowly pour the contents of bowl #1 into a quarter of the pan. Repeat with remaining flavors. Use a spatula to smooth the tops.
- Carefully dollop the raspberry jam in small circles on top of the vanilla cheesecake. Use a toothpick or knife to carefully swirl it into the filling. Garnish the outer border with fresh raspberries.
- Garnish the outer border of the chocolate hazelnut cheesecake with the chocolate hazelnut truffles.
- Garnish the outer border of the dulce de leche cheesecake with the chopped pecans and drizzle with dulce de leche
- Pour the remaining lemon curd on top of the lemon cheesecake and smooth with an offset spatula or spoon. Garnish the outer border with candied lemon slices.
- Cover the top of the pan tightly with plastic wrap and chill for 4 hours or overnight in the fridge before slicing and serving.
- Enjoy!
Nutrition Facts : Calories 1118 calories, Carbohydrate 69 grams, Fat 95 grams, Fiber 1 gram, Protein 13 grams, Sugar 59 grams
HOMEMADE MOCHI
Mochi, in its many forms, is a New Year's tradition in Japan. It is made with sticky rice and can be either sweet or savory. The great thing about mochi is you can prepare some of it sweet, then present a savory version with the remaining mochi the next day or even later the same night.
Provided by Food Network
Time 1h30m
Yield 4 to 6 servings
Number Of Ingredients 11
Steps:
- For the mochi dough base: Wash the rice gently until the water runs clear, 5 to 8 times, then drain. Cook the rice with 2 1/2 cups water in a rice cooker according to the manufacturer directions for sushi/sweet rice, about 30 minutes.
- Place the cooked rice in a wooden or stone bowl. (I don't recommend stainless steel or plastic bowls, which will make the rice wet or too soft.) Smash the rice with a thick wooden stick or pestle. Use your hands to turn the rice and continue to pound with the stick until it is a smooth and sticky dough, 6 to 8 minutes.
- Portion out 20 to 24 mochi, about 2 tablespoons of dough per portion. Have a small bowl of water nearby to lightly wet hands if the dough is too sticky. Shape each portion into a round patty about 1 1/2 inches thick and dust each side of the mochi with mochiko or potato starch.
- For the mochi toppings: To make a sweet miso sauce, combine the miso, sugar and sake in a small saucepan. Cook over medium heat, stirring occasionally, until the sugar is dissolved, 3 to 5 minutes. Remove from the heat and set aside.
- Heat a grill pan or skillet over medium-high heat. Add your desired number of plain mochi and grill, brushing with soy sauce a couple of times on each side, until the mochi are caramelized, 2 to 3 minutes per side.
- Brush some of the remaining plain mochi (reserve some of them to serve with the sweet toppings) with about 1 tablespoon of the sweet miso sauce and top with a sprinkle of shichimi. To serve the savory mochi, wrap the soy-grilled and sweet miso-glazed mochi in nori and place on a plate or platter.
- For the sweet mochi toppings: Mix the kinako with the sugar in a small bowl. Dip to coat both sides of your desired number of mochi. Top each remaining plain mochi with adzuki paste, then sprinkle with the remaining kinako sugar, if desired. Serve on a plate or platter.
BUTTER MOCHI

Butter mochi is a party staple in Hawaii. Made with mochiko (Japanese sweet rice flour) and coconut milk, the dessert is beloved for its sweet, buttery taste and chewy, pleasingly dense texture. A little goes a long way, so avoid cutting the pieces too big. (You can scale down the recipe, but the measurements for the mochiko and coconut milk are really convenient for a 9-by-13-inch baking pan.) If you'd like to add another layer of coconut, sprinkling the top of the batter with shredded coconut before baking is a lovely touch (but by no means necessary).
Provided by Food Network Kitchen
Categories dessert
Time 2h30m
Yield 18 to 20 servings
Number Of Ingredients 9
Steps:
- Position an oven rack in the middle of the oven and preheat to 350 degrees F. Line the bottom and sides of a 9-by-13-inch baking pan with parchment.
- Whisk together the mochiko, sugar, baking powder and salt in a large bowl.
- Whisk together the milk, vanilla, eggs and coconut milk until smooth in a separate large bowl. (If you have trouble incorporating the coconut milk solids, you can use an electric mixer on medium speed for this step, and the following ones, if you like.) Whisk the milk mixture into the dry ingredients just until combined. Whisk in the melted butter until the batter is smooth.
- Pour the batter into the prepared baking pan and tap the pan on the counter a few times to get rid of any air bubbles. Bake until the butter mochi is set and the top is golden brown, 1 hour to 1 hour 10 minutes. Let cool completely in the pan on a wire rack, about 1 hour.
- Carefully lift the parchment paper out of the pan from both short ends and set the butter mochi on a cutting board. Cut into about twenty 2-by-3-inch rectangles and serve immediately or store in an airtight container for up to 3 days.
CREME FRAICHE CHEESECAKES
Steps:
- Preheat the oven to 375 degrees F.
- To make the crust: In a food processor grind the walnuts and sugar together. Stir in the melted butter, cover and refrigerate for at least 1 hour, and up to 4 days. Using your fingers pack 1 1/2 teaspoons of mixture into small rings or collars 1 1/2 inches in diameter by 2 inches high. Bake for 7 minutes. Let cool slightly before adding filling.
- Reduce the oven temperature to 300 degrees F.
- To make the filling: In an electric mixer, with a whip attachment cream the cream cheese. Mix in the remaining ingredients in order. Pour into baked crust lined collars filling to about 3/8 inch from the top. Bake for 15 to 18 minutes, or until slightly puffed and barely shimmying in the center. Remove from oven and let cool a few minutes if puffed to make room for the creme fraiche topping.
- To make the topping: Blend all ingredients and place 1 tablespoon on top of the each mini cheesecake. With a small off-set spatula or a teaspoon, ease the topping to coat evenly. It will level itself out during baking. Bake at 300 degrees F for 5 minutes. Cool to room temperature, then cover and chill at least 4 hours or up to 2 days. To serve, warm the rings and slip the cheesecakes out of them.
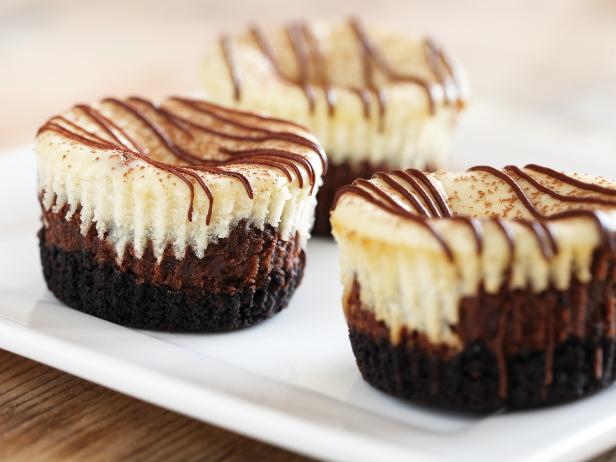
MINI CHOCOLATE CAPPUCCINO HAZELNUT CHEESECAKES
Provided by Food Network
Categories dessert
Time 50m
Yield 12 mini cheesecakes
Number Of Ingredients 9
Steps:
- HEAT oven to 325 degrees F. Line 12 muffin cups with foil bake cups. Stir crushed wafers and melted butter in medium bowl until evenly moistened. Spoon 2 tablespoons crumb mixture into each bake cup. Press onto bottoms and 1/2 inch up sides of bake cups. Chill 15 minutes.
- BEAT cream cheese, sugar and flour in large bowl with electric mixer on medium speed until fluffy. Add eggs and vanilla, beating just until blended. Remove 2 cups cheesecake filling from bowl; set aside. Add 1/2 cup cappuccino hazelnut spread to remaining cheesecake filling, beating until smooth.
- SPOON about 1 1/2 tablespoons cappuccino hazelnut filling into each crust. Top evenly with plain cheesecake filling. (Bake cups will be very full.) Bake 16 to 18 minutes or until filling is set. Cool in pan on wire rack 30 minutes. Cover and chill 1 hour or overnight.
- REMOVE cheesecakes from pan; remove foil bake cups. Sprinkle surface of cheesecakes with cocoa powder. Place remaining 1/4 cup cappuccino hazelnut spread in small heavy-duty resealable plastic bag. Microwave on HIGH 10 to 15 seconds to soften slightly. Cut very small corner off bottom of bag. Drizzle hazelnut spread over cheesecakes.
BUTTER MOCHI
Steps:
- Preheat oven to 325 degrees F. Melt the butter and chocolate. Beat the eggs and vanilla (do not over beat). Sift and fold in the flour, mochi flour, baking powder, and salt to the butter mixture followed by the sugar. Fold in the egg mixture until incorporated. Then fold in coconut flakes. Pour into an oven proof dish or pan and bake in the oven for 15 minutes.
Tips:
- Mise en place: Before starting, ensure all ingredients are measured, prepped, and organized. This will streamline the baking process.
- Quality Ingredients: Use high-quality ingredients to ensure the best flavor. Opt for full-fat cream cheese, real vanilla extract, and fresh citrus zest.
- Cream Cheese at Room Temperature: Bring cream cheese to room temperature before mixing. This helps it blend smoothly, resulting in a creamy and lump-free cheesecake.
- Proper Mixing: Avoid overmixing the cheesecake batter, as this can result in a dense and crumbly texture. Mix only until the ingredients are well combined.
- Water Bath: Baking the cheesecakes in a water bath creates a moist and even cooking environment, preventing cracks and promoting a smooth texture.
- Chilling: After baking, allow the cheesecakes to chill thoroughly in the refrigerator. This sets the cheesecakes, intensifies the flavors, and makes them easier to slice and serve.
Conclusion:
These Four-Flavor Mochi Cheesecakes offer a delightful fusion of Japanese and Western flavors, textures, and techniques. The combination of chewy mochi, creamy cheesecake, and vibrant citrus flavors creates a unique and memorable dessert experience. Whether you prefer the tangy Meyer lemon, sweet orange, refreshing lime, or subtly bitter grapefruit, each cheesecake offers a distinct taste profile that will tantalize your taste buds. With careful preparation, attention to detail, and the use of high-quality ingredients, you can create these exquisite cheesecakes that are not only visually appealing but also burst with flavor. So, embark on this culinary journey and indulge in the delightful symphony of flavors that these Four-Flavor Mochi Cheesecakes have to offer.
Are you curently on diet or you just want to control your food's nutritions, ingredients? We will help you find recipes by cooking method, nutrition, ingredients...
Check it out »