Best 5 Festive Thumbprints Recipes


Indulge in a delightful journey of flavors with our Festive Thumbprints, a vibrant collection of sweet and savory treats perfect for any occasion. From classic favorites to unique flavor combinations, these bite-sized delights are sure to tantalize your taste buds. Embark on a culinary adventure with our Classic Festive Thumbprint Cookies, featuring a buttery shortbread crust filled with velvety raspberry preserves. For a tangy twist, try our Lemon Curd Thumbprints, where a zesty lemon curd filling complements the crumbly shortbread crust.
If you prefer a savory treat, our Spinach and Feta Thumbprints offer a burst of Mediterranean flavors. The flaky pastry crust is filled with a creamy spinach and feta cheese filling, creating a harmonious balance of textures and flavors. For a more decadent experience, our Prosciutto and Gruyère Thumbprints combine the richness of prosciutto with the nutty flavor of Gruyère cheese, enclosed in a crispy pastry shell.
Chocolate lovers will rejoice at our Chocolate Ganache Thumbprints, where a rich chocolate ganache filling is encased in a delicate shortbread crust. For a fruity twist, our Strawberry Thumbprints feature a sweet strawberry filling encased in a flaky pastry crust, creating a perfect balance of tart and sweet.
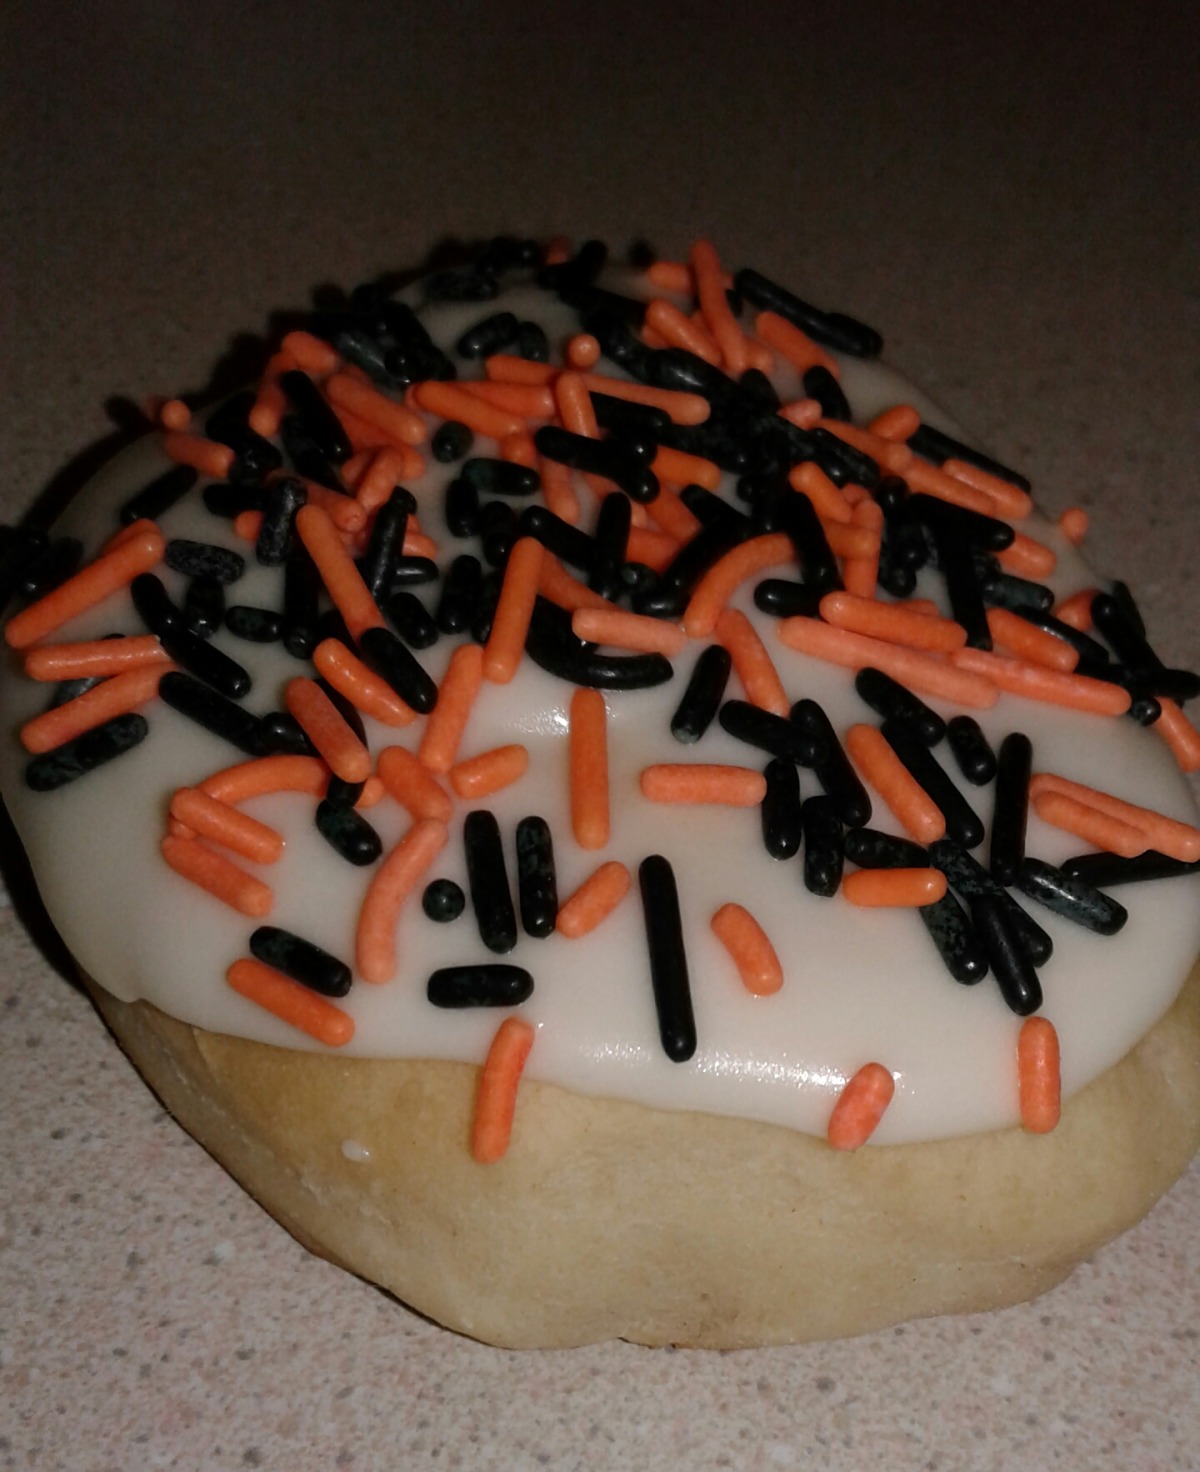
Our Festive Thumbprints are not only delicious but also visually appealing. Decorate them with colorful sprinkles, chocolate chips, or chopped nuts for a festive touch. These bite-sized treats are perfect for parties, potlucks, and holiday gatherings. With their delightful flavors and charming appearance, they are sure to be a hit among family and friends.
PEANUT BUTTER THUMBPRINTS
Steps:
- HEAT oven to 375 degrees F.
- COMBINE brown sugar, peanut butter, shortening, milk and vanilla in bowl of electric mixer; beat at medium speed until well blended. Beat in egg just until blended.
- COMBINE flour, baking soda and salt in medium bowl. Beat into peanut butter mixture at low speed just until blended.
- SHAPE dough into 1-inch balls. Roll in granulated sugar. Place 2 inches apart on ungreased baking sheets.
- BAKE 6 minutes. Immediately press centers of cookies with back of measuring teaspoon. Bake 3 minutes longer or until cookies are set and just beginning to brown. Cool 2 minutes on baking sheet.
- SPOON preserves into center of each cookie. Place on cooling rack to cool completely.
CHOCOLATE PEPPERMINT THUMBPRINTS

Combining chocolate cookies, chocolate peppermint ganache, and crushed candy canes, these chocolate peppermint thumbprints are extra festive and bound to disappear off cookie platters. Chill the shaped dough for at least 2 hours to help guarantee the cookies hold their shape.
Provided by Sally
Categories Desserts
Time 3h
Number Of Ingredients 15
Steps:
- Whisk the flour, cocoa powder, baking soda, and salt together in medium bowl. Set aside.
- In a large bowl using a handheld or stand mixer fitted with a paddle attachment, beat the butter, brown sugar, and 1/3 cup (67g) granulated sugar together on medium-high speed until smooth and creamy, about 2 minutes. Add the egg, vanilla extract, and peppermint extract and beat on high speed until combined, about 1 minute. Scrape down the sides and up the bottom of the bowl and beat again as needed to combine. Pour the dry ingredients into the wet ingredients, add the milk, and mix on low until combined. The cookie dough will be thick.
- Roll balls of dough, a little less than 1 Tablespoon each (about 1 inch balls), and roll each into remaining 1/3 cup (67g) granulated sugar. Place dough balls onto a large lined baking sheet. Using your thumb or the end of a spatula (see post above), make an indent into each cookie. If you find that the balls are cracking when you make an indent, use your hands to push back together. (Some cracks are bound to happen as the cookies expand in the oven- see my photos. No worries there!)
- Chill the shaped cookies for at least 2 hours in the refrigerator or 1 hour in the freezer (or up to 4 days in the refrigerator). Cover them if chilling for longer than 3 hours.
- Preheat oven to 350°F (180°C). Line a baking sheet with parchment paper or a silicone baking mat. Remove chilled and shaped cookies from the refrigerator. Divide between both baking sheets, spacing the cookies about 2-3 inches apart. This recipe yields about 30 cookies, so you'll have a 3rd batch with only a few cookies on the sheet.
- Bake for 12-14 minutes or until the edges are set. The cookies will still look and feel a little soft. Remove from the oven. The indents will have lost some shape or have puffed up, so use the end of a spatula to make an indent again into the warm cookies.
- Allow cookies to cool on the baking sheets for 5 minutes, then transfer to a wire rack to cool completely before filling with ganache.
- Place chocolate into a heat-proof bowl. Heat the cream in a small saucepan until it begins to gently simmer. (Do not let it come to a rapid boil- that's too hot!) Pour over chocolate and let it sit for 2-3 minutes to gently soften the chocolate. Slowly stir until completely combined and chocolate has melted. Stir in the peppermint extract. Taste and add another drop if desired. (It's potent so don't go overboard!) Allow to cool for at least 10 minutes before spooning into cookies.
- Spoon 1/2 - 1 teaspoon of ganache into each indentation. I fit about 3/4 teaspoon into each. Sprinkle ganache with crushed candy canes. Ganache will thicken inside the cookies and set on the tops after a few hours, but will still be creamy when you bite into the cookies.
- Cookies stay fresh covered at room temperature for up to 3 days or in the refrigerator for up to 1 week.
BUTTER AND JAM THUMBPRINTS

Provided by Food Network Kitchen
Categories dessert
Time 1h8m
Yield about 24 to 30 cookies
Number Of Ingredients 8
Steps:
- Preheat oven to 350 degrees F. Line 2 baking sheets with parchment paper or silicone mats.
- Whisk the flour, baking powder and salt together in a bowl.
- In another bowl, whip the butter and the sugar with a hand-held mixer until fluffy, about 5 minutes. Beat in the egg and vanilla until just combined. Slowly beat in the dry ingredients in 2 additions, mixing just until incorporated.
- Scoop the dough into 1-inch balls with a cookie or ice cream scoop and roll in sugar. Place about 2-inches apart on the prepared baking sheets. Press a thumbprint into the center of each ball, about 1/2-inch deep. Fill each indentation with about 3/4 teaspoon jam.
- Bake cookies until the edges are golden, about 15 minutes. (For even color, rotate the pans from top to bottom about halfway through baking.) Cool cookies on the baking sheets. Serve.
- Store cookies in a tightly sealed container for up to 5 days.
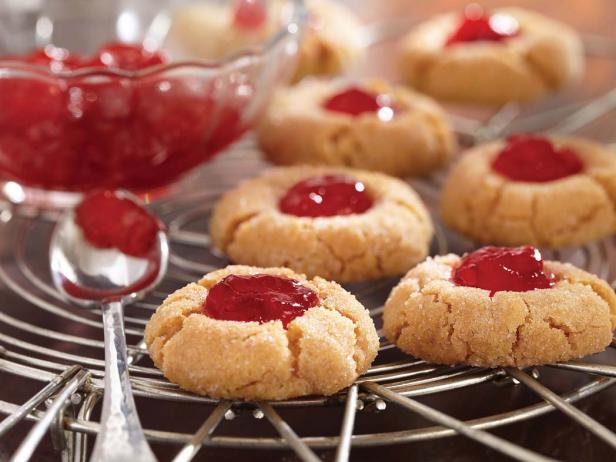
THUMBPRINT COOKIES

They say that good things come in small packages, and these jam-packed Thumbprint Cookies are proof. Fill yours with apricot, raspberry or even mint jelly-whatever suits your palate. You can't go wrong. This Thumbprint Cookies recipe won't let you! It's been tested to perfection. The shortbread-style cookie dough is a breeze to throw together and work with. It also bakes up deliciously, making some of the best Thumbprint Cookies you've ever tasted. It's not too sweet, which allows the jam to shine through. But the best part about these jam-filled cookies has got to be the almonds. Each ball of dough is rolled in finely chopped almonds before baking, which enriches the dough and adds a nubby texture that's truly delightful! So if you've been looking for classic Thumbprint Cookies that taste just like grandma's, search no more-you've found them!
Categories Dessert
Time 1h20m
Yield 36
Number Of Ingredients 9
Steps:
- Heat oven to 350°F.
- Mix brown sugar, shortening, butter, vanilla and egg yolk in medium bowl. Stir in flour and salt until dough holds together.
- Shape dough into 1-inch balls. Beat egg white slightly. Dip each ball into egg white. Roll in nuts. Place about 1 inch apart on ungreased cookie sheet. Press thumb deeply in center of each.
- Bake about 10 minutes or until light brown. Immediately remove from cookie sheet to wire rack. Cool completely, about 30 minutes. Fill thumbprints with jelly.
Nutrition Facts : Calories 85, Carbohydrate 9 g, Cholesterol 10 mg, Fat 1, Fiber 0 g, Protein 1 g, SaturatedFat 1 g, ServingSize 1 Cookie, Sodium 30 mg
THUMBPRINTS WITH DULCE DE LECHE, NUTELLA OR JAM

Thumbprints are the simplest of cookies, but these are packed with flavor from freshly toasted nuts, each paired with its own filling: pecans with dulce de leche (or homemade caramel sauce, if you have some on hand), hazelnuts with Nutella, or pistachios with a festive pool of red currant jelly in the center. Choose a single combination, or make a batch of each. These cookies benefit from forming the thumbprint halfway through baking, but if you can't take the heat, let the dough soften a bit and then press the thumbprints into the dough before baking.
Provided by Susan Spungen
Categories snack, cookies and bars, dessert
Time 1h
Yield 3 dozen cookies
Number Of Ingredients 9
Steps:
- Heat oven to 350 degrees. Spread the hazelnuts or pecans out on a small baking sheet and cook in oven, shaking several times, until toasted, 10 to 12 minutes. If using hazelnuts, transfer to a bowl to cool, cover with a folded dish towel, then rub off the skins. (No need to toast the pistachios.)
- Once cooled, transfer the nuts to a food processor, preferably a mini one. Add 2 teaspoons flour and pulse just until nuts are finely ground, being careful not to overprocess.
- In the bowl of a stand mixer fitted with the paddle attachment, cream together butter and granulated sugar on medium-high speed until light and fluffy, 2 to 3 minutes, scraping bowl as needed. Add egg yolks and vanilla, and beat on medium-high speed until well combined, about 2 minutes, scraping the bowl a few times as needed.
- Add 1/2 cup ground nuts, the salt and the remaining 2 1/4 cups flour; beat on low speed just until combined, then increase speed and beat until dough starts to clump together. Scrape the bowl and fold a few times to make sure everything is well mixed. Wrap dough in plastic wrap, flatten into a disk, and chill until firm, at least 1 hour and up to 3 days.
- Heat oven to 350 degrees. Pinch off small pieces of dough the size of a rounded tablespoon (about 20 grams each) and roll the top half of each one in the remaining ground nuts. Place a few inches apart on parchment- or silicone mat-lined baking sheets. Chill in the freezer until firm, about 10 minutes.
- Bake for 8 minutes, remove from oven and make a thumbprint in each cookie. Bake until golden brown on the bottom, and nuts are looking toasty but not burned, 6 to 8 minutes longer. Let cool a few minutes on the baking sheets and transfer to wire racks to cool further. While the cookies are still a little warm, fill each one with about 1/2 teaspoon of filling, and cool completely. Sprinkle with flaky sea salt. Cookies will keep in an airtight container at room temperature for up to 1 week.
Tips:
- Use high-quality ingredients: Fresh, flavorful ingredients will make your thumbprints taste their best. Look for ripe berries, creamy butter, and pure vanilla extract.
- Chill the dough before baking: This will help the cookies hold their shape and prevent them from spreading too much.
- Make sure the oven is preheated before baking: This will help the cookies bake evenly.
- Don't over-bake the cookies: They should be baked until the edges are just set and the centers are still slightly soft.
- Fill the thumbprints with jam or frosting while they are still warm: This will help the filling set and prevent it from running out.
- Enjoy the cookies fresh out of the oven or store them in an airtight container at room temperature for up to 3 days.
Conclusion:
Festive thumbprint cookies are a delicious and easy-to-make treat that are perfect for any occasion. With endless possibilities for fillings and decorations, they're sure to be a hit with everyone who tries them. So gather your ingredients and preheat your oven, and let's get baking!
Are you curently on diet or you just want to control your food's nutritions, ingredients? We will help you find recipes by cooking method, nutrition, ingredients...
Check it out »
You'll also love