Introducing a culinary journey that combines convenience, healthiness, and delectable flavors – say hello to No-Knead Fridge-Friendly Dough! This innovative bread-making technique transforms the traditional bread-making process into a simple, 5-minute task, allowing you to craft delicious, homemade bread with minimal effort.
From the classic No-Knead Fridge-Friendly Dough recipe, which yields a versatile dough perfect for various bread creations, to the delectable Herb and Cheese Bread that bursts with savory flavors, this collection caters to diverse taste preferences. For those seeking a healthier option, the Whole Wheat No-Knead Bread offers a nutritious alternative packed with fiber and wholesome grains.
If you're craving a taste of Italian cuisine, try your hand at the No-Knead Focaccia, a delectable flatbread that embodies the rustic charm of Italy. And for a sweet treat, indulge in the No-Knead Cinnamon Rolls, featuring a delectable combination of cinnamon sugar filling and a fluffy dough.
With detailed instructions, helpful tips, and inspiring recipe variations, this article empowers you to elevate your bread-making skills and create an array of delicious, homemade breads that will impress your family and friends. So, prepare to embark on a culinary adventure with No-Knead Fridge-Friendly Dough – let's get baking!
ENJOY NO-KNEAD, FRIDGE-FRIENDLY DOUGH HEALTHY BREAD-IN 5 MINUTES
Don't let the long directions throw you - This is so simple. This recipe was in our local paper and I made it today. To quote the article "Spend about 20 minutes making a large batch of refrigerator-friendly, no-knead bread dough that, following a standard rise, can keep up to two weeks.Each day, the desired amount of dough can be removed from the batch, shaped and baked (the basic recipe produces three to four small loaves). Total active time each day you bake is about 5 minutes." This was a HUGE hit with the kids. I love it because it's healthy and oh so easy. I've tried making bread before without great success. This recipe is a keeper. This recipe makes four 1 lb loaves; the dough can be kept in the fridge for 14 days! If you make it, I would love feedback on variations.
Provided by Zenmaria
Categories Yeast Breads
Time 23m
Yield 3-4 small loaves
Number Of Ingredients 5
Steps:
- In a 5-quart bowl, combine the yeast, water and salt. Add all the flour, then use a wooden spoon to mix until all ingredients are uniformly moist. It is not necessary to knead or continue mixing once the ingredients are wet. This will produce a loose and very wet dough.
- Cover with a lid (not airtight), or plastic wrap with several holes poked into it. Allow the mixture to rise at room temperature until it begins to collapse, about 2 hours, but no more than 5 hours.
- After rising, the dough can be baked immediately, or tightly covered and refrigerated up to 14 days. The dough will be easier to work with after at least 3 hours refrigeration.
- To bake, prepare a pizza peel by sprinkling it with cornmeal. Alternatively, overturn a baking sheet and sprinkle it with cornmeal. This will prevent the bread from sticking when you transfer it to the oven.
- Uncover the dough and sprinkle the surface with flour. Pull up and cut off a 1-pound (grapefruit-size) piece of dough (serrated knives are best). Recover the remaining dough in the bowl and refrigerate for baking at another time.
- Hold the mass of dough in your hands and add a little more flour as needed so it won't stick. Create a smooth ball of dough by gently pulling the sides down around to the bottom, rotating the dough as you go.
- While stretching, most of the dusting flour will fall off. The bottom of the loaf may appear to be a collection of bunched ends, but it will flatten out during resting and baking. This shaping should take no more than 1 minute.
- Place the dough on the peel or overturned baking sheet. Allow the loaf to rest for about 40 minutes. It does not need to be covered. The bread may not rise much during this time; this is normal.
- Twenty minutes before baking, place a pizza stone on the center rack of the oven. If you don't have a baking stone, use another baking sheet. Remove any upper racks. Place a broiler pan on a rack below the pizza stone or on the floor of the oven. Preheat oven to 450°F.
- When the dough has rested for 40 minutes, dust the top liberally with flour, then use a serrated knife to slash a 1/4-inch-deep cross or tic-tac-toe pattern into the top.
- Slide the loaf off the peel or overturned baking sheet and onto the baking stone. Quickly but carefully pour 1 cup of hot water into the broiler tray and close the oven door.
- Bake for about 30 minutes, or until the crust is nicely browned and firm to the touch. Allow the bread to cool completely, preferably on a wire cooling rack.
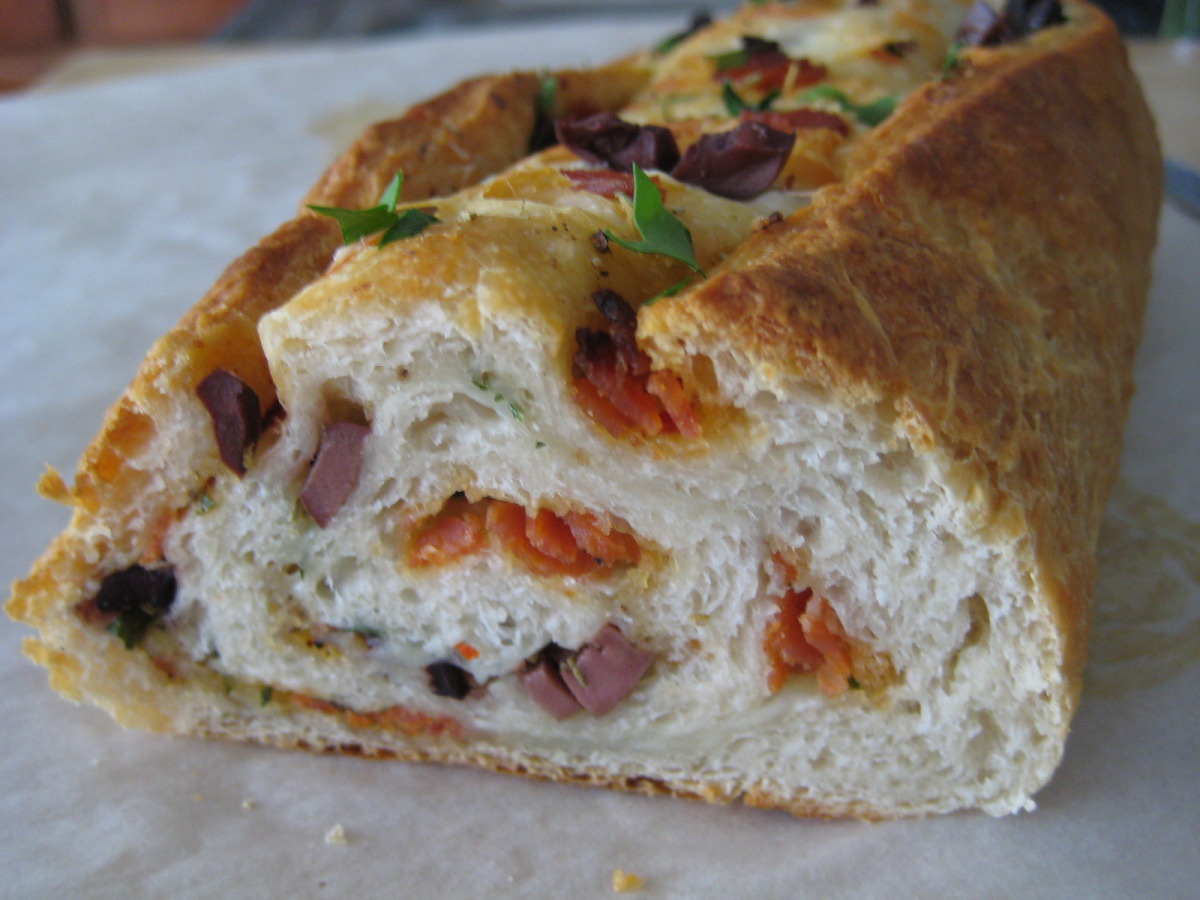
PEPPERONI BREAD (USING REFRIGERATOR LOAF)

Start with a tube of refrigerator bread dough, then add pizza-like toppings, roll up and bake until golden. This loaf is great served alongside spaghetti, or serve slices as an appetizer with a marinara dipping sauce.
Provided by CookinDiva
Categories Breads
Time 40m
Yield 6 serving(s)
Number Of Ingredients 6
Steps:
- Preheat oven to 350 degrees.
- Pillsbury makes an Italian Loaf and a French Loaf - both work fine. Remove unbaked bread from refrigerator tube; unroll.
- Place all chopped ingredients on top of dough, leaving an inch clear on the longest side to use for pinching and sealing. Roll up loaf and pinch to seal.
- Place on non-stick baking sheet. Using a very sharp knife, score loaf diagonally about 1/4 inch into dough, exposing bits of the colorful filling.
- MAKE-AHEAD HINT - you can make them to this point, then cover and refrigerate until ready to bake.
- Bake 350 degrees for 28-29 minutes until nicely browned.
Nutrition Facts : Calories 24.9, Fat 1.8, SaturatedFat 0.8, Cholesterol 3.7, Sodium 112.9, Carbohydrate 0.6, Fiber 0.2, Protein 1.7
Tips:
- Use quality ingredients: Fresh, high-quality ingredients will result in better-tasting bread. Choose unbleached all-purpose flour, sea salt, and active dry yeast.
- Don't over-knead the dough: Over-kneading will make the bread tough. Knead the dough just until it comes together and forms a smooth, elastic ball.
- Let the dough rise in a warm place: The ideal temperature for rising dough is between 75-85°F (24-29°C). A warm, draft-free place like a turned-off oven or a sunny windowsill is perfect.
- Don't overcrowd the baking sheet: When baking the bread, make sure to leave enough space between the loaves so that they can rise and expand properly.
- Bake the bread until it's golden brown: The bread is done baking when it reaches an internal temperature of 190°F (88°C) and the crust is golden brown.
Conclusion:
No-knead, fridge-friendly dough is a simple and convenient way to make delicious, healthy bread at home. With just a few simple ingredients, you can create a variety of loaves that are perfect for sandwiches, toast, or dinner rolls. So next time you're craving fresh, homemade bread, give this no-knead recipe a try!
Are you curently on diet or you just want to control your food's nutritions, ingredients? We will help you find recipes by cooking method, nutrition, ingredients...
Check it out »
You'll also love


