Best 8 Easy Bacon And Cheese Buns Recipes


Indulge in the savory goodness of our bacon and cheese buns, a tantalizing treat that combines the irresistible flavors of crispy bacon, melted cheese, and soft, fluffy bread. Perfect for breakfast, lunch, or a satisfying snack, these buns are a delightful symphony of textures and flavors that will leave you craving more. Discover the secrets behind creating these delectable buns with our easy-to-follow recipes, featuring variations such as air fryer bacon and cheese buns, oven-baked bacon and cheese buns, and even a vegan version for those with dietary restrictions. Get ready to embark on a culinary journey that will elevate your taste buds and make you a master of this irresistible dish.
Check out the recipes below so you can choose the best recipe for yourself!
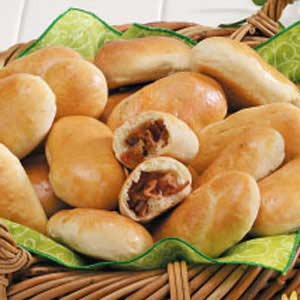
BACON AND CHEESE SOFT ROLLS

Bacon and Cheese Soft Rolls are delicious when eaten fresh from the oven and the cheese is melting! Freezer friendly and great for parties, picnics, lunchboxes.
Provided by Lovefoodies
Categories Breads
Time 2h50m
Number Of Ingredients 11
Steps:
- First we get the bread ready: Combine first 4 ingredients in the bowl of the mixer and wait 20 minutes. The mixture will become foamy.
- Then, using the hook attachment for the mixer add the remaining ingredients. Knead for 10 - 15 minutes
- Allow to rise in the bowl, covered with a cloth, in a draft-free place. (Do not place on oven top, just leave the bowl on your kitchen work top). About 30 - 45 minutes
- Whilst rising, make up the filling (fry off bacon & drain & grate cheese) and allow to cool.
- Once it has doubled, flour your hands very well and also the work top, and pull off pieces of the dough, slightly smaller than a tennis ball. Don't be frightened to add some flour if your dough is very sticky. It will be fine. Place your piece of dough on the work top and flatten as in the picture. Add a heaped teaspoon of filling in the center. Pull the dough from the sides to enclose the filling and squash the edges together so they are sealed, and reshape if necessary into a roll shape. Turn upside down (so the seal is on the bottom of the tray).
- Place the rolls apart from each other on a floured tin / tray. Allow to rise again on the cookie sheet, until the dough balls are touching (like in the picture). Rising will take about 30 - 45 minutes
- Carefully brush the tops of the rolls with milk and sprinkle some cheese over them
- Bake at 400 F / 200C / Gas 6 for 20-30 minutes (until golden brown).
- Eat warm or cold. I love them when they are still warm!
Nutrition Facts : Calories 138 calories, Carbohydrate 21 grams carbohydrates, Cholesterol 10 milligrams cholesterol, Fat 5 grams fat, Fiber 1 grams fiber, Protein 4 grams protein, SaturatedFat 1 grams saturated fat, ServingSize 1, Sodium 52 grams sodium, Sugar 3 grams sugar, TransFat 0 grams trans fat, UnsaturatedFat 4 grams unsaturated fat
BACON, CHEESE AND CHIVE BUNS

These bacon-filled savory rolls are perfect for brunch. They can be baked a day ahead, refrigerated and reheated.
Provided by Food Network Kitchen
Categories side-dish
Time 8h
Yield 12 buns
Number Of Ingredients 18
Steps:
- For the dough: Warm the milk and 1/2 cup water in a medium saucepan over low heat until it is about 100 degrees F (but no more than 110 degrees F). Remove the saucepan from the heat, and sprinkle the yeast over the the liquid. Sprinkle a pinch of the sugar over the top, and set aside without stirring until foamy, about 5 minutes. Then whisk in the butter and egg yolk.
- Whisk together the flour, remaining sugar and salt in a large bowl. Make a well in the center, and stir in the yeast mixture with a wooden spoon until you have a thick and slightly sticky dough. Turn the dough onto a floured work surface, and knead until soft and elastic, about 6 minutes. Shape the dough into a ball.
- Brush the inside of a large bowl with butter. Add the dough ball, turning to coat lightly. Cover the bowl with plastic wrap, trace a circle the size of the dough ball on the plastic and note the time. Let the dough rise in a warm place until doubled in size, about 1 hour 30 minutes.
- Turn the dough out of the bowl, and knead briefly to release excess air; re-form it into a ball, and return it to the bowl. Lightly butter a large piece of plastic wrap, and lay it on the dough. Cover the entire bowl tightly with the rest of the plastic, and refrigerate for 4 hours or overnight to let the dough proof.
- For the filling: Cook the bacon in a large nonstick skillet over medium heat until browned and crisp, about 5 minutes. Transfer the bacon to a small bowl, and remove all but 1 tablespoon of the fat from the skillet. Return the skillet to medium heat. Whisk the flour into the bacon fat, and cook, whisking, until light brown, about 1 minute. Slowly whisk in the milk, and continue whisking until thickened, about 1 minute more. Transfer the mixture to a medium bowl, add the egg yolk, Cheddar, chives, cooked bacon, 1/2 teaspoon salt and a few grinds of pepper and stir to combine. Let cool completely. (The filling will firm up a bit, but if it's too warm, it will be difficult to form the buns.)
- To fill and form the buns: Butter a 9-by-13-inch baking pan with 2 tablespoons softened butter. Turn the dough onto a floured work surface, and press it flat. Roll it into a 10-by-18-inch rectangle, with a long edge facing you. Spread the filling evenly over the dough, leaving a 1-inch border on the side opposite you. Starting from the side facing you, roll the dough up into a tight roll. Lightly brush the 1-inch border with water, and continue rolling to seal the roll. Fold the ends in just a bit, and if any spots look thicker than others, even out the roll with your hands.
- Cut the roll every 1 1/2 inches with a serrated knife, to make 12 buns. Place the buns cut-side down (except for the end pieces) in the prepared pan, spacing them 1 inch apart. Cover the buns loosely with plastic wrap, and set aside in a warm place to rise until the buns double in size, leaving no gaps in between, 1 hour 30 minutes to 2 hours.
- For the topping: Stir the butter, chives and Parmesan in a small bowl; set aside.
- Position an oven rack in the center of the oven, and preheat to 350 degrees F. Bake the buns until they're golden brown and the tops spring back when pressed lightly, 25 to 30 minutes. Spread the topping evenly over the buns, and return them to the oven for 5 minutes more. Let them cool in the pan for 10 minutes before serving.
BACON BUNS
Steps:
- In a skillet, cook bacon and onion over medium heat until bacon is crisp and onion is tender; drain on paper towels., Prepare roll mix according to package directions. Turn the dough onto a floured surface; knead until smooth and elastic, about 5 minutes. Place in a greased bowl, turning once to grease top. Cover and let rise in a warm place until doubled, about 40 minutes., Divide dough into 18 pieces. On a floured surface, roll out each piece into a 5-in. circle. Top each with 1 tablespoon of bacon filling. Fold dough around filling, shaping each piece into a small loaf; pinch edges to seal. Place seam side down on greased baking sheets. Cover loosely with plastic wrap coated with cooking spray. Let rise in a warm place for 20-30 minutes., Brush egg over buns. Bake at 350° for 20-25 minutes or until golden brown. Remove from pans to wire racks. Serve warm. Refrigerate leftovers.
Nutrition Facts :
EASY BACON AND CHEESE BUNS!
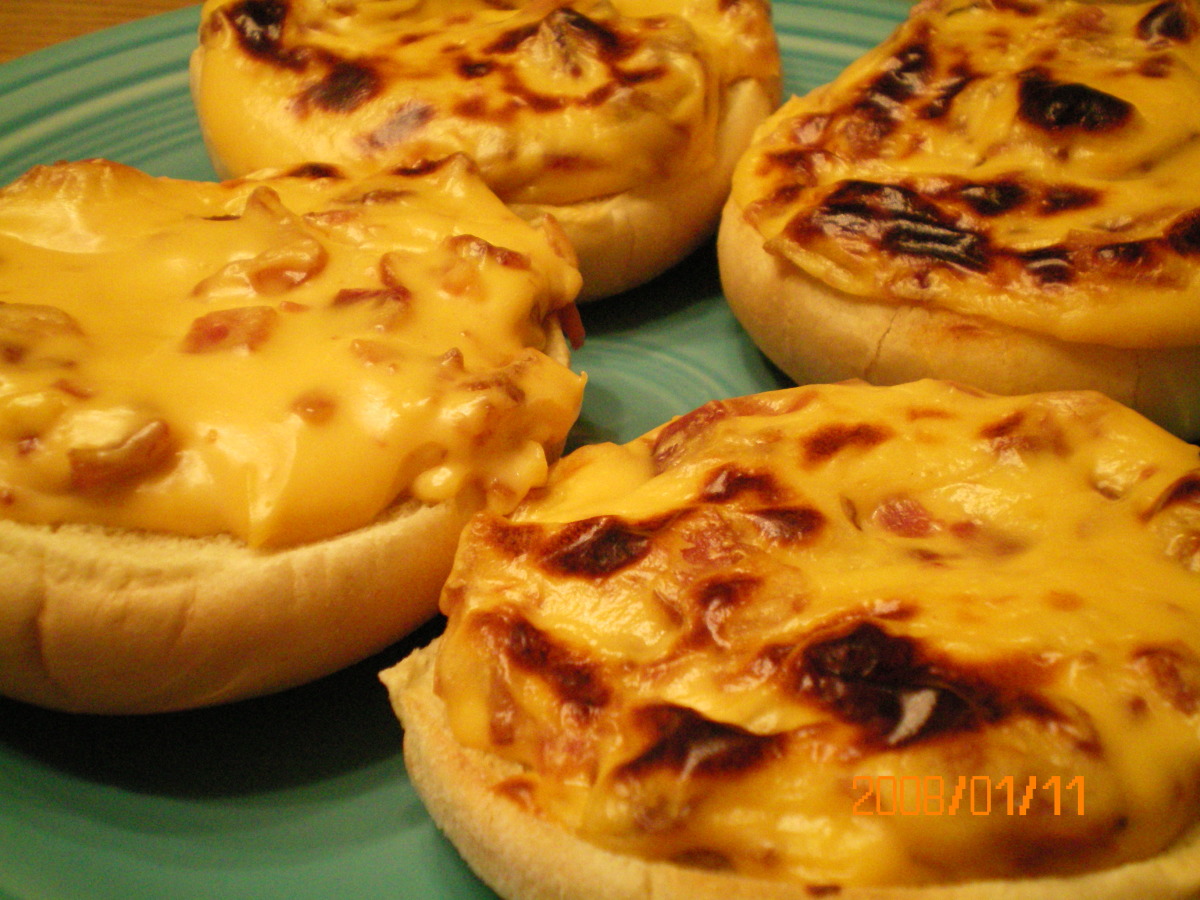
I have this on hand on a busy weekend, fast and easy just a few minutes under the broiler and you have a hot and tasty lunch or snack.
Provided by Calee
Categories Lunch/Snacks
Time 18m
Yield 12 serving(s)
Number Of Ingredients 5
Steps:
- Chop bacon into small pieces. Fry until crisp, drain and place on paper towel. COOL well, break into bite size pieces.
- Mix together mayonnaise and Cheese Whiz, mustard mix until well blended, add cooled bacon.
- Split kaiser buns in half and spread mixture on top, place on baking sheet and place under broiler for 2-3 minutes or until browned and bubbly.
Nutrition Facts : Calories 307.6, Fat 20.9, SaturatedFat 6.8, Cholesterol 34.5, Sodium 812.2, Carbohydrate 21.9, Fiber 0.7, Sugar 3.2, Protein 7.8
CHEESY BACON BREAKFAST BUNS
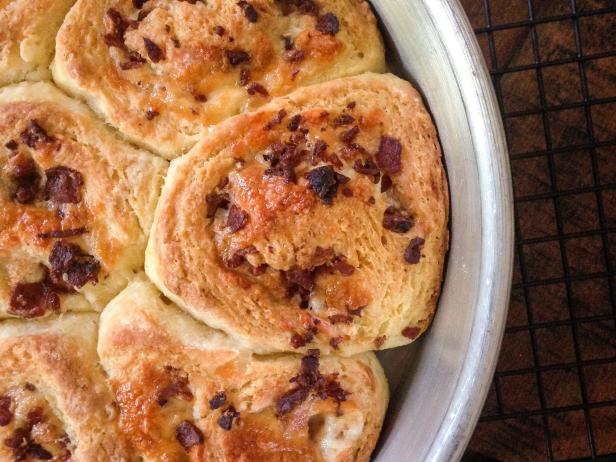
These savory buns-think cinnamon rolls, but with cheese and bacon instead of a sweet sugary filling, are the perfect solution to those few pieces of leftover cooked bacon hanging out in the fridge. You can prep the dry mix up to one month ahead of time, and store it in a container at room temperature. Just give it a shake before using to re-mix the ingredients.
Provided by Jennifer Perillo
Time 45m
Yield 8 servings
Number Of Ingredients 9
Steps:
- Preheat the oven to 425 degrees F.
- To make the dough, whisk together the flour, sugar, baking powder, baking soda and salt in a deep bowl.
- In a separate bowl or measuring cup, whisk together the buttermilk and 6 tablespoons of the melted butter. Pour over the dry ingredients, and stir together with a wooden spoon until it forms a shaggy dough.
- Dump the dough onto a lightly floured surface. Using your fingertips, gently press the dough out into a 12-by-8-inch rectangle. Sprinkle the cheese on top, leaving a 1/4-inch border. Evenly sprinkle the bacon over the cheese. Roll the dough into a log, starting from the longest (12-inch) side nearest you. Pinch the ends closed. Cut into 8 equal pieces.
- Using a pastry brush, use 1 tablespoon of the butter to coat the bottom and sides of an 8-inch round cake pan. Arrange the rolls, cut-side down, in the pan. Gently press them down with your fingertips to flatten slightly. Brush the tops of the buns with the remaining melted butter.
- Bake until golden brown and the cheese is bubbly, 23 to 25 minutes. Cool in the pan for 5 minutes before serving.
BACON-CHEESE BISCUITS
Provided by Food Network Kitchen
Time 40m
Yield 18 biscuits
Number Of Ingredients 9
Steps:
- Preheat the oven to 425 degrees F. Cook the bacon in a skillet over medium heat until crisp. Drain on paper towels and reserve 2 tablespoons drippings. Finely chop the bacon.
- Whisk the flour, baking powder, baking soda, salt, chopped bacon and chives in a medium bowl. Using a pastry blender or your fingers, work the butter into the flour mixture until it is in pea-size pieces. Stir in the cheese with a wooden spoon. Add the buttermilk and reserved bacon drippings and gently mix until just moistened. The dough will be loose.
- Turn the dough out onto a lightly floured surface and knead 3 to 5 times, just until it comes together. (Don't overknead or the biscuits will be tough.) Roll out to 1/2 inch thick, then cut out biscuits using a floured 2-inch-round cutter. Arrange on an ungreased baking sheet. Reroll the scraps and cut out more biscuits. Brush the tops with melted butter.
- Bake the biscuits until golden brown, 12 to 15 minutes. Serve warm.
CHEESE & BACON TURNOVERS
Make some moreish cheese and bacon turnovers for lunch, a picnic or buffet, and add a dollop of mustard if you like. They'll keep for up to three days
Provided by Anna Glover
Categories Picnic, Snack
Time 30m
Number Of Ingredients 6
Steps:
- Heat the oven to 200C/180C fan/gas 6. Unravel the pastry on the sheet of baking parchment it comes with, and cut into six squares. Mix the soft cheese with the mustard, if using, and a good grinding of black pepper. Divide between the middles of the pastry squares, and smooth over in a diagonal line from one corner to the opposite side.
- Lay a bacon rasher over the soft cheese, then scatter over the cheese. Brush the two exposed corners of pastry with beaten egg, and fold over the top of the filling to join together. Brush the tops with more egg, then slide the baking parchment on to a baking sheet and bake for 15-20 mins until the cheese has melted and the pastry is golden.
- Transfer to a cooling rack for 5-10 mins before serving warm. Will keep chilled in an airtight container for two-three days.
Nutrition Facts : Calories 366 calories, Fat 27 grams fat, SaturatedFat 13 grams saturated fat, Carbohydrate 17 grams carbohydrates, Sugar 1 grams sugar, Fiber 2 grams fiber, Protein 13 grams protein, Sodium 1.52 milligram of sodium
BACON ROLL UPS II
I was given this recipe at a party a long time ago by the hostess. It is a really easy appetizer to make and always the first one to disappear. Toothpicks are necessary to secure these little roll ups.
Provided by Putertym
Categories Appetizers and Snacks Wraps and Rolls
Time 55m
Yield 20
Number Of Ingredients 3
Steps:
- Preheat oven to 350 degrees F (175 degrees C).
- Cut each slice of white bread in half horizontally. Spread with cream cheese. Tightly roll each piece of bread with half a piece of bacon. The bacon should be on the outside of the bread. Secure with toothpicks.
- Arrange roll ups in a single layer on a medium baking dish. Bake in the preheated oven 30 minutes, or until bacon is no longer pink and bread is lightly browned. Serve warm.
Nutrition Facts : Calories 203.4 calories, Carbohydrate 11.9 g, Cholesterol 27.8 mg, Fat 14.9 g, Fiber 0.5 g, Protein 5.2 g, SaturatedFat 6 g, Sodium 376.8 mg, Sugar 1 g
Tips:
- To get the most flavor out of your bacon, cook it until it's crispy. This will help to render out the fat and give the bacon a smoky flavor.
- If you don't have a rolling pin, you can use a wine bottle or even a glass to roll out the dough.
- Be sure to preheat your oven before baking the buns. This will help them to rise evenly and prevent them from becoming too dense.
- To make sure the buns are cooked through, insert a toothpick into the center of one of them. If the toothpick comes out clean, the buns are done.
- Let the buns cool slightly before serving. This will help them to hold their shape and prevent them from falling apart.
Conclusion:
These easy bacon and cheese buns are the perfect addition to any meal. They're soft, fluffy, and packed with flavor. They're also incredibly easy to make, so you can have them on the table in no time. Serve them with your favorite soup or salad for a complete meal.
Are you curently on diet or you just want to control your food's nutritions, ingredients? We will help you find recipes by cooking method, nutrition, ingredients...
Check it out »
#30-minutes-or-less #time-to-make #course #cuisine #preparation #occasion #north-american #5-ingredients-or-less #lunch #canadian #easy #sandwiches #british-columbian #brunch #3-steps-or-less
You'll also love