In the vibrant celebration of Easter, the tradition of decorating eggs holds a special place. Dyeing eggs is a delightful activity that brings families and friends together, creating beautiful works of art to mark this joyous occasion. This article offers a comprehensive guide to egg dyeing, showcasing a variety of techniques and creative ideas to transform ordinary eggs into colorful masterpieces.
From the classic vinegar and food coloring method to the intriguing marbled effect using shaving cream, each technique is explained step-by-step with clear instructions, ensuring successful results. Discover the secrets of creating vibrant ombre eggs, speckled eggs with a touch of whimsy, and elegant gold-leaf eggs that exude sophistication. Unleash your creativity and explore the endless possibilities of egg decorating, turning them into personalized ornaments, charming gifts, or simply delightful additions to your Easter table.
EASTER EGGS - EGG DYE
Don't buy the tablets, use whats in your pantry! Glitter and tie-dyed eggs too! Use in recipe #153466 to make Cascarones. Cook time is drying time. Safe and natural for those of you who eat them easter morning!
Provided by MommyMakes
Categories Very Low Carbs
Time 35m
Yield 1 egg bath
Number Of Ingredients 6
Steps:
- For each dye bath combine 1/2 cup boiling water with 1 tsp vinegar and 10 drops of food coloring in a bowl. Start with 5 drops red and 5 drops yellow, for orange for example, or 6 drops blue and 4 drops green for turquoise.
- Dip hard-cooked eggs in dye bath for 3-5 minutes, extend time for richer color. Try using tongs to dip only half an egg in one color, then dip other half in a different color.
- Use tongs or a slotted spoon to remove eggs and place on wax paper to dry, blot any excess with a paper towel.
- For tie dyed eggs, add 1 tbsp olive oil to the mixture and stir with a fork. Roll egg gently in bath to pick of streaks of color. Remove egg from bath and blot oil off with a paper towel, then dry on wax paper. Once dry, lightly dip in another color if desired.
- For glitter eggs, brush dried dyed egg with a thin layer of craft glue. Spoon glitter over egg, allow to dry on wax paper. To put glitter on only part of an egg (half blue, half red for example), use masking tape over the un-glittered part (or use stickers for shapes) and once dry remove masking tape and glue/glitter the remaining area.
- For letters, numbers or shapes use small vinyl stickers (office or hardware supplies) and place them on the egg before dying. Once slightly dry peel off stickers gently. You can also use a white crayon to write names or draw pictures.
- If you plan to eat your easter eggs, never leave them unrefrigerated at any point for more than 2 hours.
NATURAL DYES FOR EASTER EGGS
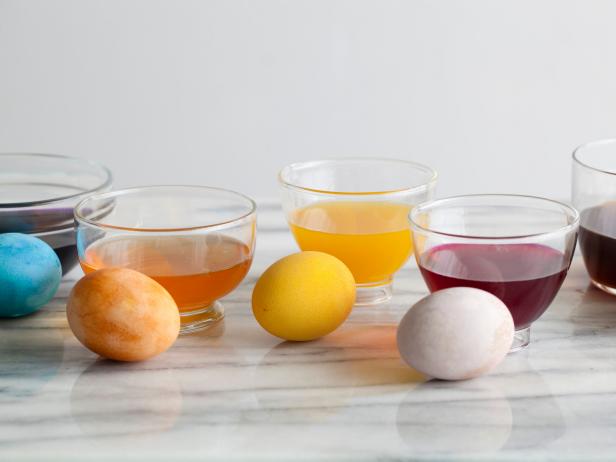
Provided by Food Network Kitchen
Yield each color will color 1 dozen
Number Of Ingredients 6
Steps:
- For all but the coffee color, in a 5 quart saucepan add 1 vegetable or ingredient. Add 4 quarts water, bring to a boil and cook for 1/2 hour or until the color is very dark. Allow to cool to room temperature and strain out vegetables. Add 1/4 cup distilled white vinegar and then add hard boiled eggs to each color. Refrigerate overnight. For the coffee color: brew the coffee. Allow to cool to room temperature. Add 1/4 cup distilled white vinegar, add hard boiled eggs, refrigerate overnight.
TO DYE EASTER EGGS
There's no need to buy special kits for dyeing Easter eggs-all the ingredients you need are probably already in your cupboards.
Categories Quick & Easy Easter Egg Kid-Friendly Small Plates
Number Of Ingredients 4
Steps:
- To make 1 color:
- Line large baking sheet with paper towels and top with wire cooling rack.
- In small bowl or cup, stir together 1/2 cup boiling water, vinegar, and food coloring. Immerse eggs in dye, turning occasionally to ensure even coating, until desired color, about 5 minutes. Using slotted spoon or tongs, remove eggs from dye and transfer to rack to drain. Refrigerate when dry.
- Here are some ways to create designs on your eggs:
- Striped Easter Eggs: Wrap a portion of the egg with a rubber band before dyeing. Once the egg is dry, remove the rubber band to reveal the white, undyed strip underneath.
- Decal Easter Eggs: Another way to block off portions of the egg: Affix stickers or tape in shapes such as daisies or dots before dyeing. Remove once the egg is dry.
- Free-Hand Easter Eggs: A third way to block off portions: Before dyeing, draw on the egg with a light-colored crayon or wax. If desired, once the egg is dry, the wax can be softened by holding the egg over a candle flame and then wiped off.
- Two-Toned Easter Eggs: All three of the above methods can be used to create two-toned eggs: Dye the whole egg a light color, such as pink, and let it dry. Then wrap the egg with a rubber band, affix stickers, or draw a design in crayon. Dye the egg a second color, such as blue. Once dry, remove the rubber band, stickers, or crayon. The areas blocked off will remain the first color (in this case, pink), while the rest of the egg will turn a combination of the 2 colors (in this case, purple).
- Ombre Easter Eggs: Dip a portion of the egg in one color and another portion in another color. If the two sections overlap, that area will turn a combination of the two colors.
Tips:
- Use fresh eggs. Older eggs may have a thinner shell, making them more likely to crack while boiling.
- Start with cold water. Bringing the eggs to a boil in cold water helps prevent the shells from cracking.
- Add vinegar to the water. The vinegar helps the dye adhere to the eggs.
- Use food-grade dyes. Non-food-grade dyes can be toxic if ingested.
- Be creative! You can use different colors and techniques to create unique Easter eggs.
Conclusion:
Dyeing Easter eggs is a fun and easy way to celebrate the holiday. With a little creativity, you can create beautiful and unique eggs that will be enjoyed by everyone. So gather your supplies and get started!
Are you curently on diet or you just want to control your food's nutritions, ingredients? We will help you find recipes by cooking method, nutrition, ingredients...
Check it out »
You'll also love


