Best 3 Cocoa Butter Sticks Recipes


**Cocoa butter sticks**, also known as **cacao butter sticks**, are a type of confectionery made from cocoa butter, sugar, and other ingredients. They are similar to chocolate bars, but they have a smoother, creamier texture and a higher melting point. Cocoa butter sticks are often used in baking and candy making, but they can also be eaten on their own as a snack. The article "Cocoa Butter Sticks" provides recipes for three different types of cocoa butter sticks:
* **Basic cocoa butter sticks:** These are made with just cocoa butter, sugar, and vanilla extract. They are a simple and delicious treat that can be enjoyed on their own or used in baking.
* **Chocolate cocoa butter sticks:** These are made with cocoa butter, sugar, cocoa powder, and vanilla extract. They have a rich, chocolatey flavor and are perfect for snacking or using in baking.
* **Peanut butter cocoa butter sticks:** These are made with cocoa butter, sugar, peanut butter, and salt. They have a sweet and salty flavor that is sure to satisfy your cravings.
All of the recipes in the article are easy to follow and require just a few simple ingredients. They are also relatively quick to make, so you can enjoy your homemade cocoa butter sticks in no time!
SWEET COCOA BUTTER
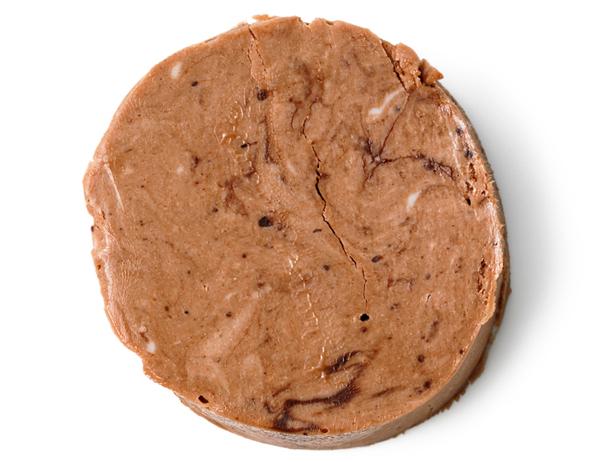
Steps:
- Blend the ingredients in a food processor, shape into a log on waxed paper, wrap and chill.
ALMOND CHOCOLATE BISCOTTI
My neighbors look forward to getting my gifts of these chocolate-covered cookies. I love that this chocolate biscotti recipe is such a cinch to make. -Ginger Chatfield, Muscatine, Iowa
Provided by Taste of Home
Categories Desserts
Time 1h
Yield about 3-1/2 dozen.
Number Of Ingredients 11
Steps:
- Preheat oven to 350°. In a large bowl, beat cake mix, flour, butter, eggs, chocolate syrup and extracts until well blended. Stir in almonds and chocolate chips. Divide dough in half. On ungreased baking sheets, shape each portion into a 12x2-in. log., Bake 30-35 minutes or until firm to the touch. Carefully remove to wire racks; cool 20 minutes., Transfer baked logs to a cutting board. Using a serrated knife, cut diagonally into 1/2-in. slices. Place on ungreased baking sheets, cut side down. Bake 10-15 minutes or until firm. Remove from pans to wire racks to cool completely., In a microwave, melt baking chips and shortening; stir until smooth. Drizzle over biscotti; let stand until set. Store between pieces of waxed paper in airtight containers. Freeze option: Freeze undrizzled cookies in freezer containers. To use, thaw in covered containers. Drizzle with baking chip mixture as directed.
Nutrition Facts : Calories 126 calories, Fat 6g fat (3g saturated fat), Cholesterol 16mg cholesterol, Sodium 117mg sodium, Carbohydrate 17g carbohydrate (10g sugars, Fiber 1g fiber), Protein 2g protein.
BEST COCOA BROWNIES

Cocoa brownies have the softest center and chewiest candylike top "crust" of all because all of the fat in the recipe (except for a small amount of cocoa butter in the cocoa) is butter, and all of the sugar is granulated sugar rather than the finely milled sugar used in chocolate. Use the best cocoa you know for these fabulous brownies.
Provided by Alice Medrich
Categories Cake Chocolate Dessert Bake Quick & Easy Pecan Vanilla Fall Winter Edible Gift Kidney Friendly Vegetarian Pescatarian Peanut Free Soy Free Kosher
Yield Makes 16 large or 25 smaller brownies
Number Of Ingredients 10
Steps:
- Position a rack in the lower third of the oven and preheat the oven to 325°F. Line the bottom and sides of the baking pan with parchment paper or foil, leaving an overhang on two opposite sides.
- Combine the butter, sugar, cocoa, and salt in a medium heatproof bowl and set the bowl in a wide skillet of barely simmering water. Stir from time to time until the butter is melted and the mixture is smooth and hot enough that you want to remove your finger fairly quickly after dipping it in to test. Remove the bowl from the skillet and set aside briefly until the mixture is only warm, not hot.
- Stir in the vanilla with a wooden spoon. Add the eggs one at a time, stirring vigorously after each one. When the batter looks thick, shiny, and well blended, add the flour and stir until you cannot see it any longer, then beat vigorously for 40 strokes with the wooden spoon or a rubber spatula. Stir in the nuts, if using. Spread evenly in the lined pan.
- Bake until a toothpick plunged into the center emerges slightly moist with batter, 20 to 25 minutes. Let cool completely on a rack.
- Lift up the ends of the parchment or foil liner, and transfer the brownies to a cutting board. Cut into 16 or 25 squares.
Tips:
- Choose high-quality cocoa butter: Opt for unrefined, organic cocoa butter for the best flavor and aroma.
- Use a double boiler or bain-marie: This gentle heating method prevents the cocoa butter from overheating and burning.
- Stir constantly: Keep stirring the cocoa butter as it melts to ensure even heating and prevent scorching.
- Add essential oils sparingly: A little goes a long way when it comes to essential oils. Start with a few drops and adjust to taste.
- Let the cocoa butter cool slowly: Allow the cocoa butter to cool and harden gradually at room temperature. This helps it develop a smooth, creamy texture.
- Store cocoa butter sticks properly: Keep the cocoa butter sticks in an airtight container in a cool, dark place. They can last for up to a year.
Conclusion:
Creating your own cocoa butter sticks at home is a rewarding and enjoyable experience. With a few simple ingredients and a bit of patience, you can craft personalized skincare products that are tailored to your unique needs. Experiment with different essential oils and carrier oils to discover your favorite combinations. Embrace the versatility of cocoa butter sticks and use them for a variety of purposes, from moisturizing dry skin to soothing sore muscles. Handmade cocoa butter sticks make thoughtful gifts for friends and family, sharing the benefits of natural skincare. As you embark on your cocoa butter journey, remember to prioritize quality ingredients, practice proper techniques, and enjoy the creative process.
Are you curently on diet or you just want to control your food's nutritions, ingredients? We will help you find recipes by cooking method, nutrition, ingredients...
Check it out »
You'll also love