Best 5 Classic Italian Bread Recipes


**Classic Italian Bread: A Culinary Journey Through Italy's Beloved Breads**
From the bustling streets of Rome to the sun-kissed vineyards of Tuscany, the aroma of freshly baked bread fills the air, enticing locals and visitors alike. Italian bread is a culinary masterpiece that has been passed down through generations, each region boasting its unique flavors and textures. This article takes you on a journey through Italy's beloved breads, introducing you to the classic recipes that have stood the test of time.
In this comprehensive guide, you'll discover the secrets behind making the perfect focaccia, a Ligurian flatbread known for its airy texture and crispy crust. Learn how to create the iconic ciabatta, a versatile bread with a chewy interior and a slightly crunchy exterior. And don't miss out on the delightful panettone, a sweet bread traditionally enjoyed during the Christmas season, filled with candied fruits and raisins.
For those who love a rustic touch, the article features the traditional Tuscan bread, a hearty loaf made with a blend of wheat and rye flours, perfect for pairing with regional cheeses and cured meats. And for a taste of Sicily, try your hand at making pani ca meusa, a savory bread roll stuffed with spleen, lung, and ricotta cheese, a true street food delicacy.
These recipes are not just instructions; they are a testament to the passion and artistry of Italian bakers. Whether you're an experienced bread maker or just starting your culinary adventure, this article provides all the guidance you need to create authentic Italian bread that will transport your taste buds to the heart of Italy. So, gather your ingredients, preheat your oven, and let's embark on a delicious journey through the world of classic Italian breads.
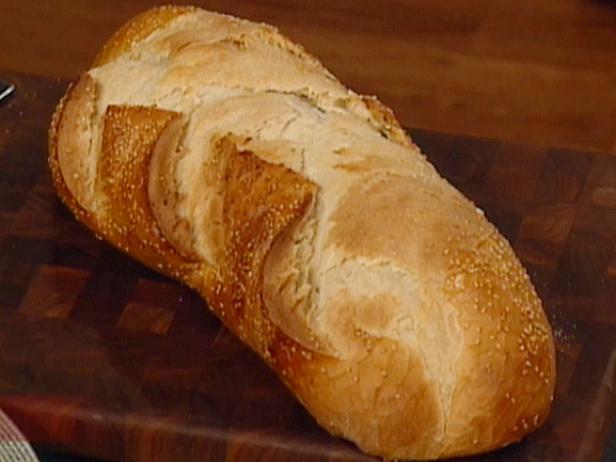
BASIC ITALIAN BREAD
Provided by Food Network
Time 3h26m
Yield 1 large loaf Italian bread
Number Of Ingredients 8
Steps:
- Place the water and yeast in the bowl of an electric mixer and allow the yeast to bloom for about 5 minutes. Using a dough hook attachment, add the flour and sugar to the water and mix on low speed until a dough starts to form. Drizzle the oil and salt into the dough and beat on medium speed for 8 to 10 minutes, or until a smooth, firm, elastic dough is formed.
- Transfer the dough to a lightly oiled bowl and spray the dough with a thin coating of cooking spray. Wrap the bowl with plastic wrap and set aside to proof in a warm, draft-free place for 11/2 hours or until doubled in size. Remove the plastic wrap, punch down and flatten the rounded dough with the heel of your hand. Roll the dough up tightly, sealing the seam well after each roll. The dough should be elongated and oval-shaped, with tapered and rounded (not pointed) ends.
- Preheat the oven lined with a pizza stone to 425 degrees F. Alternately, an inverted baking sheet may be used in place of a pizza stone.
- Place the dough on a baker's peel heavily dusted with semolina flour, or cornmeal, or alternately on an inverted baking sheet. Allow the dough to proof, loosely covered with a damp towel, for 30 minutes, or until doubled in size. Brush the dough with the egg white and sprinkle the sesame seeds over the top. Using a razor blade or sharp knife, score 3 (1/4-inch deep) slashes across the top of the dough at a 45 degree angle.
- Spray the dough generously with water from a water bottle and place in the oven on the baking stone. Immediately close the oven and bake for 3 minutes. Open the oven door and spray the dough again with the water bottle. Close the oven door and bake for an additional 3 minutes before spraying the dough for a third time (the spraying of the dough will ensure a crisp golden brown crust). Bake the dough for 45 minutes, or until a hollow thud is heard when the bread is whacked with the bowl of a wooden spoon. Allow the bread to cool slightly before serving.
MAMA D'S ITALIAN BREAD
This is a basic delicious Italian bread.
Provided by Christine Darrock
Categories Bread Yeast Bread Recipes White Bread Recipes
Time 2h50m
Yield 36
Number Of Ingredients 5
Steps:
- Add the sugar and yeast to the warm water and let proof.
- Stir in 4 cups of flour and beat until smooth. Cover and let rest for 15 minutes.
- Beat in the salt and then add enough remaining flour to make a stiff dough. Knead until as soft and smooth as a bambino's behind. Turn in a greased bowl, cover, and let double in size. (I put it in the oven with the light on - perfect rising temperature.)
- Once doubled, punch down and divide into three. Place back in the bowl, cover, and let rise.
- Once doubled again, punch down and form into three fat "footballs." Grease heavy cookie sheets and sprinkle with corn meal. Place the bread on the sheets, cover with a towel, and let rise.
- Once risen, mist with water and place in a preheated 450 degrees F (230 degrees C) oven. Mist loaves with water and turn occasionally while they bake. Bread is done when golden brown and sounds hollow when tapped on the bottom.
Nutrition Facts : Calories 89.9 calories, Carbohydrate 18.8 g, Fat 0.3 g, Fiber 0.7 g, Protein 2.6 g, Sodium 194.4 mg, Sugar 0.2 g
MOM'S ITALIAN BREAD

I think Mom used to bake at least four of these tender loaves at once, and they never lasted long. She served the bread with every Italian meal. I love it toasted, too. -Linda Harrington, Windham, New Hampshire
Provided by Taste of Home
Time 50m
Yield 2 loaves (12 pieces each).
Number Of Ingredients 5
Steps:
- In a large bowl, dissolve yeast in warm water. Add the sugar, salt and 3 cups flour. Beat on medium speed for 3 minutes. Stir in remaining flour to form a soft dough., Turn onto a floured surface; knead until smooth and elastic, 6-8 minutes. Place in a greased bowl, turning once to grease the top. Cover and let rise in a warm place until doubled, about 1 hour., Punch dough down. Turn onto a floured surface; divide in half. Shape each portion into a loaf. Place each loaf seam side down on a greased baking sheet. Cover and let rise until doubled, about 30 minutes. , Meanwhile, preheat oven to 400°. With a sharp knife, make 4 shallow slashes across top of each loaf. Bake 20-25 minutes or until golden brown. Remove from pans to wire racks to cool.
Nutrition Facts : Calories 106 calories, Fat 0 fat (0 saturated fat), Cholesterol 0 cholesterol, Sodium 197mg sodium, Carbohydrate 22g carbohydrate (1g sugars, Fiber 1g fiber), Protein 3g protein.
CRUSTY ITALIAN BREAD
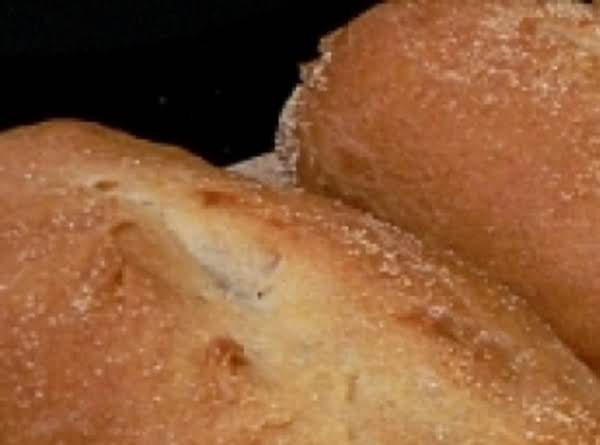
Found this tonight on a site called: cooklikeyourgrandmother.com. The recipe sounds promising, & the pic is from their website. I recommend checking out the website as well as the recipe, it's full of pics and a couple of videos. http://cooklikeyourgrandmother.com/2008/12/how-to-make-crusty-italian-bread/
Provided by Donna Roth
Categories Other Breads
Number Of Ingredients 7
Steps:
- 1. Dissolve the yeast in a quarter-cup of warm water. You should actually check the temperature of the water. Too cold and it won't activate, too hot and you can kill the yeast.
- 2. Give the yeast a few minutes, until it starts bubbling, then mix it in with the rest of the warm water.
- 3. Add the flour, sugar and salt and stir.
- 4. Don't add the oil until after you've worked the water and flour together. Otherwise the oil will coat the proteins and prevent gluten formation. Gluten lets the dough stretch when it rises, making it light and chewy instead of crumbling like cake.
- 5. After mixing the oil in, turn the dough out onto a clean, floured surface to knead.
- 6. Stretch the dough away from you, fold it back, turn a quarter turn and repeat. Once the dough is well incorporated, slap it on the surface a few times. This will encourage more gluten production leading to a lighter, airier bread.
- 7. When the dough is smooth and silky, continue kneading for another several minutes. You can work it with both hands and keep turning the dough, or just hit it from opposite angles with each hand.
- 8. Once the dough is thoroughly kneaded, place it in an oiled bowl. Toss the dough around so it is coated with oil all the way around.
- 9. Cover the dough with plastic wrap, pressed right up against the dough. This will prevent a skin from forming on the dough, allowing it to rise more.
- 10. Put the bowl someplace warm until the dough has doubled in size, about 1-1/2 to 2 hours.
- 11. Pre-heat the oven to 425°. If you have a pizza stone, put it on the bottom rack. Otherwise, place a baking sheet upside-down on the bottom rack. Turn the dough out onto a floured surface and punch down to knock out most of the air out. Don't go crazy and try to turn it into a pancake. Just give it a quick couple of hits.
- 12. Roll the dough out into a loaf shape and cut it in half. You can form the halves into loaves or, like I did here, divide each half into three smaller pieces.
- 13. Roll out the pieces of dough until they are about 6-9 inches long.
- 14. If you have a peel (the large wooden spatula you see in pizza shops) use that. If not, a wooden cutting board will work. Dust it with cornmeal so the dough doesn't stick.
- 15. Cover the loaves with plastic and allow to rise for another 40 minutes. They should roughly double in width.
- 16. Cut each loaf down the middle with the sharpest blade you have. If you don't have anything that is absolutely razor sharp, use a razor blade. You want to cut about a quarter-inch deep in a single quick stroke without sawing back-and-forth. This will prevent the bread from bursting open when it rises in the oven.
- 17. Transfer the loaves onto the baking stone. Leave room between loaves for them to rise some more. If they don't all fit on your stone, put the rest on an upside-down baking sheet.
- 18. Bake at 425° for 10 minutes, then turn the oven down to 400° and bake another 25-30 minutes. To check if they're done, pick one loaf up and thump on the bottom with your thumb. If it has a hollow sound, it's done. If you want really crusty bread, great for dipping in olive oil or marinara sauce, place a pan of water in the bottom of the oven. The steam will keep a skin from forming too fast, giving the bread more time to rise. It will also make the crust crisper. Don't put the loaves near the top. The radiant heat from the top of the stove will brown the crust too much, too fast. Serve immediately with butter, or with olive oil and balsamic vinegar for dipping.
CLASSIC ITALIAN BREAD

I've been using this yeast bread recipe for nearly 20 years - I think it originally came from a package of flour. I've "tweeked" it quite a bit from the original, and now this bread is great, in that it calls for no added fat (other than what you use to oil the bowl for rising); it's just flour, water, sugar, salt and yeast. Makes 2 loaves - let one get slightly stale, and it makes the best French toast ever!
Provided by KrisLady
Categories Yeast Breads
Time 6h40m
Yield 2 loaves, 16 serving(s)
Number Of Ingredients 7
Steps:
- Add sugar and yeast to warm water in large mixing bowl and let dissolve.
- Gradually add salt and flour to liquid and mix thoroughly until dough pulls away from sides of bowl.
- Turn out onto floured surface to knead.
- Knead dough for about 3 minutes.
- Allow dough to rest about 5 minutes.
- While dough is resting, scrape mixing bowl and grease (either spray with Pam or swirl about 1 tablespoon oil up sides of bowl).
- After dough has rested, knead about 3 minutes more, until bouncy and smooth.
- Place dough in bowl and turn over once to grease top.
- Cover with damp towel or plastic wrap and let rise until doubled in bulk, 1 to 2 hours.
- Punch down.
- Let dough rise again until doubled (optional).
- Punch down and knead briefly.
- Cut dough in half and shape into 2 loaves.
- To shape into loaves: pat each half into a rectangular shape, about 8 x 12 inches.
- Roll dough tightly from short end, pinching end to seal.
- Place pinched side on bottom and fold ends under loaf to make loaf shape.
- Place loaves on baking sheet generously sprinkled with corn meal and slash tops. Let dough rest, covered, an additional 10 minutes.
- For Quick Baking: Brush loaves with cold water. Place on rack in cold oven. Bake at 400 for 35-40, until crust is golden brown and hollow to the touch.
- For Traditional Baking: For a lighter, crustier bread, let the loaves rise another 45 minutes. Preheat oven to 450 for 15 minutes. Pour 2-3 cups boiling water into a roasting pan and carefully place the pan on the bottom of the oven. Place bread on rack above pan and bake 20 minutes. Turn off oven and allow bread to remain for 5 more minutes.
Nutrition Facts : Calories 160.3, Fat 0.4, SaturatedFat 0.1, Sodium 437.1, Carbohydrate 33.7, Fiber 1.2, Sugar 0.9, Protein 4.5
Tips:
- Use high-quality ingredients. Fresh, high-quality ingredients will ensure that your bread is flavorful and delicious. Using "00" flour will give your bread a light and airy texture.
- Take your time. Do not rush the process of making bread. It takes time for the dough to rise and develop its flavor.
- Be patient. Baking bread takes time and practice. Do not be discouraged if your first loaf of bread does not turn out perfectly. Just keep practicing and you will eventually be able to make delicious, homemade bread.
- If you are new to baking bread, start with a simple recipe. Once you have mastered the basics, you can start experimenting with more complex recipes.
- Have fun! Baking bread is a fun and rewarding experience. Experiment with different ingredients and recipes until you find a bread that you love.
Conclusion:
Classic Italian bread is a delicious and versatile bread that can be enjoyed on its own or used to make sandwiches, bruschetta, and other dishes. With a little patience and practice, you can make delicious classic Italian bread at home. So what are you waiting for? Start baking today!
Are you curently on diet or you just want to control your food's nutritions, ingredients? We will help you find recipes by cooking method, nutrition, ingredients...
Check it out »
#course #preparation #for-large-groups #healthy #breads #easy #low-fat #dietary #low-cholesterol #low-saturated-fat #yeast #low-in-something #number-of-servings
You'll also love