Adorn your desserts with delicate and elegant chocolate curls, an essential garnish for any pastry chef or home baker. These beautiful shavings add a touch of sophistication and richness, transforming ordinary treats into culinary masterpieces. Discover the art of creating these intricate embellishments with our comprehensive guide, featuring three distinct methods: using a vegetable peeler, a sharp knife, and a chocolate shaver. Each technique yields unique results, catering to different skill levels and preferences. Whether you're a seasoned pro or a novice in the kitchen, our step-by-step instructions and helpful tips ensure success. Unleash your creativity and elevate your desserts to the next level with these stunning chocolate curls.
Let's cook with our recipes!
CHOCOLATE CURLS
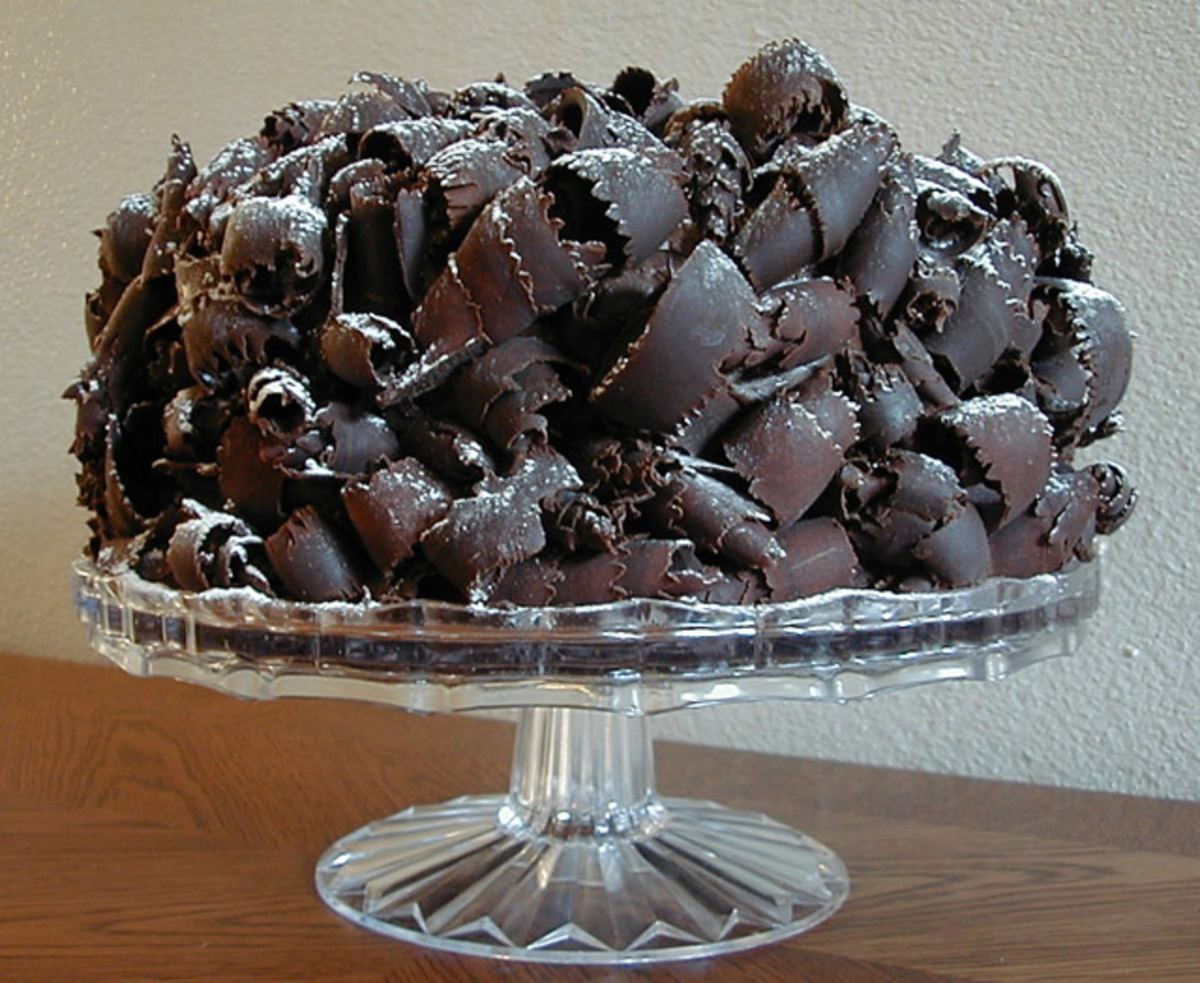
Delicate chocolate curls to garnish desserts, or to decorate cakes. Method found in an old issue of Good Housekeeping magazine. This recipe should provide enough curls to entirely cover a 2-layer cake. Adjust as necessary for desired amount of curls. ***NOTE***After submitting this recipe, I was informed that single ingredient recipes are not approved for this site. Therefore, the toothpick was added to the ingredient list. This toothpick is only used as a tool to lift the curls, as the heat of your hands will melt the delicate chocolate. The curls will not stand up to being punctured by the toothpick. They are adhered to the cake using the fresh frosting as glue.
Provided by Ms B.
Categories Dessert
Time 2h
Yield 1 cake
Number Of Ingredients 2
Steps:
- In a heavy 1-quart saucepan over low heat, heat 5 squares of chocolate, stirring frequently, until melted and smooth.
- Pour melted chocolate into a 15 1/2" by 10 1/2" jelly roll pan; use a rubber spatula to scrape all of the chocolate from the saucepan.
- With the same rubber spatula, spread the chocolate to evenly cover entire bottom of pan.
- Refrigerate until firm, but not brittle, about 10 minutes.
- Place jelly-roll pan on damp cloth on work surface (damp cloth keeps pan from moving while working).
- Holding teaspoon at a 30 degree angle, scrape chocolate into curls (if chocolate softens and sticks to spoon, place pan in refrigerator several minutes).
- With toothpick, transfer curls to another jelly-roll pan; refrigerate.
- Repeat 4 more times to make 5 batches of curls in all.
- To Garnish Cake with Curls: Using a toothpick as a tool to lift the delicate curls (the heat of your hands will melt or mar them), carefully press chocolate curls onto fresh frosting. (The gooey fresh frosting is the glue that holds the curls in place.)
CHOCOLATE CURLS
Use these to garnish any dessert, such as our Milk-Chocolate Pudding Cupcakes, Tiramisu Ice Cream Cake, or Mint Parfait.
Provided by Martha Stewart
Categories Food & Cooking Dessert & Treats Recipes
Yield Makes 8 ounces
Number Of Ingredients 2
Steps:
- Melt chocolate with the shortening in a heatproof bowl set over a pan of simmering water, stirring occasionally.
- Divide chocolate mixture between two 11-by-17-inch rimmed baking sheets; smooth with an offset spatula. Refrigerate until chocolate is set but not brittle.
- Holding a sturdy metal spatula or a bench scraper at a 45-degree angle, scrape chocolate away from you to form curls. If chocolate is too brittle, let stand at room temperature 1 to 2 minutes. If too soft, refrigerate briefly. Curls can be refrigerated in an airtight container up to 2 weeks.
TO MAKE CHOCOLATE CURLS
Steps:
- Rub the underside of a baking sheet with an oiled paper towel, then peel back one piece of paper to expose a square of gold leaf. Don't dally: It is whisper-thin, so it practically flies away if you breathe on it. Holding the rest of the book in your hand, invert the gold onto the oiled baking sheet and lift off the remaining piece of paper the gold leaf was sandwiched against. (Wrinkles are okay.) Repeat the process with eight more gold squares.
- Next, melt the chocolate and spread it over the gold leaf as thinly and evenly as possible with the offset spatula.
- Now comes the tricky part. The chocolate needs to set to the right consistency. If it isn't firm enough, it won't curl; if it's too firm, it will break into shards (which have their own beauty). Chill the chocolate for about seven minutes before trying a test curl. Brace the baking sheet against the kitchen wall and, holding the putty knife at an angle, scrape the chocolate (and gold leaf) away from you. If it curls, you've got it! The correct angle is really just a matter of feel.
- Carefully transfer the curls with the putty knife to a paper towel-padded box and keep them cold until you're ready to use them.
CHOCOLATE CURLS FOR DEVIL'S FOOD CUPCAKES

Use the curls to decorate our Devil's Food Cupcakes. This recipe is from "Martha Stewart's Cupcakes."
Provided by Martha Stewart
Categories Food & Cooking
Number Of Ingredients 1
Steps:
- Use a vegetable peeler to slice strips from a slightly warm block of good-quality chocolate (heat in microwave for 5-second intervals, checking after each, until just warm to the touch; do not overheat). To produce tight curls, start from the far edge of the chocolate and move the peeler toward you. The delicate curls are best used immediately; you can even shave the curls right onto a cupcake.
CHOCOLATE CURLS

Categories Candy Chocolate Dessert Quick & Easy Chill Simmer Double Boiler Gourmet
Yield Makes 2 cups
Number Of Ingredients 2
Steps:
- Chop bittersweet chocolate and in a double boiler or small metal bowl set over a saucepan of barely simmering water heat until melted. With a metal spatula spread melted chocolate onto a baking sheet (not non-stick) as thinly and evenly as possible. Cool chocolate until firm to the touch but not hard. (Alternatively, chill melted chocolate on sheet; if it becomes too hard let it soften slightly at room temperature.) With a pastry scraper or metal spatula held at an angle scrape chocolate slowly from sheet, letting it curl. Carefully transfer curls as formed to a plate lined with waxed paper. Make more curls with milk chocolate in same manner. Chocolate curls may be made 1 day ahead and chilled, loosely covered.
ALMOND CHOCOLATE TORTE WITH CHOCOLATE CURLS
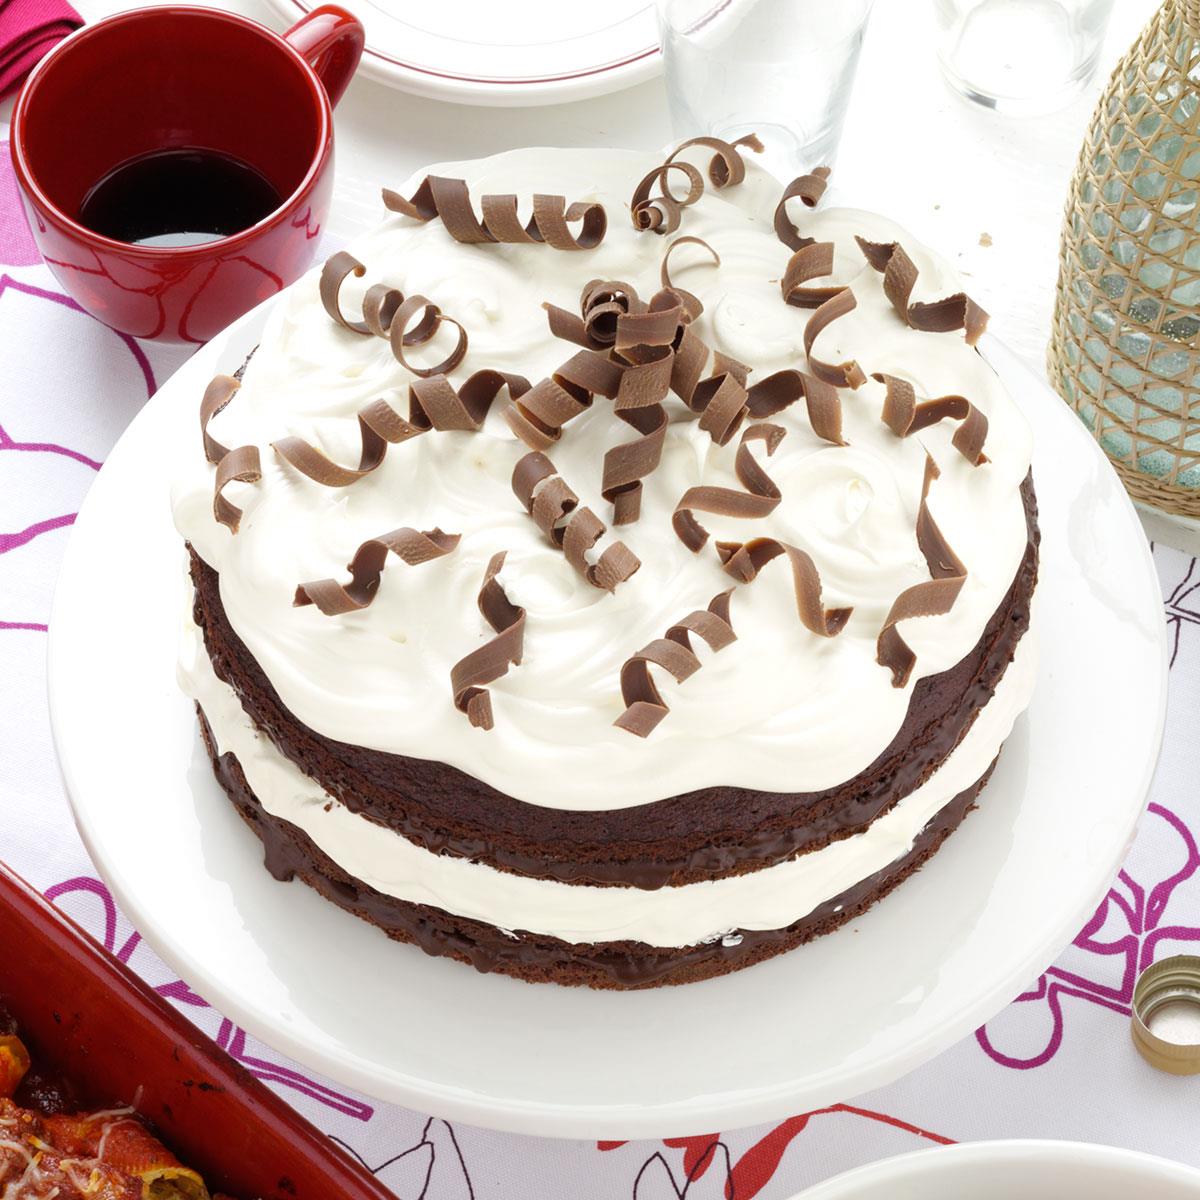
"I've been making this recipe since the 70s, and it's often requested by family and friends. It's popular not only for the wonderful eye appeal and taste, but for the short time it takes to create." -Elaine Gairy, Chester, Maryland
Provided by Taste of Home
Categories Desserts
Time 1h5m
Yield 12 servings.
Number Of Ingredients 6
Steps:
- Prepare and bake cake according to package directions, using two greased and floured 9-in. round baking pans. Cool for 10 minutes before removing from pans to wire racks to cool completely., Meanwhile, in a small saucepan, melt chocolate and butter; stir until smooth. Stir in almonds (mixture will be thin); set aside. , Split each cake into two horizontal layers. Place bottom layer on a serving plate; spread with half of the chocolate mixture. Top with second cake layer; spread with half of the whipped topping. Repeat layers. Sprinkle with chocolate curls. Chill at least 1 hour before serving. Refrigerate leftovers.
Nutrition Facts : Calories 557 calories, Fat 36g fat (18g saturated fat), Cholesterol 83mg cholesterol, Sodium 389mg sodium, Carbohydrate 57g carbohydrate (39g sugars, Fiber 4g fiber), Protein 7g protein.
Tips:
- Choose the right chocolate: Using high-quality chocolate is essential for achieving beautiful, glossy curls. Look for chocolate with a cocoa content of at least 70% and make sure it's tempered before using.
- Use a sharp vegetable peeler: A sharp vegetable peeler will create thin, even curls. Avoid using a dull peeler, as this will result in thick, uneven curls.
- Hold the chocolate at an angle: When peeling the chocolate, hold it at a slight angle to the peeler. This will help create long, flowing curls.
- Peel the chocolate slowly: Don't rush the process of peeling the chocolate. Take your time and peel the chocolate slowly and carefully.
- Keep the chocolate cold: If the chocolate starts to get too warm, it will become difficult to peel. Place the chocolate in the refrigerator or freezer for a few minutes to cool it down before continuing.
Conclusion:
Chocolate curls are a beautiful and versatile decoration that can be used to add a touch of elegance to any dessert. With a little practice, you can easily create your own chocolate curls at home. Just remember to choose the right chocolate, use a sharp vegetable peeler, hold the chocolate at an angle, peel the chocolate slowly, and keep the chocolate cold. With these tips in mind, you'll be able to create beautiful, glossy chocolate curls that will impress your friends and family.
Are you curently on diet or you just want to control your food's nutritions, ingredients? We will help you find recipes by cooking method, nutrition, ingredients...
Check it out »
#time-to-make #course #main-ingredient #preparation #occasion #low-protein #5-ingredients-or-less #desserts #easy #dinner-party #holiday-event #romantic #chocolate #dietary #low-sodium #low-cholesterol #low-calorie #low-carb #low-in-something #taste-mood #sweet #number-of-servings #4-hours-or-less


