Indulge in the delicate charm of cherry blossom cookies, a delightful treat inspired by the ethereal beauty of Japanese cherry blossoms. These delectable cookies capture the essence of spring with their soft pink hue, intricate designs, and delicate cherry flavor. Discover two enchanting recipes to create these edible works of art. The first recipe guides you through the process of crafting traditional cherry blossom cookies with a crisp exterior and a soft, chewy interior, adorned with intricate flower patterns. The second recipe introduces a unique twist with cherry blossom macarons, featuring delicate almond meringue shells filled with a luscious cherry blossom buttercream. Both recipes offer step-by-step instructions, detailed ingredient lists, and helpful tips to ensure your cookies turn out perfectly. Prepare to embark on a culinary journey that celebrates the fleeting beauty of cherry blossoms and leaves a lasting impression on your taste buds.
Here are our top 2 tried and tested recipes!
CHERRY BLOSSOM COOKIES

Simple sugar cookies serve as the canvas for these elegant "cherry blossoms." Use pink royal icing to create the "petals" and brown luster dust to form the "branches."
Provided by Martha Stewart
Categories Food & Cooking Dessert & Treats Recipes Cookie Recipes
Yield Makes about 16
Number Of Ingredients 14
Steps:
- Sugar Cookies: In a medium bowl, whisk together flour, salt, and baking powder. In the bowl of an electric mixer fitted with the paddle attachment, beat together butter and granulated sugar on medium-high speed until light and fluffy. Add vanilla, egg, and brandy and continue beating until well combined. Reduce speed to low and add flour mixture, beating until just combined. Shape dough into a disk, wrap in plastic, and refrigerate until firm, at least 45 minutes and up to overnight.
- Preheat oven to 350 degrees. Line two baking sheets with parchment. On a lightly floured surface, roll out dough to 1/4 inch thick. Use a 2 5/8-inch square cutter to cut out squares. Reroll scraps once (you should have about 16 cookies). Transfer to prepared sheets, spaced about 1 inch apart. Refrigerate at least 1 hour. Bake until set and golden around edges, 15 to 20 minutes. Transfer sheets to wire racks and let cool completely.
- Royal Icing: In the bowl of an electric mixer fitted with the paddle attachment, beat egg whites on medium speed until frothy. Reduce speed to low and add confectioners' sugar, 1/4 cup at a time, increasing speed to medium-high between each addition, until mixture has consistency of shampoo. Add lemon juice. Tint with pink food color until desired shade is reached. Transfer mixture to a shallow bowl. If not using immediately, icing can be stored at room temperature, with plastic wrap pressed directly on surface, up to 2 days, or in refrigerator, well wrapped in plastic, up to 3 days. Bring to room temperature before using.
- Working with one cookie at a time, dip cookie top-side down in icing to completely coat surface, allowing excess glaze to drip back into bowl. Invert cookie and clean edges with your finger, if desired. Transfer to a wire rack or baking sheet and let stand at room temperature until completely dry, at least 12 hours and up to overnight. Reserve remaining icing for decorations, at room temperature, with plastic wrap pressed directly on surface, or in refrigerator, well wrapped in plastic. Bring to room temperature before using.
- Stir additional confectioners' sugar into icing until it has consistency of toothpaste. Divide mixture into 3 portions and tint with pink food color until 3 desired shades are reached. Transfer each color to a piping bag fitted with a small plain round or star tip (such as Ateco #2, #3, or #13).
- Place luster dust in a small bowl. Stir in vodka, a little at a time, until mixture has consistency of thick watercolor paint. Using a small food-safe paintbrush, paint a tree branch design on surface of each cookie. Using the 3 shades of pink icing, pipe small blossoms on branches. Let stand at room temperature until completely dry, about 4 hours. Cookies can be stored in an airtight container at room temperature up to 3 days.
CHERRY KISS COOKIES
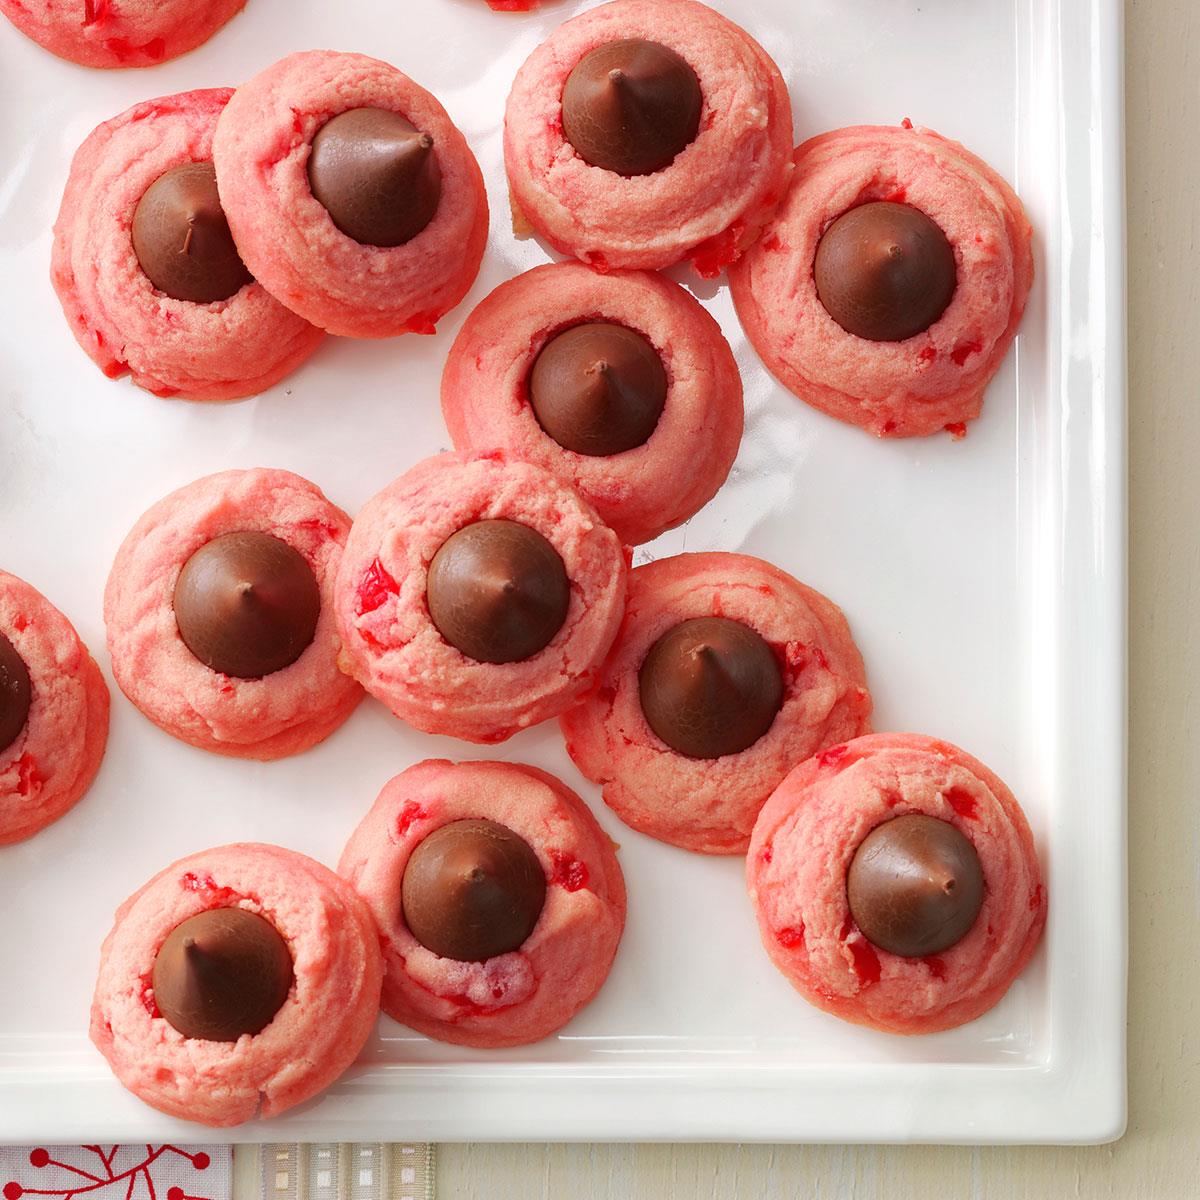
Topped with a chocolate kiss, these cherry-flavored cookies look super cute on a dessert tray. Share them with family and friends. -Joy Yurk, Grafton, Wisconsin
Provided by Taste of Home
Categories Desserts
Time 30m
Yield 4-1/2 dozen.
Number Of Ingredients 9
Steps:
- Preheat oven to 350°. In a large bowl, beat butter, confectioners' sugar and salt until blended. Beat in cherry juice, extract and, if desired, food coloring. Gradually beat in flour. Stir in cherries., Shape dough into 1-in. balls. Place 1 in. apart on greased baking sheets. , Bake 8-10 minutes or until bottoms are light brown. Immediately press a chocolate kiss into center of each cookie (cookie will crack around edges). Cool on pans 2 minutes. Remove to wire racks to cool.
Nutrition Facts : Calories 85 calories, Fat 5g fat (3g saturated fat), Cholesterol 10mg cholesterol, Sodium 51mg sodium, Carbohydrate 10g carbohydrate (5g sugars, Fiber 0 fiber), Protein 1g protein.
Tips:
- Use fresh or frozen cherries. Fresh cherries are best, but frozen cherries will also work well. If using frozen cherries, thaw them completely before using.
- Don't overmix the dough. Overmixing will make the cookies tough. Mix just until the ingredients are combined.
- Chill the dough before baking. Chilling the dough will help the cookies hold their shape and prevent them from spreading too much.
- Bake the cookies until they are just set. Overbaking will make the cookies dry and crumbly. Bake until the edges are golden brown and the centers are just set.
Conclusion:
Cherry blossom cookies are a delicious and festive treat that are perfect for any occasion. They are easy to make and can be enjoyed by people of all ages. With their delicate flavor and beautiful appearance, cherry blossom cookies are sure to be a hit at your next party or gathering.
Are you curently on diet or you just want to control your food's nutritions, ingredients? We will help you find recipes by cooking method, nutrition, ingredients...
Check it out »
You'll also love


