**Chapati: A Culinary Journey Through India's Versatile Flatbread**
Chapati, also known as roti, is an integral part of Indian cuisine, a delectable flatbread that embodies the country's culinary diversity. This versatile bread, made from whole wheat flour, is a staple in many Indian homes and holds a special place in the hearts of food lovers. From the bustling streets of Delhi to the serene backwaters of Kerala, chapati weaves its way through India's culinary tapestry, offering a comforting and wholesome experience. Discover the art of crafting chapati with our collection of recipes, each representing a unique regional twist on this beloved flatbread. Embark on a culinary journey through India, savoring the distinct flavors and textures that make chapati a beloved dish across the nation.
INDIAN WHOLE WHEAT GRIDDLE BREADS: CHAPATIS
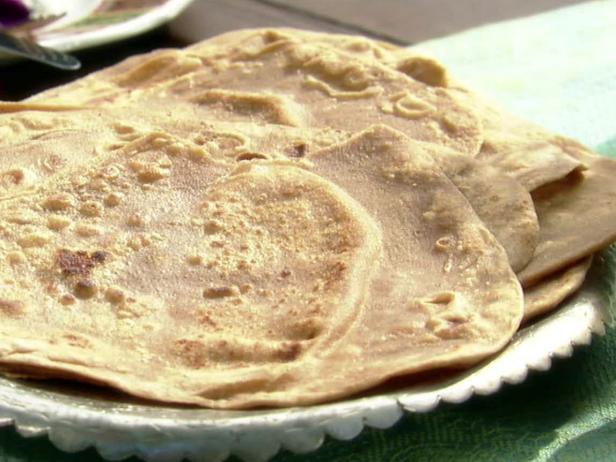
Provided by Aarti Sequeira
Time 1h15m
Yield 12 chapatis
Number Of Ingredients 4
Steps:
- Pour the flour and salt into a large bowl. Slowly pour water into the flour, moving your other hand through the flour in circular motions, until it starts to come together. Then, either in the bowl or on your counter (which you might want to lightly flour to prevent sticking), knead the dough for about 10 minutes. The dough should be soft and pliant.
- Return the ball of dough to the bowl and rub the surface of the dough with a little oil to keep it from drying out. Cover with plastic wrap or a damp cloth and allow to rest about 30 minutes.
- When you're ready to make chapatis, assemble your tools: a small, flat bowl of whole wheat flour, a small bowl of olive oil or melted butter with a small spoon in it, and a paper towel-lined plate or container for the finished breads.
- Heat a flat griddle or cast iron skillet over medium-high heat. Meanwhile, on a lightly-floured surface, work the ball of dough into a long log. Cut into 12 equal pieces by cutting it in half, and then half again. Cut each of the quarters into 3 equal pieces. Return to the bowl and cover with a damp towel to prevent them from drying out.
- To roll the chapatis: Roll a piece of dough between your palms to form a ball, and then flatten with your palm. Dunk this puck in the bowl of flour, and then roll until it's a 4-inch circle. Spoon about 1/4 teaspoon of oil in the center of the circle, and spread it out almost to the perimeter of the circle using the back of the spoon. Fold the circle in half, then in half again, so it forms a triangle. Seal the edges, and dunk in flour again if it's sticky.
- Start rolling, turning the triangle a quarter turn after each roll, until it's about 6-inches wide, with an even thickness. After some practice you'll be able to roll the chapati and rotate it without picking it up; I do this by weighing down a little on my right hand and pushing the chapati around that way.
- Test the griddle by sprinkling a little flour on it; if it turns brown immediately, it's ready. Flapping the chapati between your hands to remove any excess flour, slap the chapati onto the griddle. It should start darkening almost immediately.
- When small bubbles start to form, spread a little oil over the surface of the chapati, then flip. It should start to puff up. Spoon a little oil over this side too, and when it's puffed up a little more, flip. Press down on the edges of the chapati with your spatula or (if you're brave!) with a dry rag. This will seal the edges and encourage the entire chapati to puff up. If you spot any holes, press down on those too so the air doesn't escape. Allowing the air to stay inside the whole chapati makes it flaky and light. But don't fret if your first few don't puff up; it takes practice! It will still taste delicious.
- Remove to your container. Repeat with the remaining dough, and serve the chapatis hot.
CHAPATIS
Making chapatis can be a very relaxing thing to do. In quite a short time you can produce eight or 10 breads, each one turning out a little bit different from the others, but all of them attractive, nutritious and good. We've grown so accustomed to making chapatis that they now feel almost like a convenience food, a household staple of the best kind.
Provided by Food Network
Time 3h10m
Yield 8 chapatis, 7 to 8 inches acro
Number Of Ingredients 3
Steps:
- You will need a medium-sized bowl, a rolling pin, a castiron griddle or heavy skillet, and a small cotton cloth or a paper towel.
- In a medium-sized bowl, mix together the salt and the flour. Make a well in the middle and add just less than 1 cup warm water. Mix with your hand or with a spoon until you can gather it together into a dough (depending on the condition of your flour, you may need a little extra water or a little extra flour to make a kneadable dough). Turn out onto a lightly floured bread board and knead for 8 to 10 minutes. Cover with a damp cloth or a plastic wrap and let stand for 30 minutes or for up to 2 hours. The longer the dough stands, the more digestible the breads.
- Divide the dough into 8 pieces and flatten each with lightly floured fingers. Continue flattening with a rolling pin until each piece is 8 inches in diameter. Once you have started rolling, roll out each bread without flipping it over. To keep the bread from sticking to your bread board, make sure that the bread is lightly floured underneath. Cover the breads with the damp towel or plastic wrap as you roll out others (make sure not to stack the rolled out breads; if you don't have enough counterspace for the breads, roll out just a few and begin cooking, rolling out the others as the breads cook).
- Heat a castiron griddle or skillet over medium-high heat. When the griddle is hot, place a chapati on the griddle, top side of the bread down first. Let cook for only 10 seconds and then gently flip to the second side. Cook on the second side until small bubbles begin to form, approximately one minute. Turn the chapati back to the first side and finish cooking (another minute approximately). At this stage, a perfect chapati will start to balloon. This process can be helped along by gently pressing on the bread. The bread is hot, so we find the easiest method is to use a small cotton cloth or a paper towel wadded up to protect your finger tips. Gently press down on a large bubble forcing the bubble to extend itself wider. If the bread starts to burn on the bottom before it has ballooned, move the bread (with the help of your paper towel) across the skillet, dislodging it from the point at which it is beginning to burn.
- When you are satisfied with your chapati, remove it and wrap in a clean towel. Continue to cook the other breads, stacking each as it is finished on top of the others.
CHAPATIS (INDIAN OR KENYAN WHOLEWHEAT FLATBREAD)
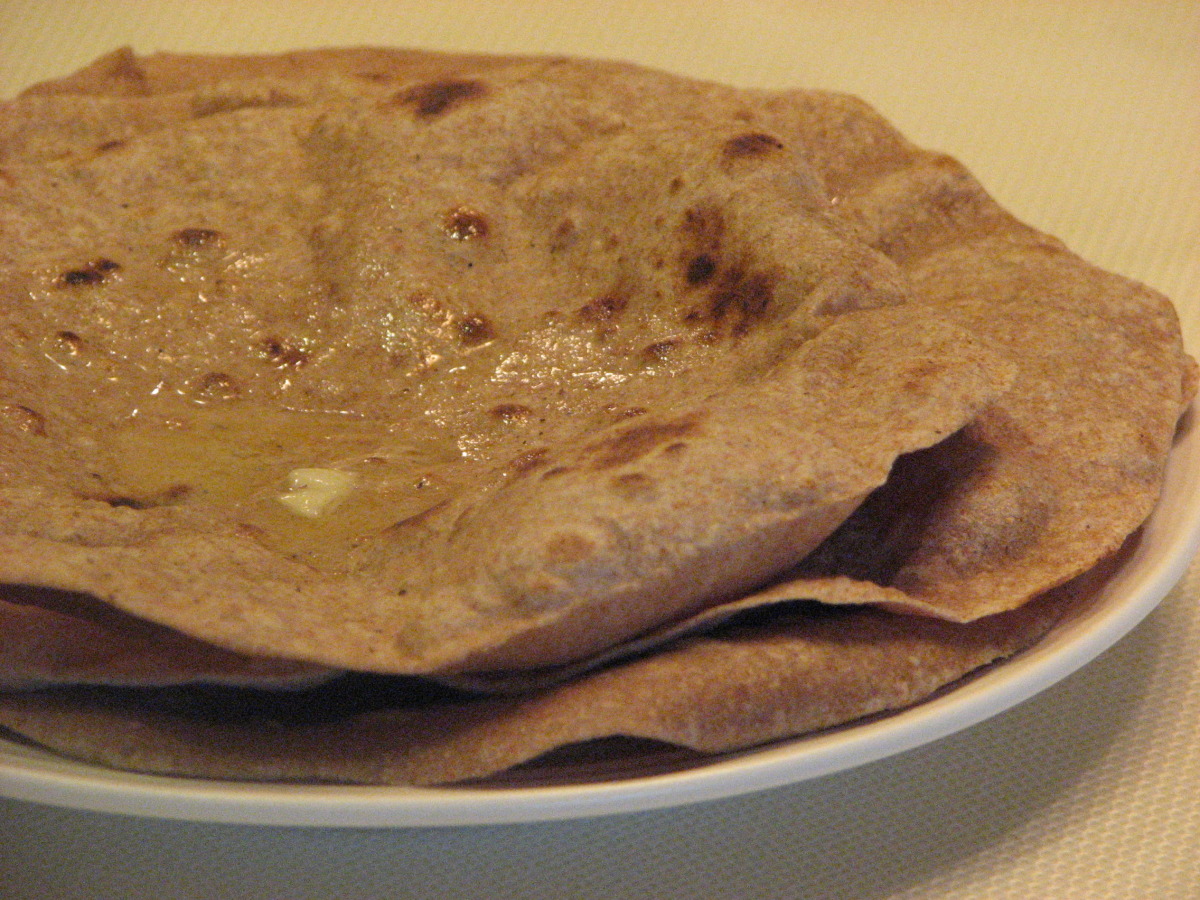
This is a recipe by Guy Fieri that I saw on Guy's Big Bite. Easy and tasty - a really good recipe. The cooking time is for only one batch of griddling because it depends on how big your griddle is. Each flatbread counts as 1 WW point. Enjoy!
Provided by Nif_H
Categories Breads
Time 40m
Yield 8 flatbreads, 8 serving(s)
Number Of Ingredients 3
Steps:
- In a medium bowl, combine flour and salt. Using a wooden spoon, slowly stir in water, until dough forms. Lightly flour a clean board and knead dough until smooth, about 10 minutes. Rest dough in bowl, covered with damp towel for 20 minutes.
- Preheat a griddle over medium heat.
- Divide dough into 8 equal balls. Using a floured rolling pin, roll balls out on floured board to 7 inches in diameter, about 1/4-inch thick. Place the rolled out dough onto griddle. Flip when raised bumps appear on the surface of the dough, about 1 to 2 minutes. Cook second side until it turns golden. Do not cook too long or flatbread will become brittle. Cover flatbread with a towel up to 20 minutes before serving.
INDIAN GRIDDLE FLATBREADS (CHAPATIS)

Entered for ZWT. From Madhur Jaffrey's "World Vegetarian", this is quintessential Indian bread. Chapatis can be made in all sizes, but Jaffrey likes them small. Serve with beans or vegetables. You may also roll foods inside them as you would a tortilla. Traditionally, chapatis are made without salt. If you prefer, put about 1/2 teaspoon salt into the dry flour. These are best as soon as they are made, but they can be made ahead and kept in a plastic bag in the refrigerator or freezer. An assistant could form the next chapati while one is cooking to keep the process flowing smoothly. The chapati dough can also be cut into noodles, such as the traditional Dal Dhokli (Pasta in a Split Pea Sauce).
Provided by KateL
Categories Breads
Time 1h12m
Yield 12 5-1/2-in chapatis, 6 serving(s)
Number Of Ingredients 5
Steps:
- DOUGH:.
- Put the flour in a bowl.
- Slowly add about 3/4 cup plus 2 tablespoons water, just enough to gather the dough together and make a ball.
- Knead the dough well for 10 minutes.
- Make a smooth ball and put it in a bowl. Cover with a damp cloth and set aside for 30 minutes. It will turn quite soft.
- Divide into 12 balls. Keep covered while you work with the twelfth.
- COOK:.
- Set a cast-iron frying pan or griddle on medium-high heat. Allow it to heat up. Make a small wad with a cloth or paper towel and keep nearby.
- Take a ball of dough and dust it well with flour. Now roll it out into a 5-1/2-inch round on a floured surface. Lift it up and slap it back and forth between your palms to shake off the extra flour.
- DO THE FOLLOWING STEPS FAST:.
- Slap the chapati onto the hot griddle. Let it cook for 45 seconds.
- Turn it over and cook the second side for another 35-45 seconds.
- Turn it over again and cook another 5 to 6 seconds, pushing down on it with the paper wad and rotating it a little with each push. Do this fast; it helps to puff up the chapati.
- Put the cooked chapati on a plate and cover it with a towel or another upturned plate.
- Make all the chapatis this way, making sure to wipe off the cast-iron pan with a paper towel after each one is made. If it takes you a while to roll out the next chapati, turn the heat under the cast-iron pan down to low while you roll it and then turn it up again. (Or have someone else form a chapati while you cook one.).
- Serve immediately.
- These can be made ahead and stored in a plastic bag in the refrigerator or freezer. To reheat them, wrap a whole bundle of them in foil and put them in a medium oven (350F/177C) for 15 minutes. You can also sprinkle a little water on an individual chapati and then either heat it in a microwave oven for 30-45 seconds or slap it onto a hot, lightly greased griddle for a few seconds on each side.
EASY CHAPATIS (FLATBREAD)
Found at yahoo! health online. LOVE these flatbreads--perfect for brown bag lunches or dips at parties.
Provided by spatchcock
Categories Breads
Time 1h40m
Yield 8 serving(s)
Number Of Ingredients 4
Steps:
- In the bowl of a food processor fitted with a dough blade, process flour, salt and water until the mixture forms a ball.
- Turn dough onto a floured work surface and knead for 5 minutes.
- Transfer to a bowl and cover tightly with plastic wrap.
- Let dough rest for 30 to 90 minutes.
- Preheat oven to 200 degrees F (95 degrees C).
- Divide dough into 8 equal pieces.
- Roll each piece into a 7-inch (18-cm) circle.
- Spray a cast-iron griddle or skillet once with cooking spray and set over medium-low heat.
- Cook a chapati for 1 minute.
- Turn over and cook 5 minutes on second side or until chapati bubbles up.
- Flip back to first side and cook for 5 minutes.
- Then place the cooked chapati over the open flame (or on the coils) of a separate burner for a few seconds to brown, as you would a tortilla.
- Keep cooked chapatis warm in the oven while you cook the remaining dough.
- If you prefer a crispy, cracker-like texture, increase oven temperature to 350 degrees F (175 degrees C).
- Bake cooked chapatis, on a pizza stone if possible, until crispy, about 10 minutes.
TRADITIONAL CHAPATIS
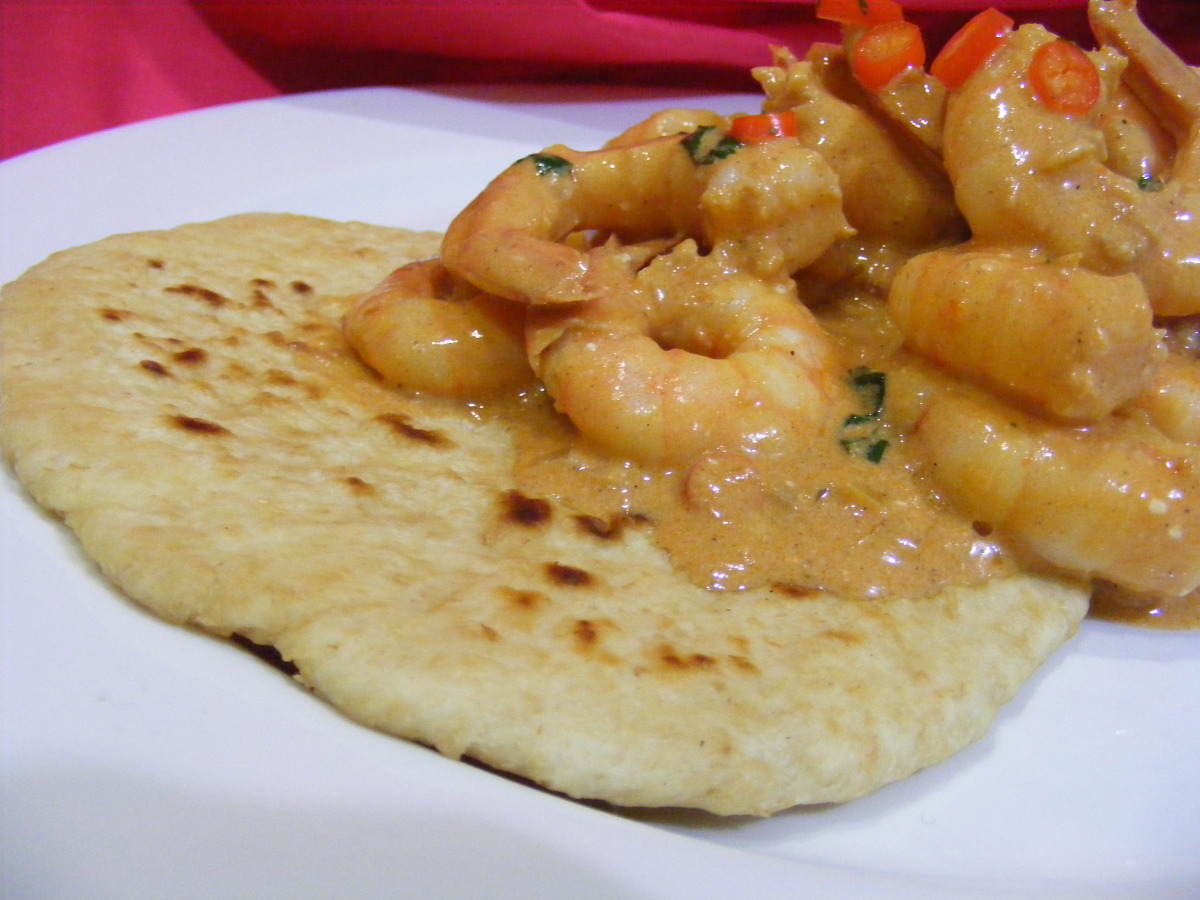
Traditional chapatis are made every day in India and contain only two ingredients, the flour and the water. This makes them very simple to make and very healthy too.
Provided by PinkCherryBlossom
Categories Breads
Time 20m
Yield 7 serving(s)
Number Of Ingredients 2
Steps:
- Add the water to the flour a little at a time, kneading as you go until you have a soft, elastic dough.
- Sprinkle a little flour onto a flat surface or board.
- Divide the dough into 8 and shape each piece into ball.
- Flatten the balls slightly then place one on the floured surface and roll out into a flat disc approximately 15cm/6inches in diameter.
- Repeat with the other 7.
- Heat a shallow frying pan.
- Lay a disc onto the hot pan and leave for 20 to 30 seconds until the surface is bubbly.
- Flip over and cook the other side for 10 to 15 seconds.
- As soon as brown spots appear on the underside it is done.
- Repeat with the other breads.
- Cooks tip: The longer you knead the chapati dough the softer the breads will be.
Nutrition Facts : Calories 217.7, Fat 1.6, SaturatedFat 0.3, Sodium 2.4, Carbohydrate 46.1, Fiber 6.8, Sugar 0.3, Protein 8.5
HOW TO MAKE CHAPATIS

Parathas are an Indian unleavened bread and an integral part of many Indian meals. Any subzi (vegetable) or curry dish can be fabulous when accompanied with fresh, hot parathas. Try this recipe. It'll be worth your while! Although we refer to this recipe as Chapatti in the video, this is actually a Paratha recipe. The difference between the two is that Chapattis are cooked without oil whereas Parathas are pan fried. recipe courtesy videojug.com watch the video at http://www.videojug.com/film/how-to-make-chapatti-paratha
Provided by jas kaur
Categories Grains
Time 1h
Yield 9-10 chapatis
Number Of Ingredients 4
Steps:
- To make the dough we're going to add our flour to a bowl and sprinkle the salt. This is optional, in case you know you don't use salt that's fine too.
- Incorporate the salt well, and then we'll pour oil inside it.
- Now you want to mix the flour again to make sure all the oil gets incorporated in to the flour and you don't want lumps of oil in there. just for a few seconds.
- When the oil and salt are nicely incorporated, add water slowly. This water has been warmed in the microwave for about 30 seconds, pour little at a time and just mix.
- We have used whole wheat flour from the Indian store as its a little different from the whole wheat flour that you find in the grocery stores.
- The one in the American grocery stores is usually a lot darker in color, so chapattis turn a little browner than you probably like them, this one is available in any Indian store its called chapatti atta and is readily available.
- Just mix all that dough in and form a nice ball.
- It doesn't take a lot of time at all, but people are scared to do this, because you're using your hands and that freaks people out, but it really is not that bad. It literally takes under a minute to make this dough.
- When the dough is in a nice ball, we're going to take just a couple of drops of oil, just to lightly coat it and in that way it doesn't form a dry skin on top of the dough. Then keep it covered for about 15 to 20 minutes.
- So if you are not comfortable using your hands while making the dough, here's another alternative way of doing it. Here's the whole wheat flour, I'm going to use the food processor, and if you notice I'm using a chopping blade instead of a dough blade, because it just mixes better and it gets all the edges and there's nothing left at the sides.
- I'm going to mix in the salt at this point and I'm going to give it a mix.
- Then I'm going to add in the oil.
- I've also heated up the water for 30 seconds and am going to pour it in very slowly once i have the food processor on. This is just as easy.
- It's best just to give it one knead by hand just to incorporate everything and make sure there's no air bubbles and all in it.
- This food processor option is really good if you're making dough in bulk because i understand that dough freezes really well
- Then put a couple of drops of oil and just smother a little bit, rub it a little bit so that it doesn't dry out and cover it up. Then set it aside for 15 minutes as before.
- After it has been resting for about 15 to 20 minutes we're going to knead the dough one more time quickly.
- This is 1 and 1/2 cups of dry flour, so it makes approximately 9 chapattis. But there's no signs involved, so if you like really big chapattis it can be less and if you want small ones you know it'll make more.
- But something that fits in to your palm or close fist, a kind of a golf size ball is perfect.So just divide it out.
- Before we start rolling out our chapattis we'll go ahead and turn on our stove and get our pan heated.
- The pan we are using is called a tawa. You can also use a non stick frying pan.
- Put the stove on medium heat, or a little bit higher than medium. And you want to make sure your pan is really hot before you put your first chapatti on.
- So while our pan is heating, we're going to take our dough and form a nice round ball. If you start off with a round ball, the shape changes, but your final chapatti will probably be round also.
- We're then going to dip it in some dry flour, shake off the excess and role it out.
- Now this rolling pin is my favorite. It's a thinner version, but a lot of people are used to the thicker version of the rolling pins. Whatever you have is absolutely fine and if you notice that your chapatti is sticking to the ground or to whatever surface you are rolling out on, take it and dip it again in the dry flour.
- This is a trick that my mom taught me when i was learning how to do this when i was little, you rub your hand across it, and instantly you'll feel where its thicker and where it's thinner and then you can just roll the parts that are thicker, that way you don't have a chapatti that is really thin on one side and really thick on the other side that also helps in blowing up when you're cooking it.
- The tawa looks hot so we're going to put our rolled chapatti in and move it around to make sure it doesn't stick.
- Then we leave it alone until we start seeing bubbles appearing, and then we're going to flip it around, and let go for a few seconds.
- Now we're going to take some oil and you can just dip your spoon in to your oil and then whatever is left, the remainder few drops, just put it on and smear it on like that and flip it around and press. You want to press where it bubbles to force the air to the other side which is not risen yet. Smear the oil again and press.
- You want to cook the chapatti until you see that all the doughiness is gone and it looks fully cooked. It's ok to have little brown spots on it.
- It looks delicious and there's nothing like home made chapattis. You can buy these from the store but when you taste these like fresh off the stove it's awesome.
- And one of the other reasons why it doesn't taste as nice sometimes is a lot of people don't use oil in their chapattis, but I put oil inside the dough and what happens with that is that when you eat the chapatti a little bit later on, it still tastes nice and soft, as supposed to the dough which has been prepared without oil, which tends to turn a little bit chewier.
- Once the chapatti is cooked I like to keep it in a nice insulated cannister like this. It helps it to stay nice and warm. So you can finish all your chapattis and sit with you family and enjoy your dinner and they'll still be piping hot.
- note: if u dont wish to use oil on ur chapatis just use a clean cloth to press the chapatis after u have flipped them the second time n press lightly to ensure the air is distributed evenly and the chapatis wud puff up.enjoy !
Nutrition Facts : Calories 81.1, Fat 1.9, SaturatedFat 0.3, Sodium 65.9, Carbohydrate 14.5, Fiber 2.4, Sugar 0.1, Protein 2.7
QUICK BASIC CHAPATIS/ROTIS

Unleavened vegan stove top Indian flat bread. We really enjoy this with garlicky hummus and an herb salad. I learned to make it from Manjula on YouTube (http://www.manjulaskitchen.com/). If you have chapati flour and are good with a rolling pin, you can whip 4 of these out 15-20 minutes or less because they do not have to rise or rest. With regular flours, 4 will take an hour including 1/2 hour resting time. I am not sure the exact origin because so many peoples claim them as their own. I have seen many good ideas for adding herbs/spices to these on this website that I will be trying... Yummm!
Provided by Kanopolis Kook
Categories Quick Breads
Time 20m
Yield 4 chapatis, 4 serving(s)
Number Of Ingredients 6
Steps:
- Heat iron skillet or no-stick skillet on medium flame.
- Sift flour and salt into bowl. (If no sifter, fluff with fork.).
- With a wooden spoon, stir in oil, if using, and 1/4 C water, continue to slowly add water until enough water to form a ball.****.
- Turn onto floured surface. Knead for 20 strokes or until dough is elastic. Use only enough flour to keep dough from sticking.
- Divide dough into 4 golf-ball sized balls.
- Roll each in flour.
- With a rolling pin, roll out one ball into about an 8" thin circle. Keep a pile of flour beside you and dust the dough often but only enough to keep it from sticking.
- When skillet is hot enough to immediately sizzle dry a drop of water, put chapati on.
- When bubbles form on top of chapati (1-3 minutes), look at bottom. If it has a few brown spots, flip it over.
- The second side takes much less time, and when it has a few brown spots, remove the pan from the fire and toss chapati directly on the burner (With a gas stove--leave roti in pan and pan on burner, use spatula to massage roti and it will puff up -- Manjula shows how on YouTube). In a few seconds, it will puff up like a balloon. If it doesn't, the dough was not kneaded/rested long enough or there was too much flour worked inches.
- Remove from heat to plate. (Some people slap the air out first.).
- Brush with oil, if desired, to keep soft.
- Cover with towel to keep warm.
- Repeat with next ball. The second and later chapatis always seem to cook faster than the first.
- Serve warm.
- By your third batch, you'll be fast enough to roll out the next one while one is cooking!
- *chapati flour available at Indian food markets, chapati flour does not need to rest to come out properly, other flours do need to rest.
- **chapati flour substitute: 1/2 C whole wheat plus 1/2 C enriched white flour or 3/4 C, 1/4 C respectively (my favorite). Or 1 C all purpose white flour. If using this, after kneading, lest rest for 30 minutes in a warm place--or up to an hour if in cool place, until when you press your finger into it, it feels elasticky and springs back a little. Refrigerate now or continue with dividing into balls, etc.
- ***you can also make it up as much as 5 days ahead of time and store refrigerated in a ball wrapped in plastic. It's best to remove it from the fridge an hour or 2 before using, but if not, it'll just be a little more difficult to roll out.
- ****For flatbread beginners: If you get too much water, just add some flour. If you're new to this, as soon as all the flour is gathered in little balls go ahead and put it on a pile of flour on your work surface and if necessary work water into it a little at a time. It will not hurt the dough no matter how much you work with it -- it will only make it better because it activates the gluten which is what makes the layers you should see after cooking the chapati if you tear it apart -- if you do not see these after cooking, the dough was not worked long enough. Other than burning them, these are foolproof enough to always be edible!
CHAPATIS
Steps:
- Stir together flour and salt in a large bowl, then make a well in center and add water to well. Using a fork, stir until a dough forms. Turn dough out onto a lightly floured surface and knead, adding more flour as needed, until smooth and elastic (dough will be slightly sticky), about 8 minutes.
- Transfer to a clean bowl and cover bowl with plastic wrap. Let dough stand at room temperature at least 1 hour.
- Divide dough into 12 equal pieces and roll each piece into a ball, then cover with a kitchen towel (not terry cloth). Dip 1 ball of dough into additional flour, shaking off excess, then flatten ball with your hands on lightly floured surface.
- Roll dough into a 5- to 6-inch round with a lightly floured rolling pin, lifting and rotating as necessary. Shake off excess flour, then transfer round to a sheet of wax paper and cover with another kitchen towel (not terry cloth). Repeat with remaining balls, arranging rounds in 1 layer (do not stack).
- Heat a dry 10-inch cast-iron or heavy skillet over medium heat until hot. Lightly grease skillet with a paper towel dipped in oil, then cook one round of dough until underside is golden brown in spots, about 30 seconds. Gently turn over and cook until deep golden brown in spots, 30 seconds to 1 minute. Turn over again and cook, gently pressing with tongs, until chapati is cooked through, 30 seconds to 1 minute more. (Chapatis may puff up.)
- Keep warm, wrapped in another kitchen towel, and cook remaining rounds. Serve immediately.
KHEEMA WITH HOMEMADE CHAPATIS
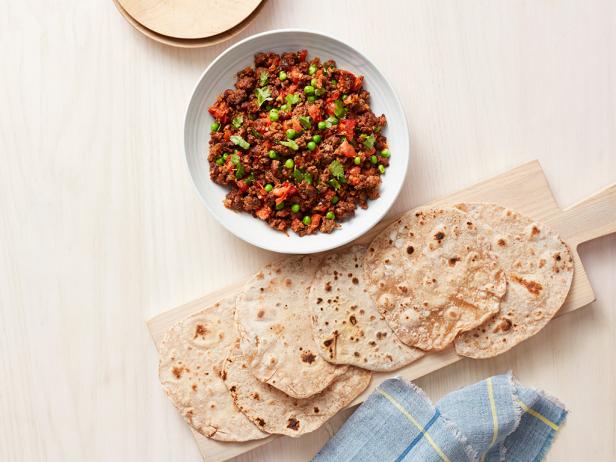
"My girls jump up and down when they hear I'm making chapatis for dinner. They line up next to me and help me roll the dough. It connects me with my ancestors. It's magical," says Aarti.
Provided by Aarti Sequeira
Categories main-dish
Time 1h50m
Yield 4 servings of kheema and 12 chapatis
Number Of Ingredients 21
Steps:
- Heat the canola oil in a large skillet over medium-high heat. Add the onion and cook, stirring, until golden, about 4 minutes. Add the garlic and ginger and cook, stirring, until softened, 1 minute. Stir in the coriander, paprika, garam masala, cumin and cayenne and cook for another minute.
- Stir in the tomatoes until well mixed. Add the beef and cook, breaking it up with a wooden spoon, until the meat is no longer pink, about 6 minutes. Add 1 cup water and season with salt and black pepper. Add the peas, stir well and simmer, partially covered, until tender, about 10 minutes for fresh peas or 5 minutes for thawed frozen peas.
- Stir in the vinegar and chopped cilantro. Garnish with torn cilantro and serve with warm chapatis.
- Combine both flours and the salt in a large bowl. Slowly pour in the water, moving your other hand through the flour in circular motions, until it starts to come together (you may not need all the water). Then, either in the bowl or on your counter (which you might want to lightly flour to prevent sticking), knead the dough for about 10 minutes. The dough should be soft and pliable. Return the ball of dough to the bowl and rub the surface with a little oil to keep it from drying out. Cover with plastic wrap or a damp cloth and allow to rest about 30 minutes.
- Fill a shallow bowl with whole-wheat flour. Fill a small bowl with the oil or melted butter or ghee and put a spoon in it. Line a plate or baking sheet with paper towels for the finished breads. Heat a cast-iron skillet over medium-high heat. Meanwhile, on a lightly floured surface, work the ball of dough into a 12- to 14-inch-long log. Cut into 12 equal pieces by cutting it in half, and then in half again; cut each of the quarters into 3 equal pieces. Return to the bowl and cover with a damp towel to prevent the dough from drying out.
- Roll the chapatis: Roll a piece of dough between your palms to form a ball, and then flatten with your palm. Dunk this puck in the bowl of whole-wheat flour, and then start rolling it out with a rolling pin, turning a quarter turn after each roll, until it's about 6 inches wide with an even thickness. After some practice you'll be able to roll the chapati and rotate it without picking it up; I do this by weighing down a little on my right hand and pushing the chapati around that way. Test the skillet by sprinkling a little flour on it; if it turns brown immediately, it's ready.
- Flap the chapati between your hands to remove any excess flour, then slap the chapati onto the skillet. It should start darkening almost immediately. When small bubbles start to form, 1 to 2 minutes, spread a little oil over the surface of the chapati, then flip. It should start to puff up. Spoon a little oil over this side too, and when it's puffed up a little more, about 1 minute more, flip. Press down on the edges of the chapati with your spatula or (if you're brave!) with a dry rag. This will seal the edges and encourage the entire chapati to puff up. If you spot any holes, press down on those too so the air doesn't escape. Allowing the air to stay inside the whole chapati makes it flaky and light. Don't fret if your first few don't puff up; it takes practice! They will still taste delicious.
- Remove the chapati to the paper towels. Repeat with the remaining dough, taking care to wipe any excess flour or oil from your pan occasionally and adjusting the heat as needed. Serve the chapatis warm.
BEEF CHAPATIS (AFRICAN VERSION OF TACOS)
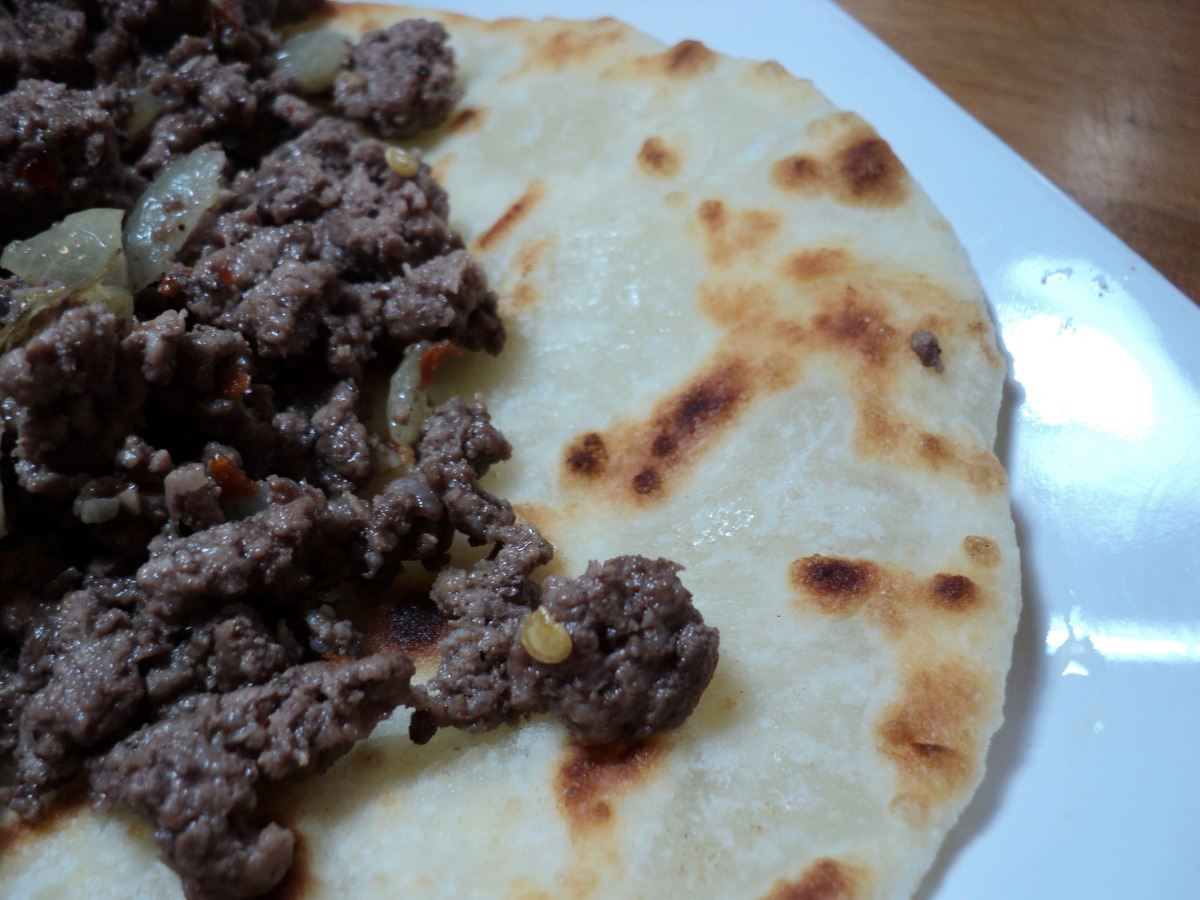
This is an African version of beef tacos. Recipe courstesy of chef Keith Famie. I've added some optional ingredients for topping these tacos that aren't true to the African way, but might be tasty! P.S. I can never seem to find red chilies in our markets, so I sub jalapenos.
Provided by LifeIsGood
Categories Meat
Time 1h
Yield 4 serving(s)
Number Of Ingredients 15
Steps:
- Chapatis:.
- In a mixing bowl, use your hands to combine the flour, water, salt and 2 T of the olive oil. Mix until well combined and a sticky dough forms. (You may need to fine tune this to get the right consistency for kneading without sticking, by adding more flour. If the dough is too stiff then add a bit more water) Remove the dough from the bowl and place it on a floured surface. Knead the dough for about 3 to 5 minutes. Refrigerate for 20 minutes.
- Return the dough to the floured work surface and roll it into 4 six-inch circles/discs.
- Put the remaining 2 T of olive oil in a saute pan over medium heat and make sure to get really hot before adding the chapatis, or the chapatis will soak up the oil instead of browning properly. Put one or two chapatis into the hot pan (depending on the size of your pan) and brown both sides of the chapatis. Remove from pan and keep warm and do the other two (you may need to add a bit more oil to the pan.). I also like to lightly salt the cooked chapatis.
- Filling:.
- In a hot saute pan over medium heat, saute the onion and garlic in the olive oil until the onion gets translucent, about 2 minutes. Add the chiles and saute for 1 minute. Add the ground beef and continue to saute until the meat is completely cooked - approximately 10 minutes.
- Season the filling with salt and pepper and serve on a piece of chapati. Add toppings if desired.
CHAPATIS
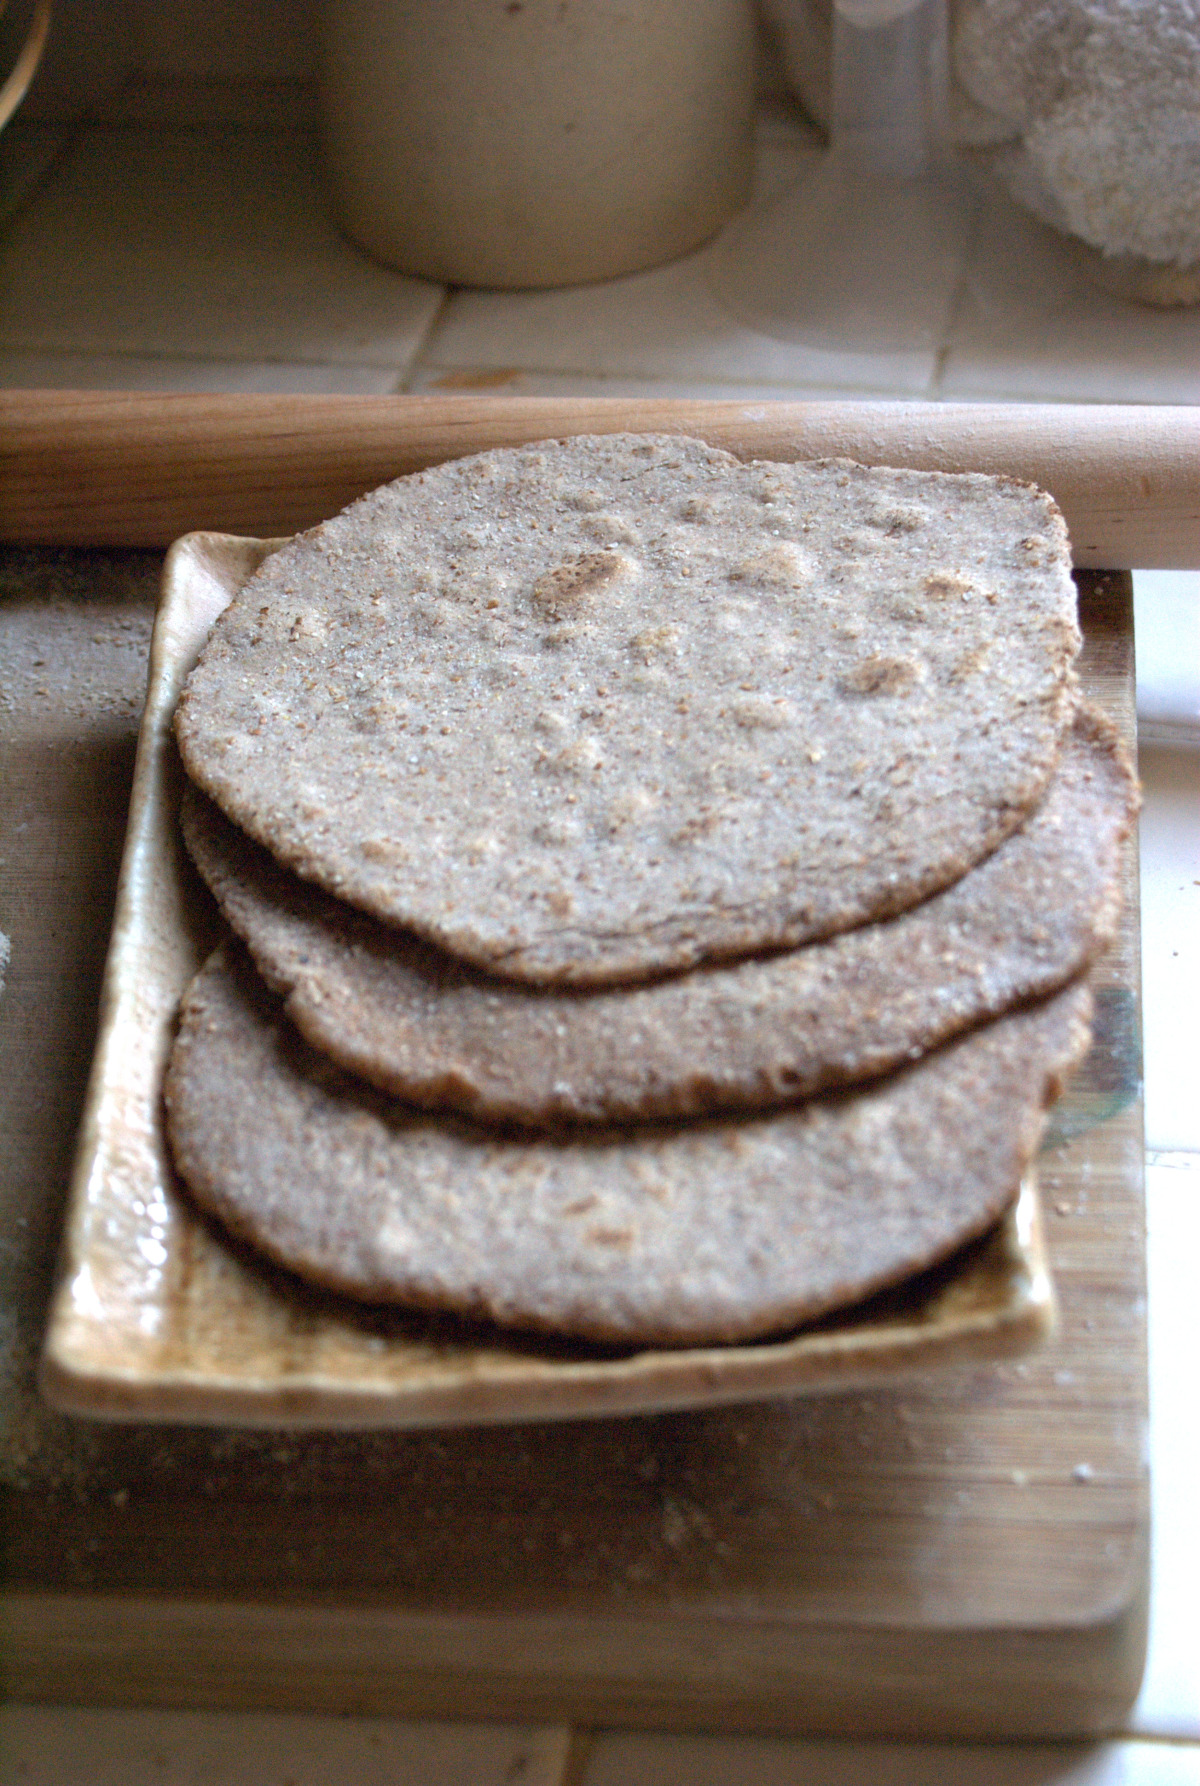
This lowfat, high fiber, vegan (without margarine) recipe was taken from the "Healthy Vegetarian Cookery" cookbook by Nicle Oakley.
Provided by bbgrl79ca
Categories Quick Breads
Time 1h
Yield 8 chapatis
Number Of Ingredients 4
Steps:
- Sift the flour and salt into a large bowl and make a hollow in the centre.
- Add the water gradually, working in the flour to make a firm dough.
- Knead well for about 15 minutes, until the dough is smooth.
- Cover with a damp cloth and leave to stand for about 30 minutes.
- The dough should be quite firm and hard.
- Divide the dough into eight portions.
- Roll each into a circle, about 15 cm (6 inch) in diameter, sprinkling the rolling pin and work surface with flour to prevent sticking.
- Cook each chapati in a very hot heavy frying pan, without fat.
- When the top surface shows signs of bubbling, turn the chapati over and cook for 30-40 seconds on the other side.
- Then place the chapati under a warm grill until it puffs up.
- Spread margarine lightly on one side, fold over and serve hot.
Nutrition Facts : Calories 95, Fat 0.5, SaturatedFat 0.1, Sodium 21.1, Carbohydrate 20.3, Fiber 3.4, Sugar 0.1, Protein 3.8
Tips:
- Use the right flour: Atta (whole wheat flour) is the traditional choice for chapatis, but you can also use all-purpose flour or a blend of the two. If you're using all-purpose flour, you may need to add a little more water to the dough.
- Knead the dough well: Kneading the dough helps to develop the gluten, which makes the chapatis soft and pliable. Knead the dough for at least 5 minutes, or until it is smooth and elastic.
- Let the dough rest: After kneading, let the dough rest for at least 30 minutes. This will help the gluten to relax and make the dough easier to roll out.
- Roll out the dough evenly: When rolling out the dough, make sure to do it evenly so that the chapatis are all the same thickness. This will help them to cook evenly.
- Cook the chapatis on a hot griddle: A hot griddle will help to cook the chapatis evenly and prevent them from sticking. If the griddle is not hot enough, the chapatis will be more likely to tear.
- Flip the chapatis frequently: As the chapatis are cooking, flip them frequently so that they cook evenly on both sides.
- Serve the chapatis hot: Chapatis are best served hot, either on their own or with a curry or other dish.
Conclusion:
Chapatis are a delicious and versatile flatbread that can be enjoyed with a variety of dishes. They are relatively easy to make, but there are a few tips that you can follow to ensure that they turn out perfect every time.
Are you curently on diet or you just want to control your food's nutritions, ingredients? We will help you find recipes by cooking method, nutrition, ingredients...
Check it out »
#60-minutes-or-less #time-to-make #course #preparation #5-ingredients-or-less #flat-shapes #breads #side-dishes #easy #inexpensive
You'll also love


