Best 4 Cake Release Recipes


Cakes are delightful treats that bring joy to celebrations and everyday moments. Baking a perfect cake requires careful attention to ingredients, techniques, and the right tools. When it comes to removing a cake from its pan without crumbling or sticking, using a cake release is essential. This article provides a comprehensive guide to cake release, including its benefits, different types, and step-by-step instructions for using each type.
We'll explore three effective cake release methods: greasing and flouring the pan, using a nonstick spray, and applying a homemade cake release. Each method is explained in detail with clear instructions and helpful tips to ensure successful cake removal. Discover the secrets to achieving perfectly released cakes that maintain their shape and texture, making them a joy to decorate and serve.
HOMEMADE CAKE RELEASE

Grease and flour your cake pans in one step using this Homemade Cake Release! Made with 3 simple ingredients, this cake goop guarantees perfect cakes, muffins and breads every time.
Provided by Jocelyn Delk Adams
Categories Dessert
Time 15m
Number Of Ingredients 3
Steps:
- Mix all of the ingredients together.
- Store in an airtight container in the refrigerator. It lasts for up to 6 months.
Nutrition Facts : Calories 210 kcal, Carbohydrate 5 g, Protein 1 g, Fat 21 g, SaturatedFat 4 g, TransFat 1 g, Sodium 1 mg, Fiber 0.2 g, Sugar 0.02 g, UnsaturatedFat 16 g, ServingSize 1 serving
HOMEMADE CAKE RELEASE
Grease and flour your pans in one step with this Homemade Cake Release! Learn how to prepare cake pans so that your cakes come out perfect every time.
Provided by Olivia
Categories Tutorial
Time 5m
Number Of Ingredients 3
Steps:
- Place all ingredients into a bowl and whisk until smooth.
- Brush onto pans before lining with parchment.
- Store in an airtight container for up to 3 months at room temperature or 6 months in the fridge.
Nutrition Facts : Calories 2073 kcal, Carbohydrate 48 g, Protein 6 g, Fat 212 g, SaturatedFat 115 g, Sodium 5 mg, Fiber 2 g, Sugar 1 g, TransFat 13 g, UnsaturatedFat 86 g, ServingSize 1 serving
HOMEMADE CAKE RELEASE (CAKE GOOP)
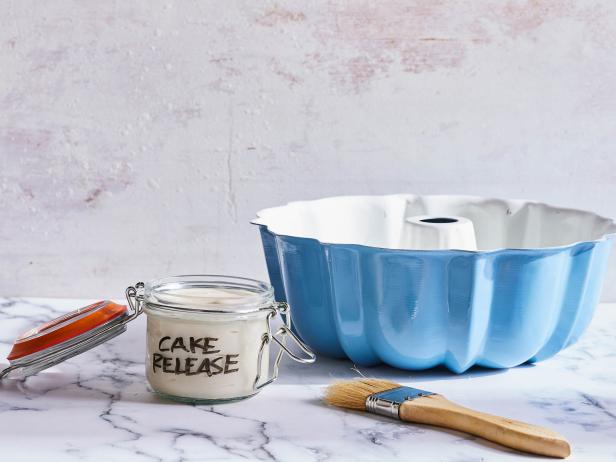
A spreadable paste to coat the inside of cake pans, this homemade cake release is a one-step alternative to buttering and flouring your pans-plus it doesn't leave a floury film on the surface of your cake. It's also a smart alternative to nonstick cooking spray, which can pool at the bottom of pans and isn't recommended for nonstick surfaces. Cake release is especially beneficial when coating intricate pans, since it can be brushed into nooks and crannies so that the design of the cake comes out clean.
Provided by Food Network Kitchen
Time 5m
Yield 1 cup
Number Of Ingredients 3
Steps:
- Whisk together the shortening and vegetable oil in a medium bowl until smooth, 2 to 3 minutes. Whisk in the flour until it becomes a smooth paste. When ready to use, spread a thin layer using a pastry brush on the inside of a cake pan before adding the batter and baking.
- Store cake release in an airtight container at room temperature for up to 1 month.
QUICK EASY CHEAP CAKE RELEASE

I have used this stuff since the mid 70's & wouldn't be without it. (May be used in any recipe that calls for the pan to be "greased". Don't need "Pam" ever again!)
Provided by Carol Speight @CanadianShe_Wolf
Categories Cakes
Number Of Ingredients 3
Steps:
- Mix well, store in an airtight container, either in your refrig. OR in a cool dark pantry. When you go to use it simply use a pastry brush and brush it into your pan like you would if you were greasing it and then flouring. (I use waxed paper to apply it) Then add your prepared cake mix and bake. (I also use it in my muffin pans and that way I don't have to use the muffin papers) (Can also be used IF making Loaf breads or Quick breads) No need to flour your pan,'cause the flour is in the mix!
Tips:
- Use a non-stick baking pan. Greasing and flouring your pan is the traditional method of preventing cakes from sticking, but a non-stick pan makes it even easier.
- Grease and flour your pan, even if it's non-stick. This will help the cake to rise evenly and prevent it from sticking to the sides of the pan.
- Use parchment paper. Parchment paper is a great way to prevent cakes from sticking to the bottom of the pan. Just cut a piece of parchment paper to fit the bottom of your pan and place it in the pan before you pour in the batter.
- Let the cake cool completely before removing it from the pan. If you try to remove the cake from the pan while it's still hot, it's more likely to stick. Let the cake cool completely on a wire rack before you try to remove it from the pan.
- Run a knife around the edges of the cake before removing it from the pan. This will help to loosen the cake from the sides of the pan.
Conclusion:
With a little care and attention, you can easily prevent your cakes from sticking to the pan. By following these tips, you can ensure that your cakes come out of the pan perfectly every time.
Are you curently on diet or you just want to control your food's nutritions, ingredients? We will help you find recipes by cooking method, nutrition, ingredients...
Check it out »
You'll also love