Best 17 Artisan Bread Recipes


**Artisan Bread: A Culinary Journey of Crusty Perfection**
In the realm of baking, few things can compare to the satisfaction of creating a perfect loaf of artisan bread. With its golden-brown crust, chewy interior, and tantalizing aroma, this handcrafted bread is a testament to the art and science of baking. Whether you're a seasoned baker or just starting your culinary journey, our collection of artisan bread recipes will guide you through the process of creating this delectable masterpiece. From classic sourdough to savory focaccia and rustic baguettes, we've got a recipe for every palate and occasion. So gather your ingredients, preheat your oven, and prepare to embark on a delightful baking adventure that will leave you with a loaf of bread that's sure to impress your family and friends.
NO-KNEAD ARTISAN STYLE BREAD

This is a very easy bread to make without any kneading. Bake in a Dutch oven or heavy casserole dish. The bread comes out very crusty and with huge holes throughout, just like at the bakery.
Provided by Jewissa
Categories Bread Yeast Bread Recipes White Bread Recipes
Time P2DT3h
Yield 6
Number Of Ingredients 7
Steps:
- Combine the flour, yeast, and salt in a large bowl and mix to combine. Add the water and herbs, if using, and mix well. The dough will be very sticky and shaggy-looking. Cover the bowl with plastic wrap and set aside at room temperature for 18 to 24 hours.
- Generously flour a work surface. The dough will have risen and will be covered in bubbles. Transfer the dough to the work surface and dust it with flour. Fold the dough in half, and then form the dough into a ball by stretching and tucking the edges of the dough underneath the ball.
- Liberally flour a kitchen towel (do not use terrycloth). Place the dough ball on the floured towel. Cover with another floured towel. Let the dough rise for about two hours [see footnote].
- Preheat an oven to 450 degrees F (230 degrees C). Place a lidded Dutch oven or deep heavy duty casserole dish (with lid) into the oven to preheat.
- Carefully remove the hot baking dish from the oven. Remove the lid and gently turn the dough ball into the ungreased baking dish, seam-side up; shake the dish so the dough is more evenly distributed.
- Cover and bake for 30 minutes. Remove the lid and bake until the crust is golden brown, 15 to 20 minutes. Remove the loaf from the baking dish and let it cool on a rack before slicing.
Nutrition Facts : Calories 229.9 calories, Carbohydrate 48 g, Fat 0.7 g, Fiber 1.9 g, Protein 6.7 g, SaturatedFat 0.1 g, Sodium 778.8 mg, Sugar 0.2 g
ARTISAN SOURDOUGH RYE BREAD

This is my favorite rye bread recipe of all time... so far. I could have just as easily called it Swedish Rye Bread or Aroma Therapy Bread for that matter (takes the coveted baking bread smell to another level). Covers both sourdough and instant yeast versions.
Provided by Eric Rusch
Categories Recipes
Yield 1 Loaf
Number Of Ingredients 11
Steps:
- Sourdough Version
- In a mixing bowl, mix the starter into the water. Add the molasses, all the seeds and orange zest.
- In a separate bowl, combine the flours and salt.
- Gradually stir the dry ingredients into the wet using a dough whisk or spoon until the flour is well incorporated. Cover with plastic and let rest for 15 minutes. After about 15 minutes, mix again for a minute or two. Again let rest for 15 minutes and mix one more time as before. Now cover the bowl with plastic and let sit at room temperature for roughly 12-14 hours.
- Instant Yeast Version
- The only difference is don't use sourdough starter and instead mix the instant yeast into the dry ingredients before combining with the wet ingredients.
- Both Versions
- After the long 12-14 hour proof, stretch and fold the dough and shape into boule or batard (round or oblong) shape for baking. (If you didn't follow that, I'm afraid you're doomed to watch the video.) Cover again with plastic and let rest 15 minutes before putting in a proofing basket for the final rise. If you don't have a proofing basket, line a bowl with a well floured kitchen towel and put the dough in there for the final rise. The final rise should last somewhere between 1 to 1 1/2 hours. Keep the dough covered with plastic to prevent it from drying out.
- Preheat your oven to 475 F a half hour before baking.
- Score the dough with a razor or sharp serrated knife and bake until the internal temp is about 200 F.
- Let cool completely before eating.
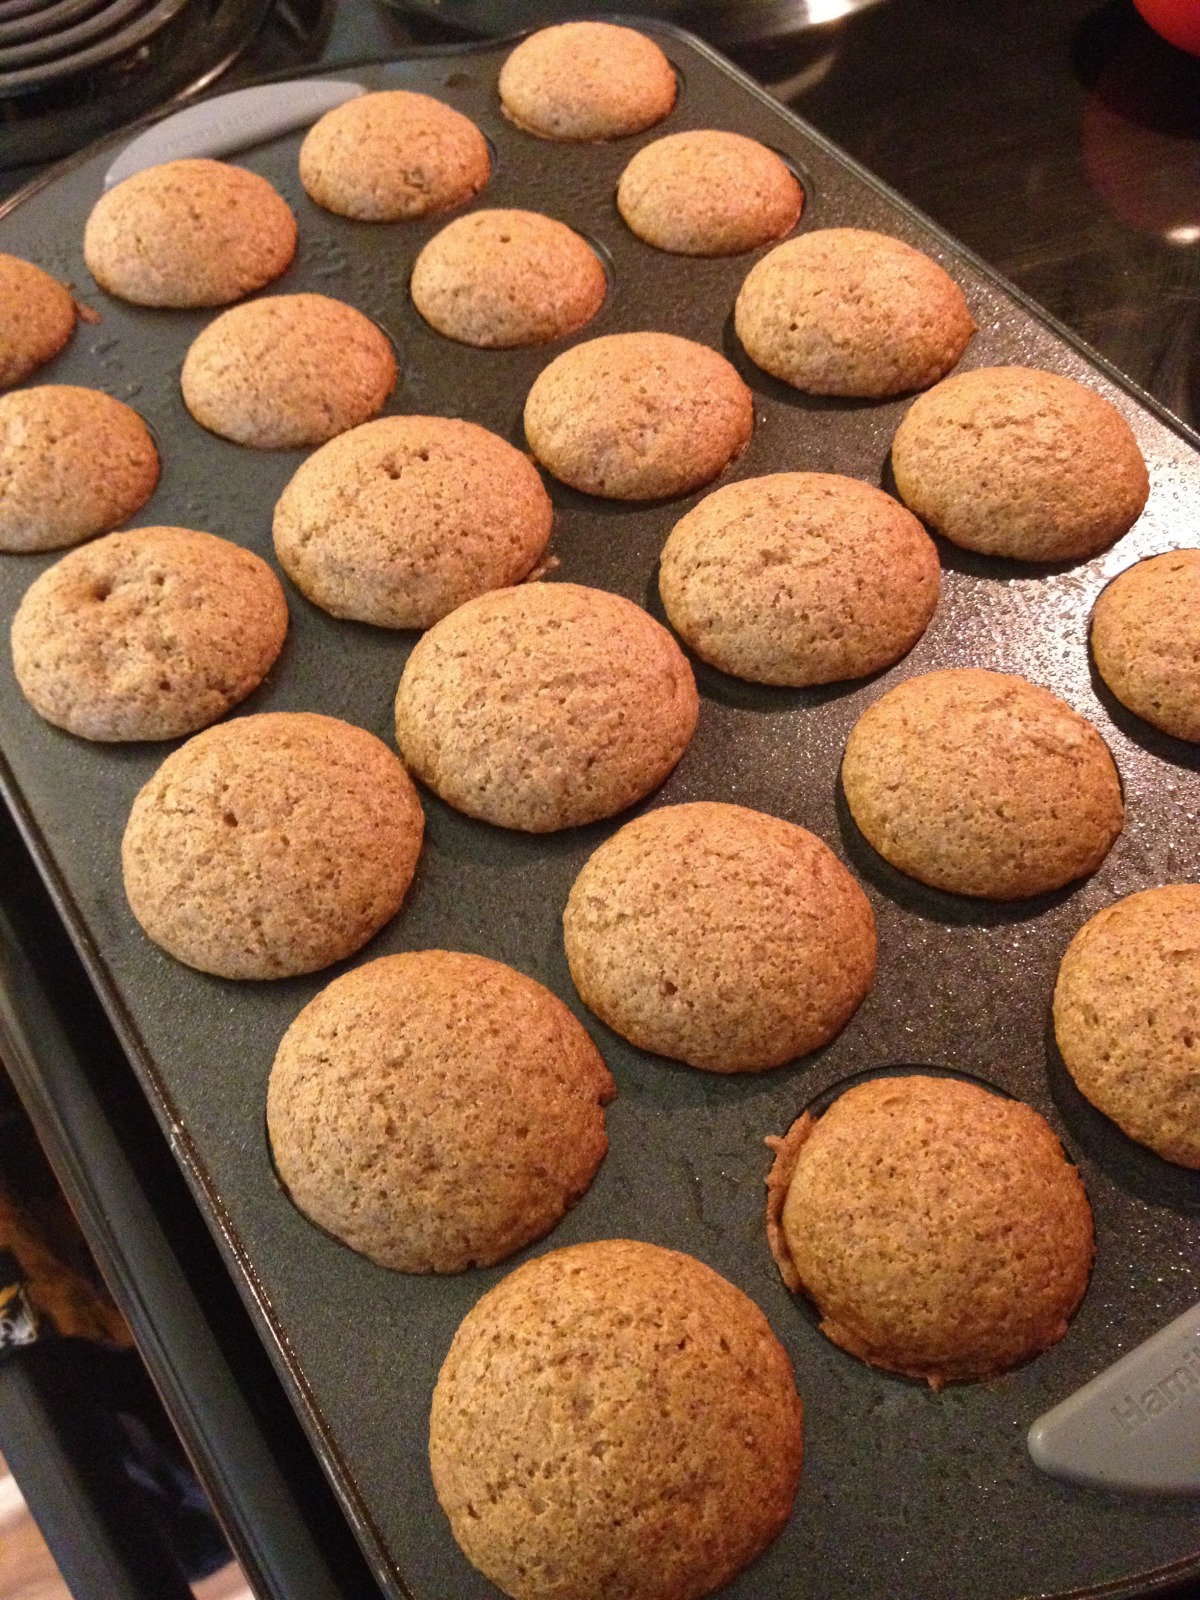
ARTISAN ASIAGO BREAD

This large, flour-sprinkled loaf looks and tastes like it came from a bakery. When you slice it, you'll find pockets of cheese scattered throughout.
Provided by By Betty Crocker Kitchens
Categories Side Dish
Time 4h15m
Yield 24
Number Of Ingredients 8
Steps:
- In large bowl, mix 1 1/2 cups of the flour, the sugar and yeast. Add warm water. Beat with whisk or electric mixer on low speed 1 minute, scraping bowl frequently. Cover tightly with plastic wrap; let stand about 1 hour or until bubbly.
- Stir in oil, rosemary and salt. Stir in enough remaining flour, 1/2 cup at a time, until a soft, smooth dough forms. Let stand 15 minutes.
- Place dough on lightly floured surface. Knead 5 to 10 minutes or until dough is smooth and springy. Knead in 1 cup of the cheese. Grease large bowl with shortening. Place dough in bowl, turning dough to grease all sides. Cover bowl tightly with plastic wrap and let rise in warm place 45 to 60 minutes or until dough has doubled in size. Dough is ready if indentation remains when touched.
- Lightly grease uninsulated cookie sheet with shortening or cooking spray. Place dough on lightly floured surface. Gently shape into football-shaped loaf, about 12 inches long, by stretching sides of dough downward to make a smooth top. Place loaf with smooth side up on cookie sheet. Coat loaf generously with flour. Cover loosely with plastic wrap; let rise in warm place 45 to 60 minutes or until dough has almost doubled in size.
- Place 8- or 9-inch square pan on bottom rack of oven; add hot water to pan until about 1/2 inch from the top. Heat oven to 450°F.
- Spray loaf with cool water; sprinkle with flour. Using serrated knife, carefully cut 1/2-inch-deep slash lengthwise down center of loaf. Sprinkle remaining 1/4 cup cheese into slash.
- Bake 10 minutes. Reduce oven temperature to 400°F. Bake 20 to 25 minutes longer or until loaf is deep golden and sounds hollow when tapped. Remove from cookie sheet to cooling rack; cool.
Nutrition Facts : Fat 1/2, ServingSize 1 Slice, TransFat 0 g
TRADITIONAL ARTISAN STYLE BAGUETTE - RUSTIC FRENCH BREAD
A traditional country-style French bread, made the old-fashioned way (although you can use the bread-machine if you wish). The result is a lovely full-flavored loaf with a wonderful crust. Best eaten the same day. Makes 2 baguettes.
Provided by BecR2400
Categories Yeast Breads
Time 32m
Yield 2 Baguettes, 4-6 serving(s)
Number Of Ingredients 5
Steps:
- Place the yeast, honey and warm water in a large bowl and let stand until foamy, about 5 minutes.
- In a separate bowl, whisk together the salt and the flour. Use a wooden spoon to stir 2 cups of the flour mixture into the yeast mixture; stir in the remaining flour mixture (dough will be stiff).
- Turn out onto a lightly floured work surface. Knead with floured hands until dough is smooth and elastic, about 5-7 minutes. Add a little flour, 1 tablespoon at a time as necessary, to prevent dough from sticking.
- Place in an oiled bowl, turning once to coat. Cover with plastic wrap (or a clean kitchen towel) and leave to rise until doubled in bulk, about 1 1/2 hours.
- Preheat oven to 400F degrees.
- Gently punch dough down to deflate it and shape into two oblong baguettes. Dust tops lightly with flour and place on a lightly greased baking sheet; let rise uncovered for 30 minutes.
- Use a serrated knife to cut 3-5 small diagonal slits across the tops of the baguettes, and lightly sprinkle with cool water.
- Bake in the middle of oven for 25-30 minutes, until golden. Transfer to a rack to cool.
- Best eaten the same day.
Nutrition Facts : Calories 476.7, Fat 1.4, SaturatedFat 0.2, Sodium 1169, Carbohydrate 100.4, Fiber 3.9, Sugar 4.7, Protein 13.6
ARTISAN SOURDOUGH NO-KNEAD BREAD
Our original contribution to the no-knead bread revolution: substitute live sourdough starter for instant yeast to create the ultimate no knead artisan bread loaf.
Provided by Eric Rusch
Categories Recipes
Time 49m
Yield 1 Loaf
Number Of Ingredients 5
Steps:
- In a large mixing bowl, stir 1/4 cup starter into purified water.
- Add combined dry ingredients and stir until well incorporated.
- 2 stretch and folds at 15 minute intervals.
- Cover bowl and let sit roughly 10-12 hours at room temperature.
- Follow video instruction for coil folding and placing dough in well floured proofing basket.
- Cover proofing basket and let rise about 1 to 1 1/2 hours. Proofing times can vary quite a bit based mostly on your ambient room temperature. Experience will be your best teacher when it comes to judging when your dough is ready to bake.
- Preheat your baking vessel to 500ºF for 30 minutes.
- Bake your dough with the cover on for approximately 17 minutes.
- Remove baker cover and continue baking an additional 17 minutes.
- When internal dough temperature reaches 200-210ºF, remove from oven and let cool completely.
- Consume bread, be happy.
ARTISAN SOURDOUGH GARLIC BREAD
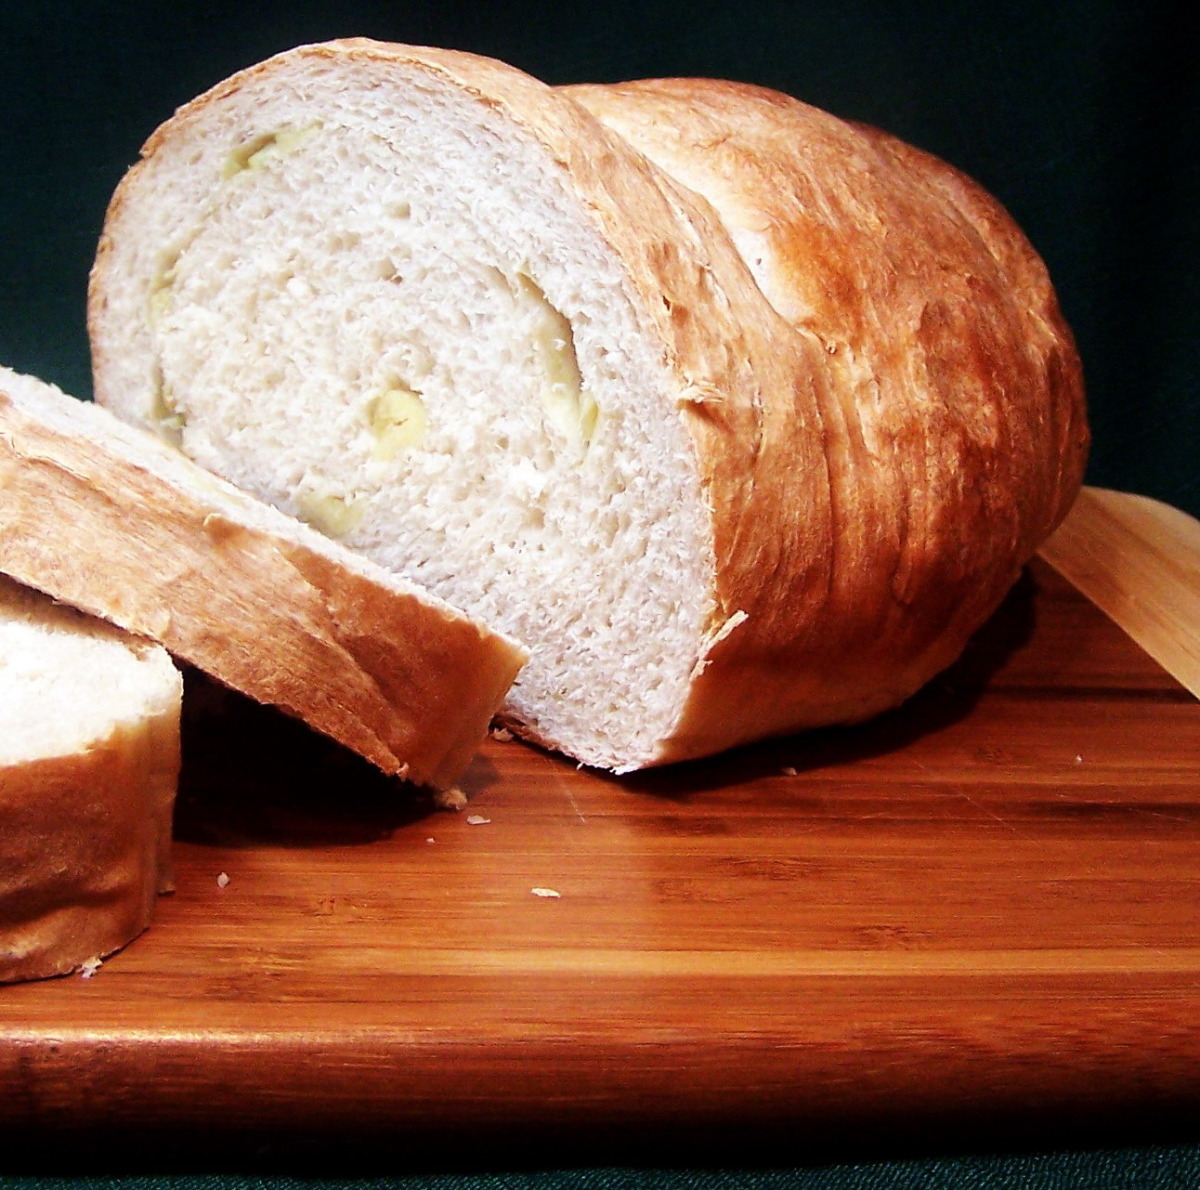
I love to buy the garlic bread with the whole cloves of garlic from Costco, however I can't always get there when I want. I fiddled around a little and this one is pretty close, you do have to plan ahead because the sponge takes at least 18 hrs but the bread is well worth the trouble. This bread makes the BEST grilled sandwiches! I also like to butter it and grill it to go with a salad. YUMMY!!!
Provided by startnover
Categories Sourdough Breads
Time 23h45m
Yield 1 large loaf
Number Of Ingredients 9
Steps:
- The Sponge: Combine the sponge ingredients in a large plastic bowl, cover with plastic wrap and keep in a warm place for 18-20 hours.
- When ready the sponge should have expanded and smell pleasantly sour and bubbling. (at this point you may wish to refrigerate for up to 7 days, just remember to bring back to room temp).
- Bread: Place sponge and all other ingredients except garlic in mixing bowl, mix well and let rest 20-30 minutes.
- Mix again for 5-10 minutes, then cover and allow to rise 2-3 hours.
- Turn out onto lightly greased surface and flatten like you would cinnamon rolls .
- Sprinkle the garlic cloves evenly over the dough and roll up in cinnamon roll fashion pinching the sides in as you make a long oblong shaped loaf.
- Allow the loaf to rise covered with a towel for 2 hours or till almost doubled in size.
- Preheat oven to 475°F.
- Slash the top of the loaf 4 times with a sharp knife.
- Spritz loaf and oven with water.
- Bake in 475°F oven for 3 minutes spraying 2 more times.
- Turn the oven down to 375°F (if it is baking to fast try 350°F).
- Spray often with the water and watch for the bread turning brown too fast. If it does, cover with a foil tent.
- Bake approx 30-40 minutes or till nicely browned and bottom thumps hollow.
- This bread can be a little temperamental, just watch the coloring and adjust temp and cook time as needed.
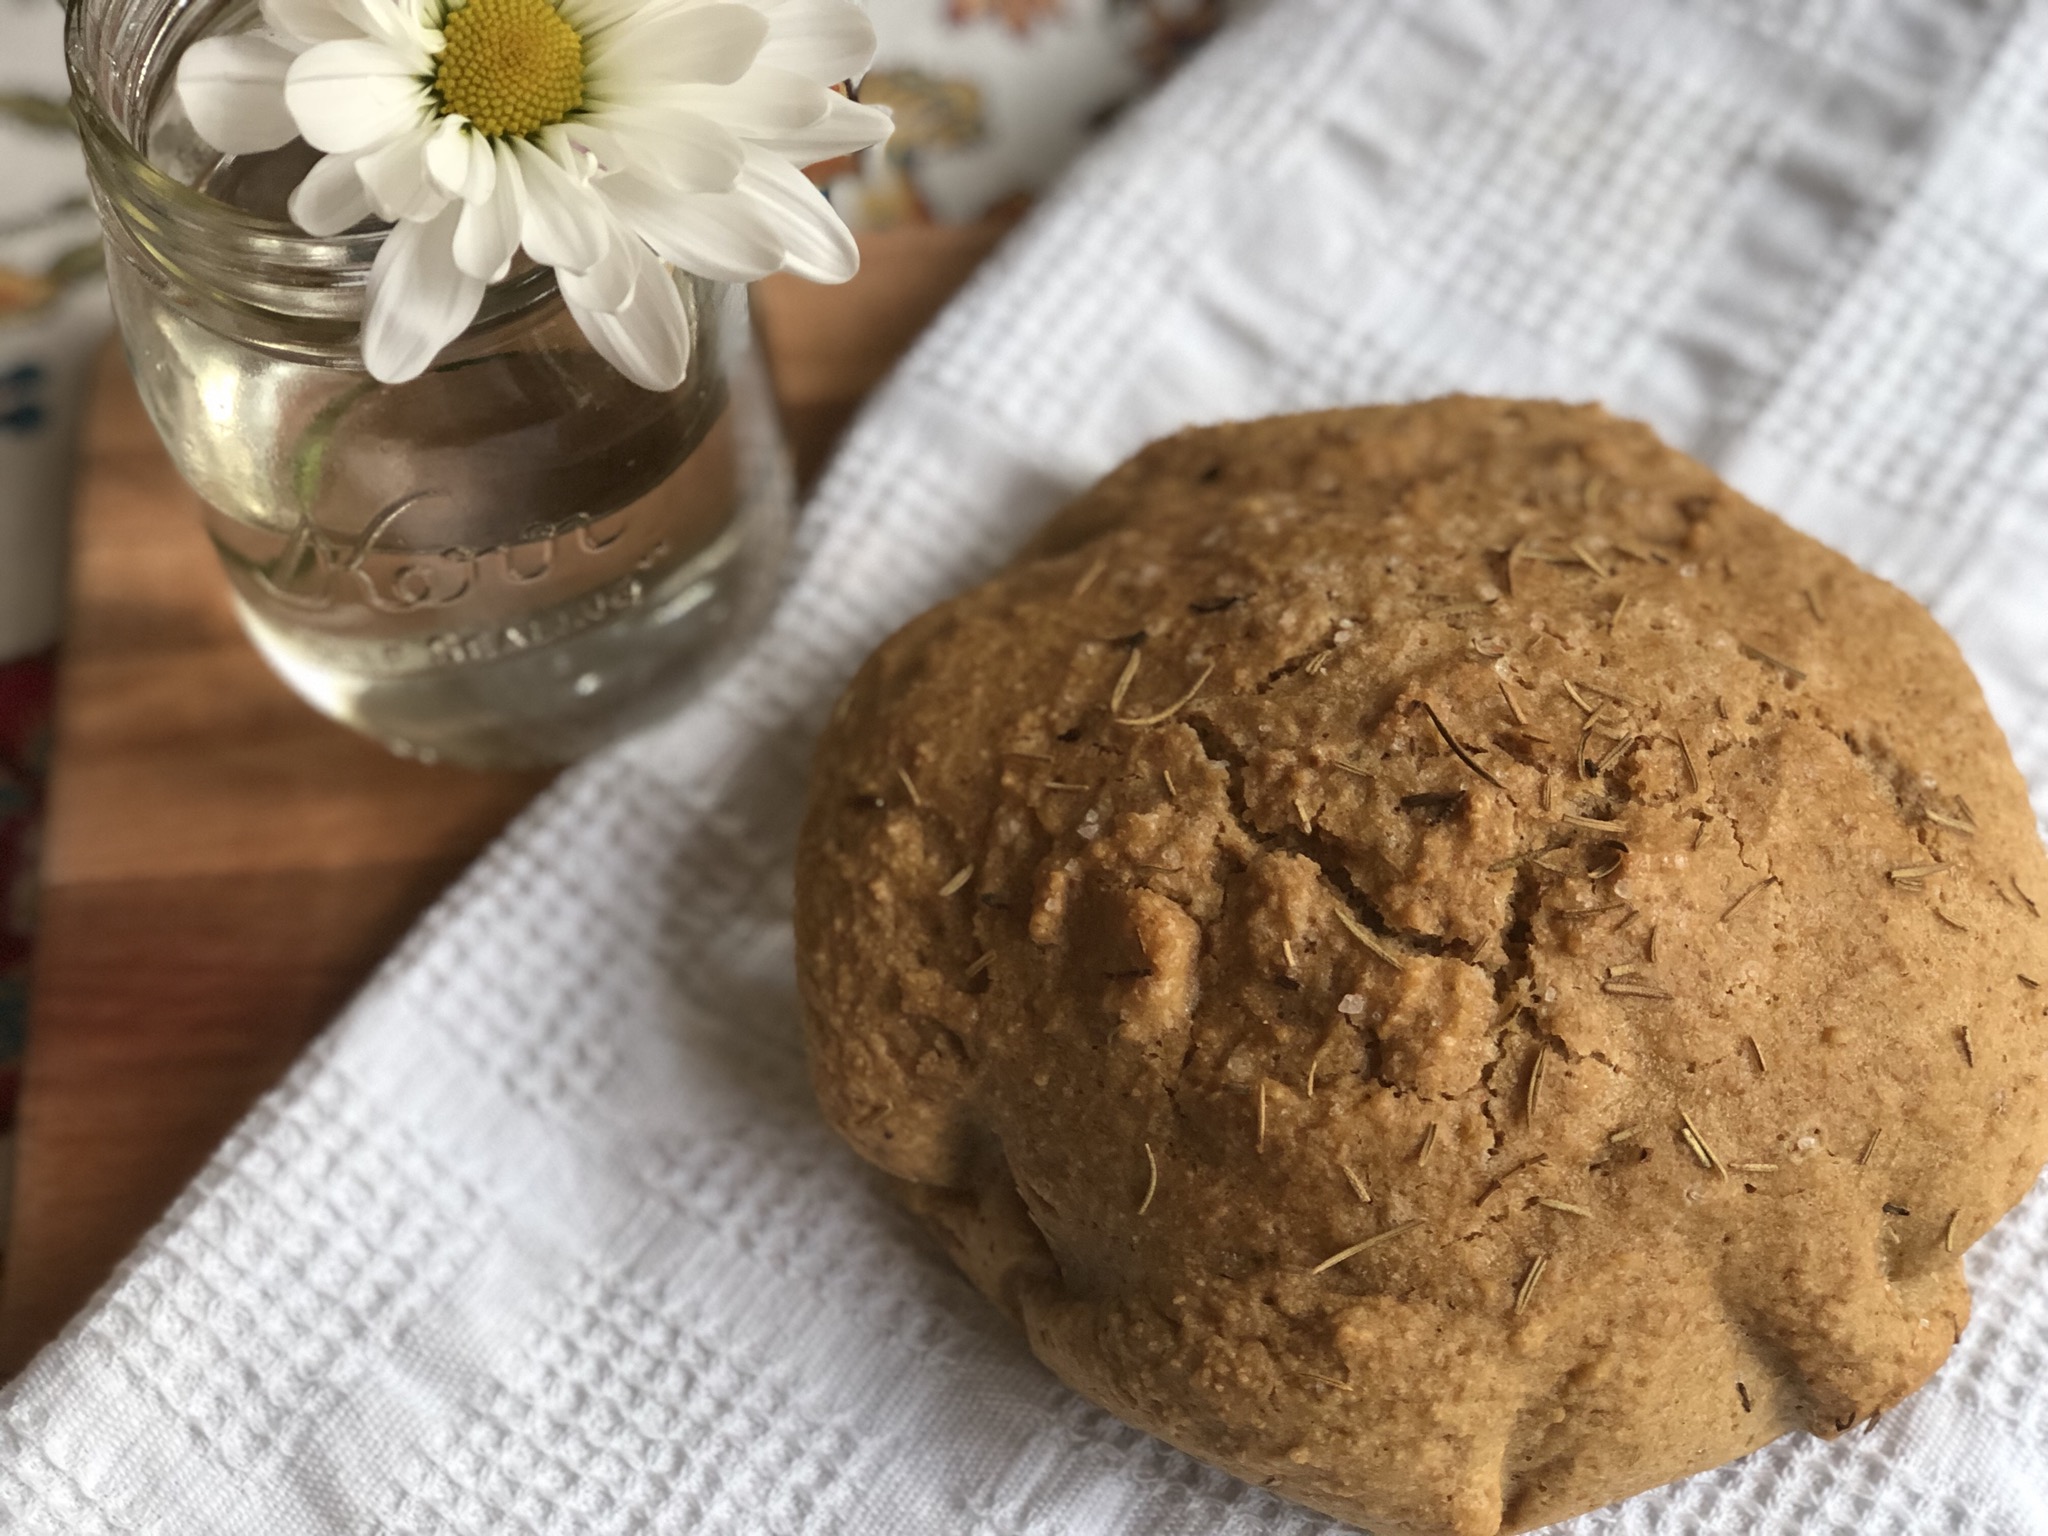
ROSEMARY ARTISAN BREAD

This bread is a combination of two recipes. One from Williams-Sonoma (which took around 8 hours to rise and didn't turn out so well for me) and an Italian herb bread from s'kat. I like how this version turned out very light and airy and aromatic. I used rosemary from my garden and think the lemon really brings out the flavors. * I threw all of the ingredients in my KitchenAid mixer, gradually adding the flour last. * I let my oven warm at 400 deg. for 1 minute then turned it off and put my covered bread in to rise. This really does the trick!
Provided by healthy mamma
Categories Yeast Breads
Time 1h30m
Yield 1-2 loaves
Number Of Ingredients 11
Steps:
- Mix yeast, warm water and sugar together in a large bowl. Set aside for five minutes, or until mixture becomes foamy.
- Stir in olive oil, lemon, salt, rosemary, garlic, onion, cheese and 3 cups flour into the yeast mixture.
- Gradually mix in next three cups of flour. (Dough will be stiff). Knead for 5 to 10 minutes, or until it is smooth and elastic.
- Place in an oiled bowl, turning to cover sides with oil. Cover with a towel, or plastic wrap. Let rise for 1 hour, or until dough has doubled.
- Punch down to release all the air. Shape into a ball. Place in a greased ceramic stoneware, or into two 9x5 inch, greased pans.
- Allow to rise for 1/2 hour again, until doubled in a warm place.
- Bake at 350 degrees for 2 loaves, 30 minutes, for one loaf, 40 minutes.
- Remove loaves from pans and let cool on wire racks for at least 15 minutes, before slicing.
ARTISAN BREAD BEST FLAVOR
This bread has the best flavor, appearance and crumb of all the breads I make. Don't rush it, let it fully rise each time. I use a dutch oven (cast iron pot with cover) so I can contain the steam like a commercial oven. You can spray the top with water and sprinkle salt or caraway seeds. I'm still looking for a way to make the crust crispy. Some of the ingredients are by weight, sorry (trust me it's worth it)
Provided by Arnboat
Categories Yeast Breads
Time 7h40m
Yield 1 Loaf
Number Of Ingredients 6
Steps:
- The critacal factor is using a dutch over to bake.
- Stir the salt into the flour then the yeast. Add the wet items and knead for 5 minutes. Let rise for 2 hours.
- Fold several times and rise again for 2 hours.
- Spray parchment paper with Pam and form it into a rising bowl. Fold the dough again and shape into a ball and put into the parchment paper. Push down the ball and spray the top lightly with Pam and cover with plastic wrap to get a final rise until doubled in size (about 1 1/2 hour).
- Sprinkle with flour and slash top.
- Heat oven and dutch oven to 500 degrees for 1/2 hour. Remove dutch oven to stove top and gently lift the partchment paper and dough and place both into the dutch oven and cover.
- Lower oven temp to 450 and bake covered for 25 minutes.
- Remove cover and bake another 15-20 minutes until golden brown or until bread internal temp is 200.
- Cool uncovered.
ARTISAN NO-KNEAD BREAD
The Breadtopia no-knead bread recipe. Create an artisan loaf of bread at home from four ingredients with about ten minutes work.
Provided by Eric Rusch
Categories Recipes
Yield 1 Loaf
Number Of Ingredients 4
Steps:
- Mix together the dry ingredients.
- Mix in water until the water is incorporated.
- Cover with plastic and let sit 9-12 hours (see "No Knead Revisited" section below).
- Follow video instruction for folding.
- Cover loosely with plastic and rest for 15 minutes.
- Transfer to well floured towel or proofing basket. Cover with towel and let rise about about 75 minutes (see "No Knead Revisited" section below).
- Bake in covered La Cloche or Dutch oven preheated to 500 degrees for 30 minutes.
- Remove cover; reduce heat to 450 degrees and bake an additional 15 minutes.
- Let cool completely on rack.
- Consume bread, be happy.
ARTISAN SEMOLINA AND ROSEMARY BREAD
Semolina is a type of flour that is used in this traditional Italian bread. Combined with rosemary leaves and olive oil, it makes a great side for any Italian-inspired dinner.
Provided by Betty Crocker Kitchens
Categories Side Dish
Time 4h40m
Yield 12
Number Of Ingredients 12
Steps:
- In large bowl, mix 2 cups of the all-purpose flour, the sugar, table salt and yeast. Stir in warm water and 1 tablespoon olive oil until well mixed, about 1 minute. Beat with wooden spoon 2 minutes.
- Stir in semolina flour and 1 tablespoon rosemary. Stir in additional all-purpose flour, 1 tablespoon at a time, until dough leaves side of bowl, flour is incorporated and dough in not sticky. Cover tightly with plastic wrap; refrigerate at least 2 hours but no longer than 24 hours.
- Line cookie sheet with cooking parchment paper. Sprinkle parchment with cornmeal. Place dough on lightly floured surface; turn dough to lightly coat with flour. With floured hands, shape dough into 6x4-inch oval by stretching surface of dough around to bottom on all 4 sides; pinch bottom to seal. Place on cookie sheet. Cover loosely with plastic wrap sprayed with cooking spray; let rise in warm place about 1 hour or until doubled in size.
- Meanwhile, about 20 minutes before baking, place pizza stone on oven rack. Heat oven to 400°F. Brush dough with 2 teaspoons olive oil; sprinkle with 1 tablespoon rosemary and sea salt. Slide dough and parchment paper from cookie sheet onto pizza stone.
- Bake 20 to 25 minutes or until golden brown. Cool on cooling rack, about 1 hour.
Nutrition Facts : Cholesterol 0 mg, ServingSize 1 Slice, TransFat 0 g
BONNIE'S ARTISAN DUTCH OVEN SANDWICH BREAD

This recipe was created to make a special organic sandwich bread that would hold up to any sandwich filling. One that was pliable and would not crumble, and one that would slice easily. It would have to be a great tasting sandwich bread, soft in the middle, crunchy on the outside, and it would have to be good to eat plain or...
Provided by BonniE !
Categories Other Breads
Time 55m
Number Of Ingredients 12
Steps:
- 1. EQUIPMENT: Small Dutch Oven with tight fitting lid Parchment paper Danish Whisk for mixing
- 2. Gather your ingredients and read through the recipe before you begin. Make sure your ingredients are room temperature.
- 3. The Danish whisk is a wonderful tool for mixing flour and wet dough. I use it all the time for pulling dough away from the sides of the bowl. It is very sticky dough and sticks to your fingers, but it doesn't stick to the Danish whisk.
- 4. When the bread is completely cool, place in a ziplock bag with two large paper towels to keep moisture from forming. The bread can be frozen.
- 5. MIXING THE DOUGH Make sure all your ingredients are at room temperature. I set the ingredients on the counter at least an hour before I make bread. Using a large mixing bowl, combine all the DRY ingredients and mix until well combined. Measure the room temperature water and pour it over the flour. Take the Danish whisk and mix the dough until you don't see anymore flour. No need to knead!
- 6. This will be a loose dough. Cover the bowl tightly with saran wrap. I put mine in the pantry because there is no draft in there from the air conditioner. Let the mixture rise overnight for 15 to 18 hours. It will double in size, and it will have bubbles all over the top of it. The dough tries to pull away from the sides of the bowl. It smells yeasty. It is ready! :)
- 7. FORMING THE DOUGH Dip your hands in flour and sprinkle some flour around the edges of the bowl. Gently pull the bread away from the sides of the bowl with the Danish whisk.
- 8. Gradually loosen the dough from the bottom of the bowl. Use as little flour as necessary.
- 9. Shape into a loose ball without kneading. Turn it out on a cutting board. Cover the dough with a tea towel, and let it rest for an hour.
- 10. PREHEATING THE OVEN Preheat the oven AND the pot (without the lid) to 425 degrees (for rustic crunchy) or 420 degrees (for a softer crunch) about ten minutes before the dough is ready to bake. (Read more about the temperature in STEP 15) Meanwhile, place parchment paper in a couple of nesting bowls to give it a bowl shape. I put something heavy in it to hold it down until ready to use.
- 11. NOTE: If you like the earthy taste of cornmeal on the bottom of your Artisan bread, sprinkle some on the parchment paper just before you put the bread in the oven.
- 12. BAKING THE BREAD After the dough has rested for an hour, remove the tea towel and cut two to three slits in the top of the dough with a sharp knife.
- 13. Remove the hot pot from the oven. Gently lift the dough and place it in the prepared parchment paper, and gather the edges of the parchment paper in both hands and lift both paper and dough into the center of the hot pot. (Careful it is a hot pot!) This is easier than trying to juggle dough that wants to move and you trying to drop it in the middle of the hot pot. Cover with its lid. Using mitts, return the pot to the hot oven.
- 14. Bake for 40 minutes covered and remove the lid to check how brown it is, and if it is not brown, continue to bake with lid on an additional 10 minutes until golden brown and done in the center. You can also take the temperature with a thermometer. Mine is done all the way through in 50 minutes. So I haven't needed to use a thermometer.
- 15. NOTE: Every oven is different. So watch your bread the last few minutes of baking time. In my oven, the bread bakes perfectly in 50 minutes without peeking at 425 degrees to yield a crunchy bread. However, I have been experimenting, and I tried doubling the recipe, but that didn't turn out well. It is best to make only single loaves with this recipe. Next, I experimented making the most perfect loaf ever, and baked at 420 F for 50 minutes with the lid on, yielded an outstanding, golden brown loaf of sandwich bread, pliable and not crumbly. The crust is slightly softer than the loaf baked at 425 F. I like rustic crunchy, and my husband likes a softer crunch. Success! Tip: When you are baking bread in your oven, take note of what you would like to see changed in the finished product. Modern ovens come with adjustable temperatures. You can experiment and find just the right temperature that will work the best in your oven.
- 16. AFTER BAKING After you have removed the Dutch oven pot from the oven, brush the top of the bread with the melted butter to keep it soft. Remove the bread from the pot and set on a rack to cool, and cover with a tea towel. Allow to cool before slicing....Of course, I do realize that is just wishful thinking! Enjoy!
PERFECT GLUTEN-FREE ARTISAN BREAD
This no-knead gluten-free artisan bread is simple and so tasty, with an absolutely perfect crust. Ideal for those who love freshly home-baked bread right out of the oven.
Provided by Fioa
Categories Bread Yeast Bread Recipes
Time 1h55m
Yield 8
Number Of Ingredients 8
Steps:
- Preheat the oven to 500 degrees F (260 degrees C). Heat a Dutch oven with the lid on in the oven.
- Combine yeast and 1/3 cup lukewarm water in a large bowl; whisk until fully dissolved. Let stand for 10 minutes.
- Combine flour, baking soda, and salt in a separate bowl; mix well. Add flour mixture to yeast mixture; whisk until flour is absorbed.
- Whisk remaining 1/3 cup water, eggs, olive oil, and vinegar in a separate bowl. Add to flour mixture and whisk well until fully combined and a soft dough is formed. Cover dough with plastic wrap and let rise for 45 minutes.
- Spoon dough into the center a large piece of parchment paper. Smooth out loaf with an offset spatula; sprinkle top with gluten-free flour.
- Place loaf with parchment paper inside the hot Dutch oven; cover with the lid and place in the oven.
- Bake in the preheated oven until golden, about 45 minutes. Remove bread with a spatula and transfer to a wire rack.
Nutrition Facts : Calories 169 calories, Carbohydrate 25.3 g, Cholesterol 61.4 mg, Fat 6.2 g, Fiber 3.5 g, Protein 5.7 g, SaturatedFat 1 g, Sodium 212.9 mg, Sugar 1.3 g
ARTISAN STYLE GLUTEN FREE BREAD
This artisan style gluten free bread has a fantastic texture and delicious flavor. It also mixes up quickly and can be baked into various shapes and styles.
Provided by Eric Rusch
Categories Recipes
Time 1h30m
Number Of Ingredients 6
Steps:
- In a bowl, whisk together the dry ingredients (flour, sugar, yeast).
- Cut in the butter until it's dispersed throughout the flour.
- Gradually stir in the water and milk. You may want to warm up the milk to about 100ºF first.
- Cover and let the dough proof in a warm place for 15 minutes.
- Re-mix the dough, form it into the desired shape, and proof it in greased bread tin or a rice flour dusted proofing basket until about double in volume. This takes 1-2 hours, depending on your room and dough temperatures.
- Preheat your oven to 400ºF. If making an artisan style loaf, preheat your baking vessel too.
- Bake for 1 hour covered and 15 more minutes uncovered. If baking in a loaf pan, tent the pan with foil until the last 15 minutes.
NO-KNEAD ARTISAN BREAD
With ingredients like flour, sugar, salt and water, and only 15 minutes of prep time, this no-knead artisan bread can come together quite easily.
Provided by By Betty Crocker Kitchens
Categories Side Dish
Time 4h5m
Yield 24
Number Of Ingredients 7
Steps:
- In large bowl, mix 2 cups of the flour, the sugar, salt and yeast. Stir in water and oil until well mixed, about 1 minute. Beat with wooden spoon 2 minutes.
- Stir in 1 cup of the remaining flour. Stir in additional flour, 2 tablespoons at a time, until dough leaves side of bowl, flour is incorporated and dough is not sticky. Cover tightly with plastic wrap; refrigerate at least 2 hours but no longer than 24 hours.
- Grease large cookie sheet with shortening or cooking spray; sprinkle with cornmeal, shaking off excess. Divide dough in half.
- With floured hands, shape each half of dough into smooth ball by stretching surface of dough around to bottom on all 4 sides; pinch bottom to seal. Place dough balls on cookie sheet about 5 inches apart. Cover loosely with plastic wrap; let rise in warm place about 1 1/2 hours or until dough has doubled in size.
- Heat oven to 375°F. Place 8- or 9-inch pan on bottom rack of oven; add hot water until about 1/2 inch from top. Uncover dough; using serrated knife, carefully slash tic-tac-toe pattern on each loaf top. Bake 15 to 20 minutes or until loaves are dark golden brown and bread sounds hollow when tapped. Remove from cookie sheet to cooling rack; cool.
Nutrition Facts : Cholesterol 0 mg, ServingSize 1 Slice, TransFat 0 g
WHOLE WHEAT SANDWICH BREAD (ARTISAN NO-KNEAD)
From "Artisan Bread in Five Minutes a Day" by Jeff Hertzberg & Zoe Francois. Makes 3 1-1/2 pound loaves. The recipe is easily doubled or halved.
Provided by ceilmary
Categories Breads
Time 2h50m
Yield 3 1-1/2 pound loaves
Number Of Ingredients 10
Steps:
- Mix yeast, salt, honey and butter with the lukewarm water in a 5 quart bowl, or a lidded (not airtight) food container.
- Mix in the remaining dry ingredients without kneading, using a spoon, a 14-cup capacity food processor (with dough attachement), or a heavy-duty stand mixer (with dough hook). If you're not using a machine, you may need to use wet hands to incorporate the last bit of flour.
- Cover (not airtight), and allow to rest a room temperature until the dough rises and collapses (or flattens on top); approximately 2 hours.
- The dough can be used immediately after the initial rise, though it is easier to handle when cold. Refrigerate in a lidded (not airtight) container and use over the next 5 days.
- On baking day, lightly grease a 9x4x3 nonstick loaf pan with a neutral-tasting oil. Dust the surface of the refrigerated dough with flour and cut off a 1-1/2 pound (canteloupe sized) piece. Dust the piece with more flour and quickly shape it into a ball by stretching the surface of the dough around to the bottom and all four sides, rotating the ball a quarter-turn as you go. Form an elongated oval and place it in the prepared pan. Allow to rest for 1 hour and 40 minutes (or just 40 minutes if you are using fresh, unrefrigerated dough).
- Twenty minutes before baking time, preheat the oven to 400F, with an empty broiler tray on any other shelf that won't interfere with the rising bread.
- Place the loaf on a rack near the center of the oven. Pour 1 cup of hot tap water into the broiler tray and quickly close the door. Bake for about 50 minutes, or until deeply browned and firm.
- Allow to cool before slicing or eating.
Nutrition Facts : Calories 1169.8, Fat 22.6, SaturatedFat 10.9, Cholesterol 40.7, Sodium 3127.1, Carbohydrate 213.7, Fiber 23.3, Sugar 24.1, Protein 39.3
ARTISAN BASIC FRENCH BREAD AND VARIATIONS (OVERNIGHT)
Prep time includes dough sitting and rising time, hands on time is about 10 minutes. When it comes to breadmaking, simplest can be best. this recipe has 4 ingredients (or 5 if you decide to use some whole wheat flour). I learned this in a breadmaking class, and have made it before for neighbors for Christmas. Many people are surprised that it is homemade... it's not difficult, it's just a matter of learning. Variations are listed in directions. If you would like to learn more about making great bread, I recommend Artisan Bread in 5 Minutes a Day, Amy's Bread, and The Bread Apprentice. Hope you enjoy this!
Provided by Chef TanyaW
Categories Yeast Breads
Time 14h20m
Yield 2 loaves
Number Of Ingredients 4
Steps:
- Mix and knead (I mix and knead in my Bosch for about 5 minutes).
- Cover and let rise 12 hours.
- Divide dough into 2 pieces.
- Shape and let rise 2-3 hours (spray plastic with Pam so it won't stick when you uncover).
- Preheat oven to 425 degrees for about 30 minutes if using a baking stone (using a stone will give the best results).
- Slice tops. If you are not confident in slicing tops, slice before rising -- or dust with flour and use a very sharp knife -- you don't want the whole thing to collapse (brushing with water also works).
- For ideal results allow to rise on a pizza peel dusted with flour and make a quick transfer to stone at baking time (or if that's a little scary, let it rise on parchment paper for an easier transfer).
- Bake at 425 degrees for about 20 minutes, with steam first 10 minutes (spray water in oven liberally about every 3 minutes or see instructions below). Round or boule shaped loaves will take ~ 30 minutes to bake.
- Best steaming method: put shallow pan on bottom rack and allow to preheat 10-15 minutes before baking bread. Pour 2 cups into pan so there will be steam throughout baking time.
- Variations:.
- ASIAGO or PEPPER CHEDDAR: Add to basic recipe 1 cup grated or cubed Asiago or 1 cup grated or cubed Cheddar and 1 1/2 t black pepper.
- BLACK OLIVE AND SWEET RED PEPPER: After first rising, knead in one sweet red roasted red pepper, thinkly sliced, and 1 cup coarsely chopped black olives (delicious with Kalamata or other deli olives if you like them!). Shape into 3 round loaves and place on cookie sheets sprinkled with cornmeal. Let rise and bake.
- FRESH ROSEMARY BREAD WITH OLIVE OIL: Substitute q cup whole wheat flour for white flour, and add in 1/4 cup olive oil to dough. After kneading, knead in 1/3 Celsius fresh rosemary leaves, chopped. Let rise overnight, Shape into 2 or 3 boules (round loaves), let rise and bake. Brush warm loaves with olive oil. also good with 1 cup sunflower seeds.
- MULTIGRAIN: Soak together 1/2 cup oatmeal, 1/4 cup wheat kernels, 1/4 cup rolled barley or wheat, 1/4 cup sunflower seeds, 1 T millet, 2 T molasses, 1/2 c more water for 20 minutes. Combine with 4 3/4 c whole wheat flour, 1 1/2 cups water, and 2 tsp yeast. Knead into the basic bread.
- PIZZA CRUST: use 1/3 batch for a 14-16" round pizza, 1/2 batch for a rectangular pizza on a cookie sheet.
- RYE BREAD/RYE ONION BREAD: Stir 3/4 cup water into 1 2/3 cup ry flour, let sit at least an hour. For onion bread, add in 1/2 cup chopped onion. Mix and knead this in after the first rising. Shape, let rise, and bake.
- SEEDS, WHOLE WHEAT, AND FRUIT: Before mixing dough, combine in a small bowl 1 T flaxseed, 1 T millet, 1/2 c raisins, 1/2 c chopped dried apricots, and 1/2 c chopped pitted prunes. Add enough hot water to just cover. Mix dough, subbing whole wheat flour for hal the white flour. Knead till smooth, then knead in seed and fruit, rained, as well as 1/2 c sesame seeds and 2/3 c cooked wheat kernels. Let rise overnight. Shape into 2 disks, 2" thick. Score into 6 wedges each. Let rise until nearly doubled. Bake. Serve warm or cold, plain or with jam or cream cheese.
- WHOLE WHEAT AND BARLEY: Mix 4 3/4 c whole wheat flour with 1 1/2 cups water. Add 1/2 t year and 1 cup cooked barley to basic bread dough. Shape, rise, and bake. Great for sandwiches. May also add in 1 cup chopped walnuts.
QUICK ARTISAN STYLE MULTI GRAIN SOURDOUGH BREAD RECIPE - (3.9/5)
Provided by Gregg
Number Of Ingredients 13
Steps:
- To make the soaker: Put the multi grain cereal or oats in a heatproof bowl (I use mixing bowl for mixer), and pour the boiling water over them, stirring to combine ( depending on cereal or oats, water all soaked in and cereal is mushy adjust water accordingly). Let cool to lukewarm before using. To make the dough: In a large mixing bowl, or the bucket of a bread machine, combine the fed sourdough starter and 3/4 cup of the water, mixing until smooth. Add the remaining dough ingredients (combine all dry ingredients and mix before adding) plus the soaker, and mix and knead - by hand, mixer, or bread machine - until you've made a soft dough, adding additional water as needed (should be tacky and if using dough hook and pulling free from bowl). Cover the dough in the bowl, and let it rise until it's almost doubled, about 1 to 1 1/2 hours. Turn the dough out onto a lightly greased work surface and gently fold it over a few times to deflate it (push out in a rectangle and fold in 1/3s and then pull corners up to center make a ball pulling and pinching in center). Shape the dough into a large round. Grease a Dutch oven or baking crock, and place the dough into it (I put dough parchment in dutch oven). Cover the crock, and let the loaf rise until it's very puffy, about 1 1/2 to 2 hours. Just before baking, brush or spray the loaf with water, and sprinkle with seeds. Use a lame or a very sharp knife to make several slashes across the top of the loaf, in the shape of a pound sign or just have fun with your own design. Place the covered crock into a cold oven, set to 450°F, and turn on the oven. Bake the bread for 35 minutes. Uncover and continue baking until the bread is deep golden brown, about 10 additional minutes. Remove the bread from the oven and turn it out of the crock onto a rack to cool.
Tips:
- Invest in a good-quality bread machine. This will make the bread-making process much easier and more efficient.
- Use fresh, high-quality ingredients. This will result in a better-tasting bread.
- Follow the recipe carefully. Don't skip any steps or substitute ingredients unless you know what you're doing.
- Be patient. Bread making takes time. Don't try to rush the process.
- Experiment with different recipes and techniques. There are many ways to make artisan bread, so find a method that you enjoy and that produces the results you want.
- Ask for assistance if you require it; there are numerous internet resources and communities devoted to creating artisan bread.
Conclusion:
Making artisan bread at home is a rewarding experience. With a little practice, you can create delicious, crusty loaves that will impress your family and friends. So what are you waiting for? Get started today!
Are you curently on diet or you just want to control your food's nutritions, ingredients? We will help you find recipes by cooking method, nutrition, ingredients...
Check it out »
You'll also love