Best 6 Alexandra Guarnaschelli Recipes Food Network Recipes


**Discover Culinary Delights with Alexandra Guarnaschelli's Exquisite Recipes**
Journey into the culinary mastery of Alexandra Guarnaschelli, renowned chef and Food Network star. Her diverse collection of recipes showcases her passion for vibrant flavors and innovative techniques. From tantalizing appetizers to delectable desserts, each dish is a testament to her culinary expertise. Embark on a culinary adventure as you explore her signature recipes, ranging from hearty and comforting classics to inventive and modern creations. Indulge in the richness of her Braised Short Ribs with Creamy Polenta, or savor the delicate flavors of her Pan-Seared Scallops with Lemon-Caper Butter Sauce. Craving something sweet? Delight in her decadent Chocolate Lava Cakes or whip up a batch of her irresistible Brown Butter Blondies. Prepare to elevate your cooking skills and tantalize your taste buds with Alexandra Guarnaschelli's exceptional recipes.
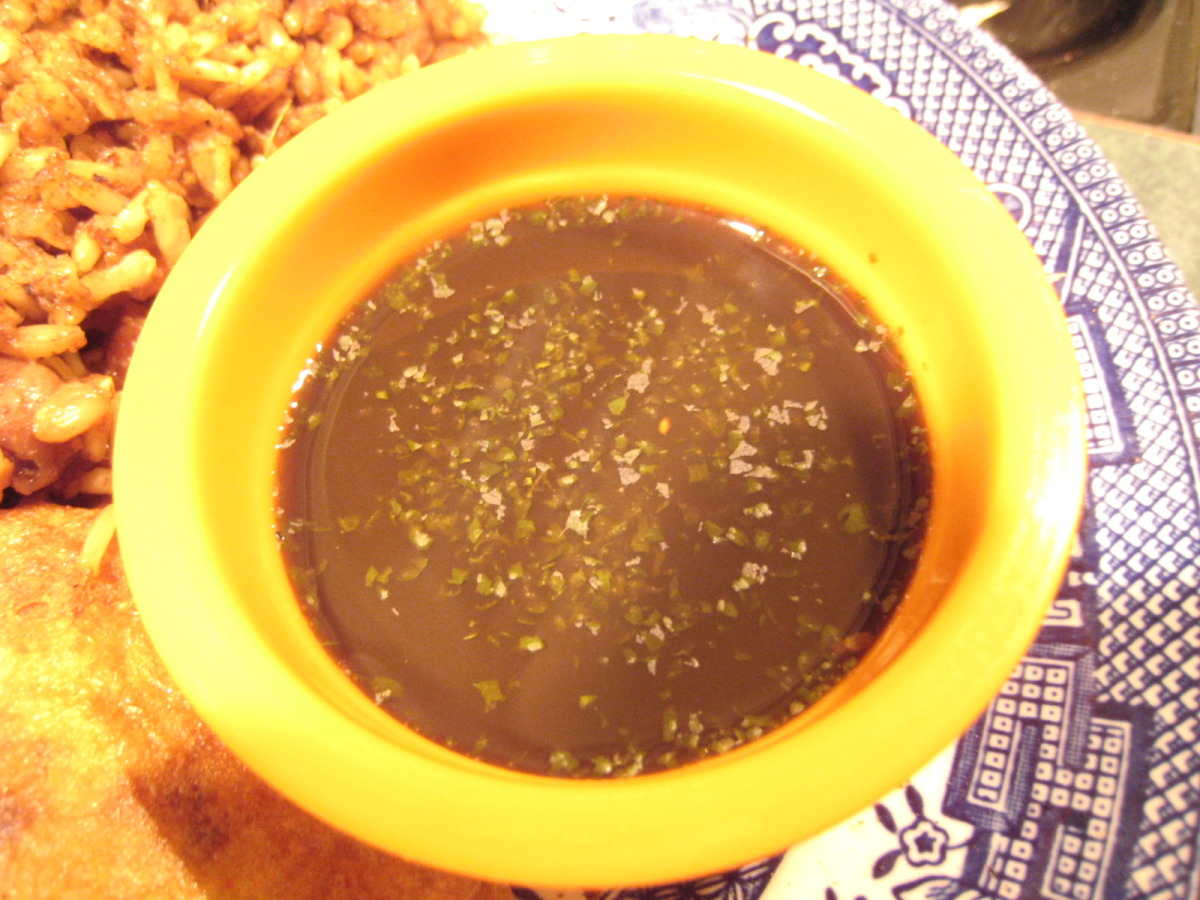
CHINESE CHILLED NOODLES
Provided by Alex Guarnaschelli
Categories appetizer
Time 3h35m
Yield 8 to 10 servings
Number Of Ingredients 12
Steps:
- Bring a large pot of water to a boil. Meanwhile, in a large bowl, combine the sesame oil, black soy sauce, balsamic, sugar, salt, and Chile Oil. Whisk to blend. Stir in half of the sliced scallions. Set aside in the refrigerator.
- When the water boils, season with salt until the water tastes like seawater. Plunge the pasta in the boiling water and cook, 3 to 5 minutes, until al dente. Place a colander in the sink. Remove the pot from the heat and pour off most of the water into the colander, catching any pasta as the water pours out.
- Remove the colander from the sink and fill the pot still containing the pasta with cold water. You want the pasta to cool quickly by being submerged in the cold water. This will assure a chewy texture.
- Drain the pasta thoroughly in the colander, shaking it a few times to remove excess water covering the pasta. Spread a kitchen towel on a flat surface and turn the noodles onto the towel. Gently use a second towel to dry the noodles. Removing the excess moisture assures that the sauce will have its proper flavoring effect on the noodles. Any water from cooking the pasta dilutes the noodles and makes them taste more like water than anything else. Gingerly transfer them the bowl with the sauce. Use your hands to mix the pasta and the sauce, taking care that all of the pasta gets coated. Cover with plastic and refrigerate until ready to serve.
- These noodles can marinate for a few hours or overnight before serving. Serve them cold, tossing them again in the sauce just before serving, and garnish with the remaining scallions.
- Remove the stems from the chiles then place in a food processor and blend until they are completely broken down.
- Use a rubber spatula and scrape into a medium sized saute pan. Add the oil and stir well. Set the pan over medium-low heat. Gently warm up the oil slowly so it draws out the color and flavor of the chiles. Stir well and season with salt. Once the oil is barely simmering, cook for 5 to 6 minutes. hut off heat and allow to cool. Store in an airtight container until ready to use.
PEA SALAD WITH BASIL AND PEA SHOOTS
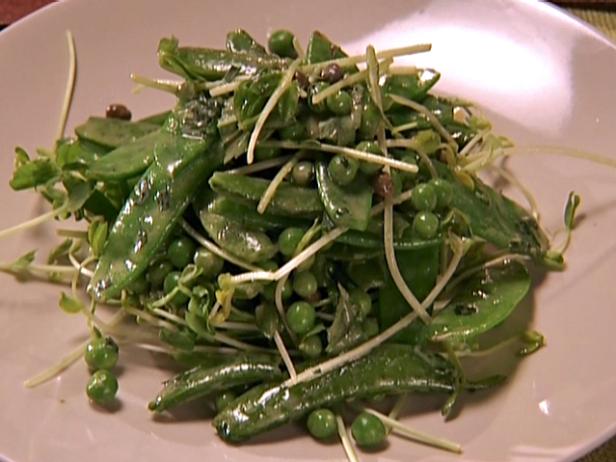
Peas embody spring to me, and there are so many shapes and sizes to choose from. Sugar snaps have a sweet and grassy flavor; snow peas have a wonderful crunch. I also love frozen peas. Defrosted and used as is, they add a starchy comfort that takes me to childhood. Small, simple touches make this salad come out better: adding a pinch of sugar to the peas enhances their sweetness, blanching and cooling them in an ice bath assures they are crisp and cold, and thoroughly drying them off before coating them in the vinaigrette prevents the flavors from diluting. When the peas are coated with the "bite" from the mustard and the saltiness of the capers, they come to life.
Provided by Alex Guarnaschelli
Categories side-dish
Time 50m
Yield 6 to 8 servings
Number Of Ingredients 14
Steps:
- Make the vinaigrette: In a medium bowl, whisk together the Dijon mustard, red wine vinegar, lemon zest and juice. Add the capers, caper brine and a pinch of salt and pepper, to taste. Slowly whisk in the olive oil. Taste and reseason, only if needed. Set aside.
- Prepare an ice bath. Fill a large bowl halfway with ice cubes and add some cold water. Put a colander squarely inside the ice bath. The colander will keep you from having to pick the peas out from amongst the ice cubes in the ice bath.
- Blanch the peas: Bring a medium pot of water to a boil over medium heat. Add salt until the water tastes like seawater. Add the snow peas and cook until crisp-tender, about 1 minute. Remove the peas from the water with a strainer and transfer them to the colander inside the ice bath. Bring the water back up to a boil. Add the sugar snap peas and cook until crisp-tender, about 1 minute. Use the strainer to remove the peas and plunge them into the colander inside the ice bath. Allow them to sit in the ice water to assure they have cooled thoroughly. Discard the blanching water.
- Finish: Remove the peas from the ice bath and spread them out onto the kitchen towel over flat surface. Use another kitchen towel to gently pat them dry. Transfer the towel to a plate and put the peas into the refrigerator to chill until you are ready to serve.
- Assemble: Toss the sugar snap peas, snow peas and defrosted peas with a sprinkle of sugar, the vinaigrette and some salt and pepper. Mix in the pea shoots and basil leaves and pea shoots. Drizzle with olive oil and taste for seasoning. Transfer the salad to a platter and serve immediately.
CANDIED BACON
This is a really easy breakfast item because you can put it in the oven, set the timer and forget about it while you make everything else and pull it out just before sitting down so it's piping hot.
Provided by Alex Guarnaschelli
Categories side-dish
Time 45m
Yield 4 servings
Number Of Ingredients 3
Steps:
- Preheat the oven to 325 degrees F.
- Put bacon slices in a bowl, season them with pepper and toss with the brown sugar. Cover a baking sheet with parchment or foil and arrange the bacon in a single layer on top. Sprinkle any sugar left in the bowl over the bacon. Top with another layer of parchment or foil and top it, squarely, with another baking sheet. The baking sheet will flatten the bacon as it cooks.
- Place the tray in the center of the oven and bake for 20 minutes. Check the bacon by lifting the top tray and parchment. If it is not golden brown and fairly crispy, resist the temptation to turn up the oven temperature, and cook it for 10 to 15 minutes longer. Check it again. Keep in mind that when you remove the tray and transfer the bacon to a serving platter or individual plates, the bacon will "crisp" up a little more. Be patient!
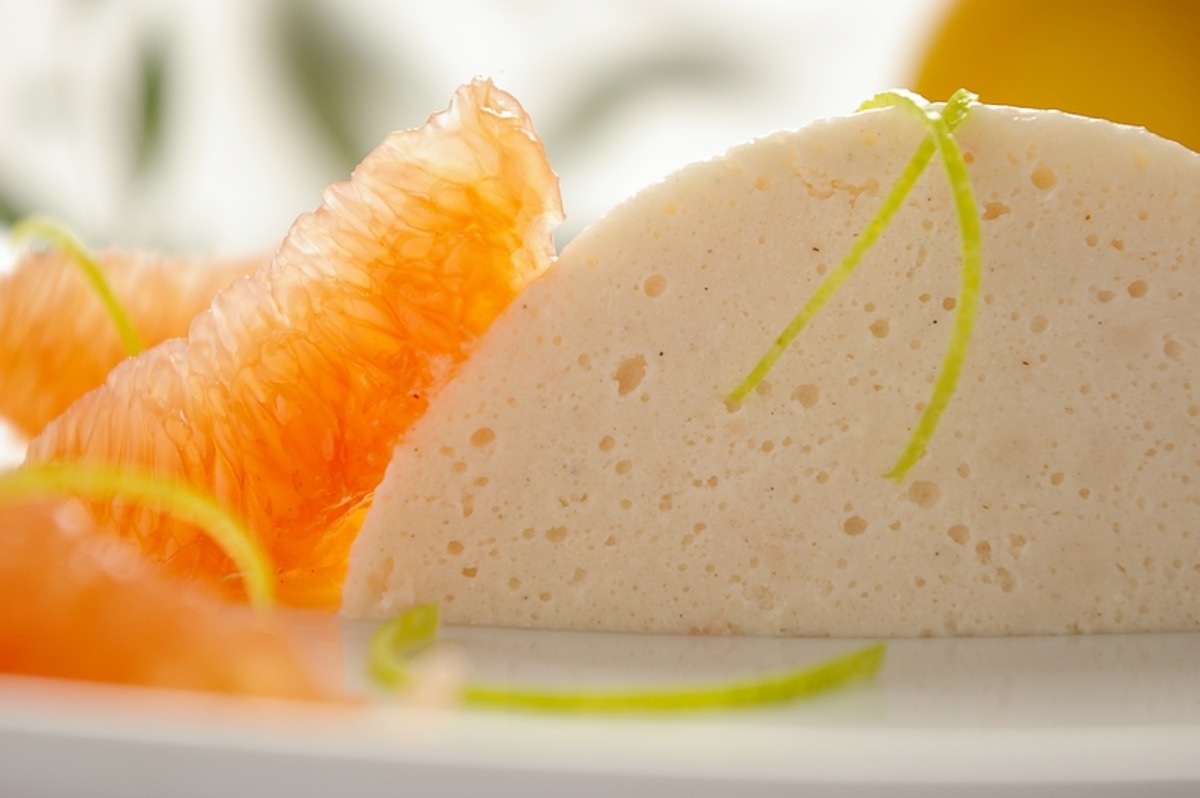
SFOGLIATELLA

I could not have made this recipe without the help and tutelage of the Sessa family that runs Ferrara s Bakery here in Manhattan. I grew up eating this pastry at their store and it has been a part of my dessert favorites ever since the first time I ate it. I can remember the first time I bit into this pastry, standing on Grand Street, I felt as if my life had changed. So good. It is difficult to make but really rewarding.
Provided by Alex Guarnaschelli
Categories dessert
Time 4h40m
Yield 15 to 18 pastries
Number Of Ingredients 16
Steps:
- In a large bowl, sift together the all-purpose flour, the semolina flour and salt. Use your fingers to work the butter into the dough until it forms pea-like balls. Alternatively, sift the dry ingredients into the food processor and pulse the butter into the mixture until it is blended and relatively smooth. Work the water in with your fingers (or in the mixer). Turn the dough out onto a flat surface and roll it into a ball. Wrap it in plastic wrap and press it down. Refrigerate for at least 1 hour.
- In a medium saucepan, bring the milk to a simmer. Whisk in the semolina flour and cook, stirring constantly with a wooden spoon, until the mixture thickens, 3 to 5 minutes. If it forms lumps as it cooks, whisk until smooth. Transfer the milk and flour mixture to a bowl to cool slightly, about 10 minutes. Stir in the ricotta, the egg, sugar. Add the candied orange and lemon bits and sift a dusting of cinnamon over the surface. Stir to blend. Taste for seasoning and refrigerate until ready to use.
- Remove the dough from the refrigerator and divide in half. Flour a flat surface and roll 1 of the halves into a rectangle about 14 inches by 24 inches. The shorter end of the rectangle should be close to you. The dough should feel very thin. The thinner the better! Brush the entire rectangle with a layer of the shortening. Sprinkle it with an even dusting of confectioners sugar. Gently and evenly roll it up into itself like a jelly sponge roll. Roll carefully, taking care that it rolls up very tightly. Refrigerate for at least 2 hours. Use a sharp knife to cut the roll into 1 to 1 1/2-inch thick pieces. Repeat the same process with the other half of the dough.
- Preheat the oven to 375 degrees F.
- Put 1 of the dough rounds in your hand and, with the other hand, press your thumb into the middle of your other hand (and, therefore, into the dough) and start to stretch the dough. You don t want to push so much that you make a cavity just yet. First, concentrate on making the dough round bigger and flatter. When it is about the size of a large clam shell, start to smooth and push down in the middle so it forms a cavity a lot like a large clam shell. You want to finish with a cone with an opening of about 3 inches and the smaller, tapered end about 1-inch. Brush a little shortening on the dough and turn it inside out, cupping the dough cone between the length of your index finger and thumb. Carefully spoon 2 large spoonfuls of the filling into the cone. The cone should be fairly filled and go to the edges of the opening with a thin layer of the filling. Close the mouth by carefully folding the cone opening over itself. The same as if you had 2 halves of a clam shell and were closing it up. Gently press the edges of the opening, together. Arrange on a nonstick baking sheet. Repeat with all of the dough, until both of the baking sheets are filled. Brush each with the egg wash.
- Put the trays in the center of the oven and bake until golden brown, 30 to 35 minutes. Remove from the oven and allow them to rest a few minutes on the baking sheet.
- After the Sfogliatella have rested for a few minutes, sprinkle them with another dusting of confectioners' sugar and put each baking sheet squarely under the broiler. Do not walk away! Stay there and watch as the sugar slowly browns the top. If the layer of sugar was light and you want to make it a little browner, repeat with another dusting of sugar and another minute under the broiler. Allow them to rest a few minutes, then transfer them to a serving platter, dust with confectioners' sugar and serve.
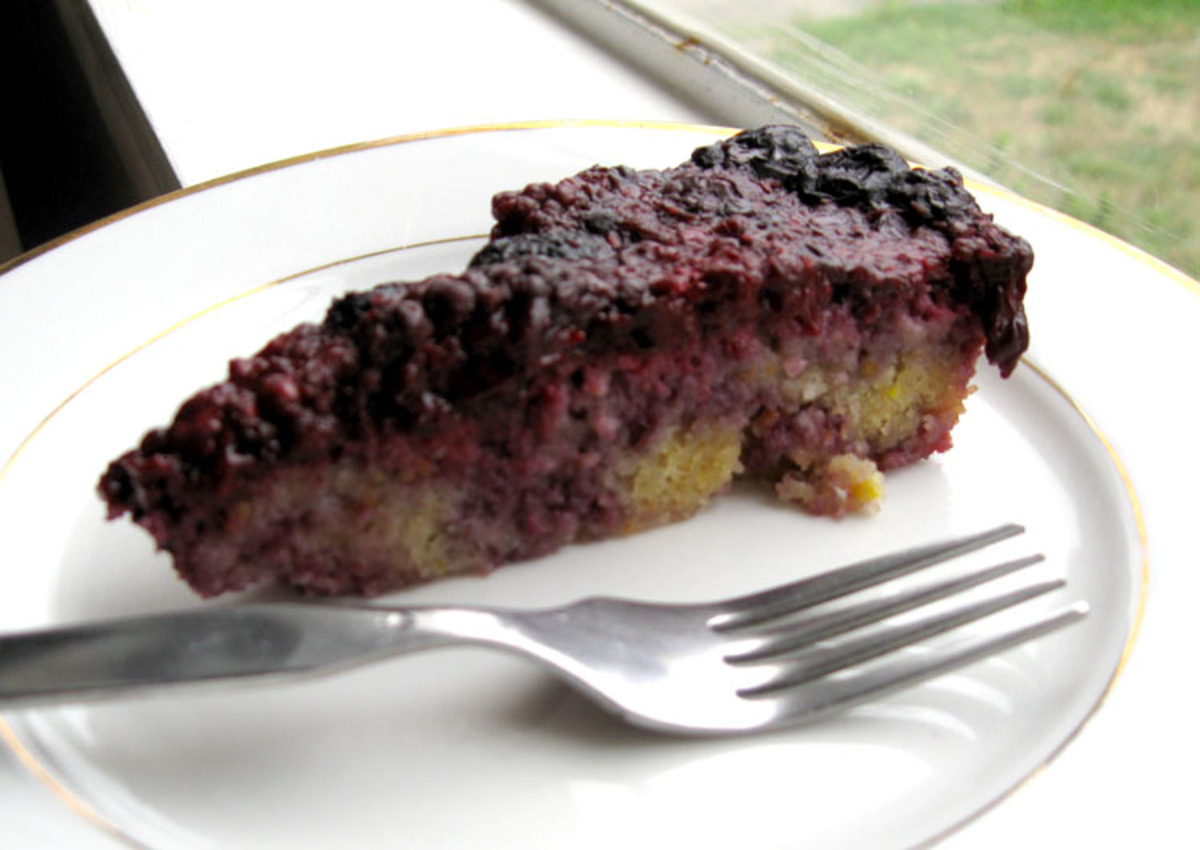
CAST IRON SKILLET CORN BREAD
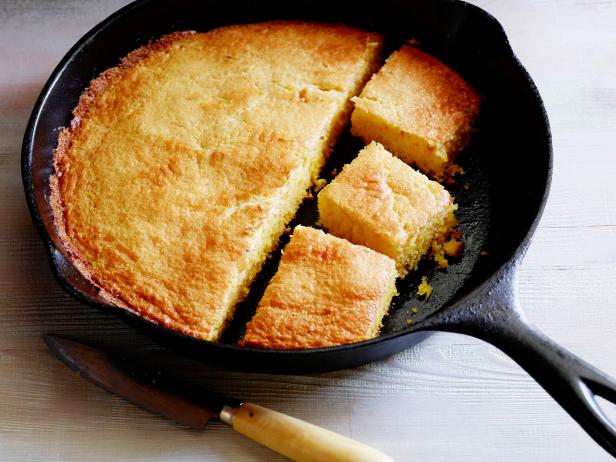
This is a great recipe and tastes better, I find, when cooked in a cast iron skillet and served hot tableside. I have also served this recipe for breakfast, brunch, lunch and dinner. Whether with jam and butter or fried chicken on the side, there are rarely leftovers!
Provided by Alex Guarnaschelli
Time 55m
Yield 8 to 10 servings
Number Of Ingredients 10
Steps:
- Preheat the oven to 425 degrees F and place a 9-inch cast iron skillet inside to heat while you make the batter.
- In a large bowl, whisk together the cornmeal, flour, sugar, salt, baking powder, and baking soda. Whisk in the milk, buttermilk, and eggs. Whisk in almost all of the melted butter, reserving about 1 tablespoon for the skillet later on.
- Carefully remove the hot skillet from the oven. Reduce oven temperature to 375 degrees F. Coat the bottom and sides of the hot skillet with the remaining butter. Pour the batter into the skillet and place it in the center of the oven. Bake until the center is firm and a cake tester or toothpick inserted into the center comes out clean, 20 to 25 minutes. Allow to cool for 10 to 15 minutes and serve.
CHEESY, STUFFED PORTOBELLO MUSHROOM BURGERS
Mushrooms are wonderful and, these days, they are getting called upon to play so many different parts. One of the most popular things is to use mushrooms as a substitute for meat. It works well because they have such wonderful texture and heartiness. The portobello is the top dog of the cultivated mushroom world because it's large and can be a meal unto itself. They are cultivated mushrooms (as opposed to wild, foraged kinds) and are earthy and meaty. Regarding mushrooms in general: Wash them just before cooking (if they are dirty) so they are clean but don't sit around, waterlogged, in your fridge. Many people scrape the brown "ribs" out of the insides of the portobello and peel the outer skin. Why? I say leave everything on the mushroom (except dirt). Make sure you cook mushrooms long enough-they take longer than you think to reach full flavor.
Provided by Alex Guarnaschelli
Categories main-dish
Time 1h
Yield 2 burgers
Number Of Ingredients 14
Steps:
- Preheat the oven to 425 degrees F. Line 2 rimmed baking sheets with parchment and set aside.
- Roast the mushrooms: Arrange the mushrooms, stem side up, onions and garlic cloves in a single layer on 1 prepared baking sheet. Drizzle with half of the olive oil. Drizzle 1/2 cup water around the mushrooms on the baking sheet. Season generously with salt and pepper. Roast in the center of the oven until the mushrooms shrink in size and become darker brown, 15 to 18 minutes. Remove and let cool.
- Bread the mushrooms: In a medium bowl, whisk the eggs with a splash of water. In another medium bowl, combine the breadcrumbs with the granulated garlic. Dip each mushroom in the egg mixture and then coat completely with the breadcrumbs. Reserve everything.
- Fry the mushrooms: In a large skillet, heat the remaining olive oil over medium heat until it begins to smoke. Add the mushrooms in a single layer. Cook on one side until golden brown, 2 to 3 minutes. Flip and cook on the second side until golden brown, another 2 to 3 minutes. Remove the mushrooms from the oil and arrange in a single layer on a clean baking sheet. Season with salt and pepper.
- Make the filling: In a medium bowl, combine the roasted garlic cloves and onion slices with the cheese. Add any remaining egg and 1/4 cup of the breadcrumbs leftover from the breading. Add the basil and mix well.
- Assemble and bake: On the same baking sheet, place 2 portobellos, stem-side up, with some distance between them. Pile half of the filling on each and then top with the remaining mushrooms, pressing gently but firmly down, so it forms a fairly compact sandwich. Bake until the cheese melts, 6 to 8 minutes.
- Arrange the lettuce to form 2 cups. Drizzle some pickle juice and red wine vinegar into the cups. Season with salt and pepper and then top with some sliced pickles.
- Place each mushroom burger onto a bottom bun. Flip a lettuce cup onto each burger and top with the top bun. Serve.
Tips:
- Mise en place: Always prepare your ingredients and equipment before you start cooking. This will help you stay organized and ensure that you have everything you need on hand.
- Use fresh, high-quality ingredients: The quality of your ingredients will greatly impact the flavor of your dishes. Whenever possible, use fresh, seasonal produce and high-quality meats and seafood.
- Don't be afraid to experiment: Cooking should be fun and creative! Don't be afraid to try new ingredients and techniques. You might just be surprised at what you can create.
- Season your food well: Seasoning is essential for bringing out the flavor of your dishes. Use a variety of herbs, spices, and condiments to create complex and flavorful meals.
- Cook with love: The most important ingredient of all is love. When you cook with love, your food will taste better. So put on some music, pour yourself a glass of wine, and enjoy the process of creating a delicious meal.
Conclusion:
These recipes from Alexandra Guarnaschelli are a great starting point for anyone looking to explore new and exciting flavors. With her unique culinary style and passion for cooking, Guarnaschelli's recipes are sure to impress your family and friends. So get in the kitchen and start cooking!
Are you curently on diet or you just want to control your food's nutritions, ingredients? We will help you find recipes by cooking method, nutrition, ingredients...
Check it out »
You'll also love